The last thing you want when you finally find time to sit down and sew is to start up your machine and then find a tangle of jammed stitches the minute, but this common problem can happen even to experienced sewers! Why does your sewing machine keep jamming? Check out this guide to learn the thirteen common causes of a jammed sewing machine and how to fix each one.
The most common reason for a jammed sewing machine is the wrong tension on the upper thread. A jammed lower thread can occur because of a loose bobbin casing or a damaged needle. A handwheel that will not turn, jamming the machine, can happen for multiple reasons, including the wrong type of thread, a dirty machine, improper tension on the upper thread, or a jammed bobbin.
In this article, you will learn what causes a sewing machine to jam up and refuse to stitch. You will discover the 13 best solutions for this problem. Finally, you will find tips for how to handle a jam on types of sewing machines like Singer and Brother.

What Causes a Sewing Machine Jam?
A sewing machine jams or stops sewing when a part that should move cannot move. This can happen for many reasons, like a bent needle that strikes the needle plate instead of reaching down to the shuttle hook or a too-loose upper thread that tangles beneath the fabric and locks the needle in place.
It may help if you think of your sewing machine like a clockwork machine. If one tiny gear cannot turn, the next cog or gear in the row also will not turn, and so on down the line. Every single moving piece needs to move at the right speed, in the right place, or the whole mechanism will shut down!
Why Does My Sewing Machine Keep Jamming: 13 Solutions
If your sewing machine is jammed up and refuses to sew, work through this list of the thirteen most common reasons for a jam, and try the appropriate solution! The top causes for a sewing machine jam include a problem with the upper thread tension, a loose bobbin, or an issue with the needle.
1. Upper Thread Tension
Nine times out of ten, a sewing machine jam occurs because of a problem with the upper thread tension. This can cause that giant tangle of thread beneath the fabric, sometimes called a bird’s nest.
You may see the upper thread flopping or whipping through the air too loosely as the machine makes its first stitches. In seconds, you will hear sounds your machine should not make, like a grinding or groaning noise. And then, inevitably, the machine will balk and stop stitching when the thread tangle stops the needle from rising and falling.
What causes the upper thread to lose its tension? When you thread the upper thread in a sewing machine, you draw the thread from the spool along a super-specific pathway across the machine before it reaches the needle. Part of this thread path pulls the thread between the tension discs, often located inside the head of the machine.
Any tiny error in threading this path can cause the thread to slip out of the tension discs. This will mess up the force, or tension, that the machine exerts on the thread.
You may have placed the thread too lightly across the tension discs in the thread path. This allows the thread to pop out once it begins to move. Quite often, a tiny fraction of an inch in a misplaced thread, like a missed loop or slot in the thread path, can allow the thread to slip free of the tension discs.
The good news is that you do not need special knowledge to fix this issue! You don’t even need to take apart your sewing machine or reach for any special tools.
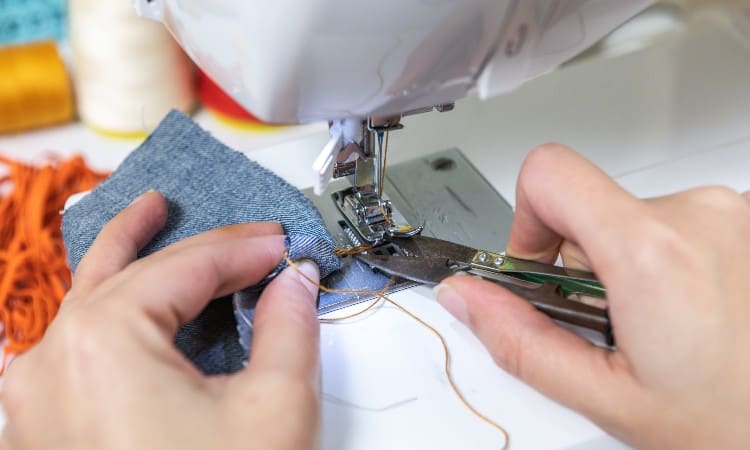
- First, remove the fabric and tangled thread from the machine. You may need scissors to cut through the bird’s nest of thread. Take the spool of thread out and remove any broken thread from the upper thread path.
- Gently clear away any bits of thread from the needle plate.
- Make sure the needle can now rise and fall by turning the handwheel.
- Lift the presser foot to its highest position.
- Next, re-thread the machine. Slot the spool onto its pin and follow the upper thread path as instructed in your sewing machine owner’s manual. (If you no longer have the manual, try looking for an instructional video on YouTube for your sewing machine model).
- Once you finish following the thread path, make sure you insert the thread into the needle in the proper direction. This can vary from one sewing machine model to another.
- Finally, use the handwheel to bring the needle down and back up, drawing the lower thread up with it.
2. Bobbin Not Spinning
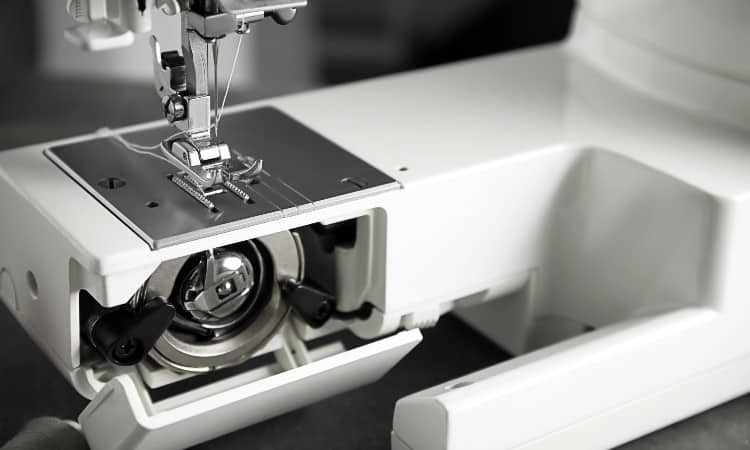
While a problem with the upper thread happens far more often, sometimes the bobbin not spinning can also cause the lower thread to jam your sewing machine. This happens for a couple of different reasons:
- You may have used the wrong size of a bobbin or the wrong bobbin case. This can make the bobbin too loose or too tight and mess with the unspooling of the lower thread. To fix this, check your owner’s manual to get the correct type of bobbin to fit your model.
- Sometimes a scratch or ding on the bobbin case can catch the lower thread or even prevent the bobbin itself from turning. You often see this on vintage machines, but check your model, even if it’s newer, just in case. If you see damage on the bobbin case or bobbin, simply replace that part, usually for less than $10, to repair your machine!
- The most common issue you find with the lower thread jamming the machine is caused by an improperly wound bobbin. This can happen if you did not push the bobbin firmly onto the winding pin. If the thread on the bobbin looks wonky, too loose, or unevenly wound, you should unwind it and start over rather than inserting the bobbin into your machine and trying to sew.
3. Handwheel Not Turning
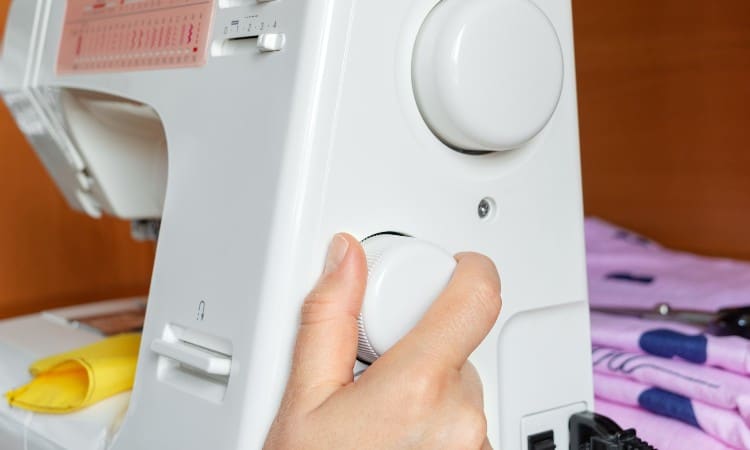
The handwheel on your sewing machine can refuse to turn or turn slowly for several reasons, including a bird’s nest tangle, a bobbin problem, or a broken needle. Actually, this is a trick question because the handwheel won’t turn any time you have a jam in your sewing machine! The handwheel raises and lowers the needle, and once your machine jams, the needle can no longer rise and fall.
As you work on this issue, make sure you don’t force the handwheel. This could damage your machine for real! Instead, fix the root cause of the jam and then try to lightly turn the wheel again.
- You already know that the most common cause for a sewing machine jam is an improperly threaded upper thread path. This can also cause the handwheel to lock up once you have a bird’s nest tangle of thread under the fabric.
- Take the bobbin case in and out and try the wheel again.
- Turn the machine off, unplug it, and let it sit for a minute. Then turn everything back on and try the wheel again.
4. Needle Stuck
Have you ever ended up with a needle stuck in the fabric when you try to sew? This extra-annoying jam may seem impossible initially because you can’t even pull the fabric out to look at the issue!
A stuck needle can happen for several reasons, like improper threading and a bird’s nest tangle. But it can have some needle-specific causes, too.
- You may have failed to screw the needle screw tightly enough if you recently replaced the needle in your machine. This tiny wobble can misalign the needle and cause it to jam up.
- If the lower thread did not pass through the shuttle hook properly when you threaded the bobbin, the needle may have struck the lower thread and jammed up. To fix this problem, take the bobbin out and reinsert it into the case properly.
- One big reason a needle can jam up and freeze on you is a dirty sewing machine, as you will see in the next section.
5. Dirty Machine
A dirty sewing machine can cause the needle to freeze, the handwheel to refuse to turn, and the machine to jam up. This happens because your machine collects bits of lint, dust, and grease inside all its delicate moving parts over time.
Ideally, you should get in the habit of quickly cleaning your machine every time you sew. You can also keep a log to remind yourself to thoroughly clean regularly. You may even want to take your machine to a shop once a year or so for regular maintenance.
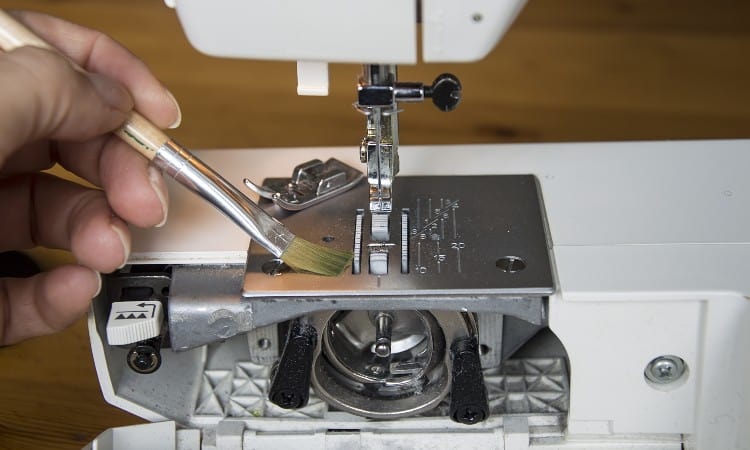
To clean a clogged sewing machine:
- Turn off and unplug the machine. Yes, this does turn off the nice light on your machine, but it also prevents you from sewing through your fingers! If you need more light as you clean, you can always prop your phone flashlight nearby.
- Open up the bobbin area and remove the bobbin and the case if your machine has a removable bobbin case. Use a small, soft paintbrush to clean out all the dust and lint from this area.
- Next, remove the needle and then use the small flathead screwdriver that came with your machine to remove the needle plate. Once again, carefully dust beneath this area.
- Hold a length of thread pulled tight between your hands and run it through the tension discs to clear away dirt.
- Wipe down the outside of the machine with a soft cloth.
- Put everything back together and insert a new needle for good measure!
As a pro tip, do not try to vacuum the dust out of your machine. Never apply oil unless your manual tells you to do so. And never, ever use a cleaning product on your machine!
6. Damaged Needle

A damaged needle can catch on the fabric and refuse to move, jamming the machine. Or it can strike the needle plate and freeze the machine.
If you put in a new needle every time you begin a new project, you may never encounter this issue. But if you did not know that sewing machine needles require frequent replacing, you may have used the same old, blunted, and possibly damaged needle for years!
- Remove the needle by turning the screw in the needle bar. The needle will drop out into your hand.
- Hold the needle up to the light and check for any scratches.
- Lightly poke your finger with the tip to see if it remains sharp (depending on the type of needle, of course–a few styles, like ballpoint needles, will not feel sharp).
- Finally, align the needle with a ruler to see if it remains straight.
- Check the needle plate to see if you can spot any scratches from a bent needle striking the plate.
- If you see any of these issues, replace the needle.
7. Wrong Needle Size
Sewing machine needles come in many shapes and sizes, and using the wrong kind can cause your sewing machine to jam up.
First, you need a brand and size of needle appropriate for your machine. Not every machine is compatible with every needle. You can check your manual to learn what kind of needles to use.
Second, you also need to match the size and type of needle to the specific fabric you want to sew on. Fine, tightly woven fabric requires a sharp, narrow needle. Looser fabrics can use a larger needle. Knit fabric works best with a ballpoint needle that will not snag.
If you use the wrong needle, it can cause loose or crooked stitches. The needle may get stuck in the fabric and jam your sewing machine.
Before you begin a new project, find out what type of needle works best with your fabric. Then buy that needle when you purchase the fabric.
8. Feed Dogs Stuck
The feed dogs in your sewing machine keep the fabric moving beneath the needle, but if they get stuck, your machine can jam up and refuse to sew.
If you have never noticed them, the feed dogs look like tiny triangular teeth set into the needle plate. They can move the fabric forward or backward as you stitch.
Several common issues can make your feed dogs jam up:
- Dirt or lint beneath the needle plate can freeze the feed dogs. Clean your machine to solve this problem!
- The stitch length can confuse your sewing machine. If you set your machine to an impossibly short stitch length, the feed dogs will not move. You sometimes need a “0” stitch length for sewing buttons, but make sure you return the settings to normal to allow the feed dogs to move again.
- Sometimes your feed dogs don’t interact well with fine, slippery fabrics. To fix this issue, you can adjust the pressure the presser foot exerts. You can also use a stiffener with fine fabric.
- Some sewing machines have adjustable feed dogs that drop down beneath the needle plate for freehand sewing. If the feed dogs become stuck in this lowered position, try raising the needle and presser foot up, and then try to raise the feed dogs again.
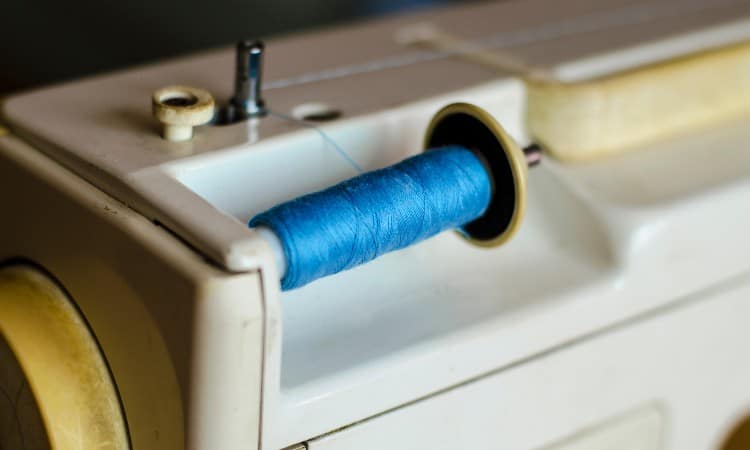
9. Bad Thread
Using bad thread can eventually cause your sewing machine to jam for several reasons.
First, cheap thread throws off lots of lint that will clog up your machine. It can also snap and break easily.
Second, an old or poor-quality thread will tangle up more easily, causing jams.
Finally, even if you buy good thread, you need to make sure its fiber content matches the fiber content of your fabric to avoid tangles, messy stitches, or a jammed sewing machine. You also need to make sure you select a needle with an eye wide enough to easily fit the thread.
10. Presser Foot Position
If you thread the sewing machine with the presser foot in the wrong position, your sewing machine will jam. This common issue plagues many beginning sewers who may not realize the importance of this one tiny, moveable piece!
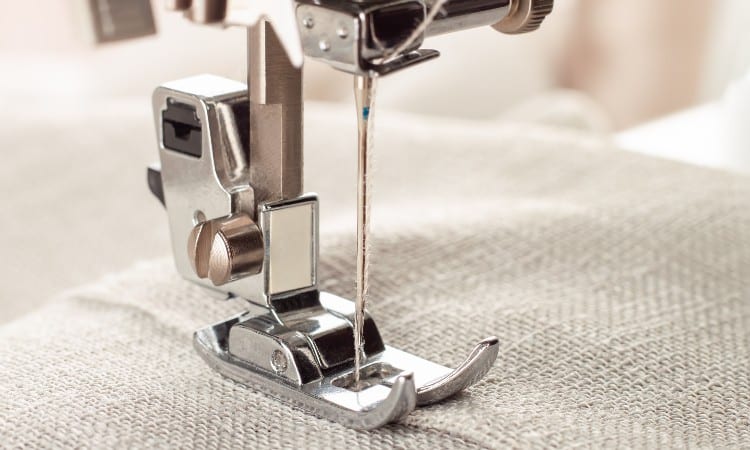
The presser foot is the small foot-shaped piece below the needle. The presser foot and feed dogs sandwich the fabric, holding it in place as you sew. You can find many different types of presser feet, like a zipper foot or rolled hem foot, but this one key rule holds true for all of them.
You must raise the presser foot before you thread the machine. When you lower the presser foot, the tension discs come together, pinching the thread to apply the right pressure as you sew. This means that if you try to thread the machine with the presser foot down, the discs pinch together, and the thread cannot slot between them!
To solve this problem, simply make sure you always raise the presser foot before you begin to thread the machine.
11. Seized Stitching
Seized stitching means the machine gets stuck trying to stitch or starts making tight, small stitches that pucker the fabric. This can often cause the sewing machine to jam.
Seized stitching happens for two common reasons. First, you may have a dirty or oily thread that easily tangles or catches in the fabric. In this case, replace the thread and start over.
Second, you may need to adjust the tension on the upper thread. Every type of fabric works best with a particular amount of tension on the upper thread. Adjusting this tension may ease the thread and allow the machine to make smooth, even stitches instead of seizing up.
12. Jammed Backstitching
Sometimes your sewing machine can get stuck, only stitching in reverse or get jammed while you try to backstitch.
If your sewing machine will only sew in reverse, try turning it off and back on and then toggle the backstitch or reverse button to release it. You may also need to remove the sewing machine casing to clean dirt or lint from behind the backstitch lever, button, or toggle.
If your machine jams up when you try to backstitch, go through the common jamming issues listed above, like rethreading the upper thread and replacing the needle. In particular, look at the thread tension and make sure the feed dogs move as you try to sew in reverse.
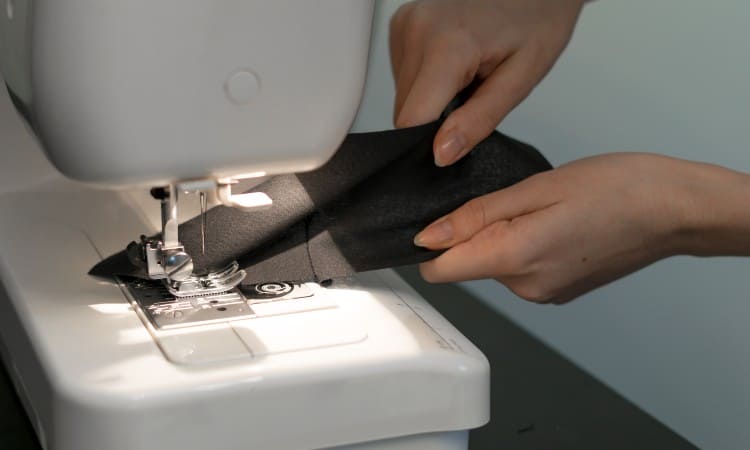
13. Wrong Fabric
Finally, one lesser-known culprit that can cause a sewing machine to jam is sewing on the wrong fabric. Not every sewing machine can handle every type of material. Many regular sewing machines don’t have the power to stitch through heavy cloth like denim or canvas!
If the sewing machine motor simply can’t handle the type of fabric you picked, it may stall out and your machine will jam.
Jammed Sewing Machine By Type
You can try all of the thirteen solutions in this article on any type of sewing machine, but you may need some brand-specific tips as well. The best place to start here is to read your sewing machine owner’s manual, which comes with specific care and troubleshooting tips for that sewing machine model. The big-name sewing brands still in production today also provide a handy help page on their websites!
Singer
Singer sewing machines can suffer from all the common jamming issues like improper threading or a damaged needle. But you may also want to make sure you use the right accessories for your project. For instance, using the right presser foot can help prevent jamming–when you sew a zipper, you need a zipper foot. You can use a special presser foot to help sew over thick fabric. And, of course, make sure you have lowered the presser foot before you begin sewing!
Most Singer models are compatible with many universal bobbins, needles, and presser feet. But you should always make sure the product says that it will fit Singer machines before buying it.
Brother
Brother machines also have a solid reputation as reliable sewing machines but can suffer from user error, just like Singer models. Check all the usual culprits like a poorly threaded upper thread or lint in the bobbin case.
You may also need to check less common causes for jamming, such as a too-small spool cap that does not hold the thread spool securely on the pin. If you set up your machine to sew with cone thread, you may also need to fix the tension if your machine keeps jamming.
Janome
Janome sewing machines often have high-quality, precise mechanics, but occasionally, you can run into a jam. Try a few pro tips if the common solutions listed earlier don’t work for you:
- When you start sewing, hold onto the thread tails from the upper and lower thread for about three seconds, and then let go. This prevents them from tangling up in the seam as you stitch.
- When you finish sewing, raise the needle and the presser foot up to remove the fabric smoothly. If you don’t, you may hear a grinding noise, or the needle could jam and get stuck in the fabric.
- For all Janome machines, always turn the handwheel toward you and never away!
BabyLock
Babylock machines often face the same challenges and user errors as any other model, but these pro tips can also help with jams!
First, some Babylock models have a drop-in bobbin instead of a bobbin in a removable case. Make sure you clean this area well, and always rethread the bobbin if you encounter a jam.
Second, if you work with a specialty BabyLock model like a serger, you may need to replace key components like the knife or make sure you have cleaned around it thoroughly.
How to Prevent Jammed Sewing Machine
Check out the top five ways to prevent a jammed sewing machine here!
- Clean your sewing machine often. A quick lint dusting every time you sew will prevent a build-up of grime that can stall your machine later on.
- Thread your machine carefully, making sure you have raised the presser foot before you begin.
- Insert a new needle with every new sewing project.
- Match the type and size of the needle to the type of fabric you want to use. Also, match the thread to the fabric, and make sure it easily fits in the needle.
- Check the stitch length, tension, and other settings before you begin to sew, and adjust them if necessary.
Conclusion
Sewing machines jam and refuse to sew for common reasons like improper threading, the wrong tension settings, a damaged needle, or the wrong kind of thread. Dirt can clog up a machine and prevent key parts from moving, which will also jam the machine. Even tiny issues like the feed dogs getting stuck can cause a sewing machine to jam.
The bottom line is that your sewing machine needs all its moving parts to work together in perfect balance, or it will just stall out and stop. You can usually fix this by removing any jammed fabric or thread, starting over from scratch, rereading the upper thread, and reinserting the bobbin.