Even if you give your Janome sewing machine all the love and care in the world, it will need repairs at some point. It’s the nature of any small machine with so many moving parts. When that happens, you will want a Janome sewing machine troubleshooting and repair guide at hand to help you through the issue!
Janome sewing machine troubleshooting involves simple fixes such as cleaning lint build-up and removing thread tangles. More complex problems like upper and lower tension problems, jammed fabric feed, or odd noises take more work. Stitching issues such as loose, knotted, or wavy seams also need attention.
In this article, you will learn 18 ways to troubleshoot Janome sewing machines. You will discover how to take apart and reset a Janome machine. Finally, you will find out how to contact a certified Janome technician when you need help!
What to Know About Janome Sewing Machines
Yasaku Ose invented the round bobbin and founded the company that would eventually become Janome in 1925. The company got its name in 1954. As a fun fact, “Janome” is a Japanese term for snake-eye, referring to the famous round bobbins!
Most of the Janome models you know and love emerged after the 1954 era when Japan’s post-war sewing machine industry exploded into a global industry.
Janome developed many sewing machine innovations over the years. The company created a research and development center specifically to continuously develop new technology in 1964. For example, the research center created the Memory 7, the first programmable sewing machine of all time!
Today, Janome machines have a reputation for excellence and high-tech capability. Professional seamstresses, tailors, and designers often use the high-end Janome models.
Janome has manufacturing plants in Thailand and Taiwan. These plants feature lots of robots made with Janomes proprietary tech that help put together the tiny, precise components of the sewing machines.
All of that goes to say that Janome machines are good sewing machines! But even good sewing machines sometimes need a little work.
Troubleshooting Janome Sewing Machine: 18 Common Issues
Every time you sit down to sew, you should expect a few minor hiccups along the way that require at least a little troubleshooting, even when using excellent Janome sewing machines!
Here you will find tips for overcoming the 18 most common problems you may encounter while using a Janome sewing machine.
As a word of caution, please check your warranty if you have a newly purchases machine. Janome does provide generous warranties for many of its machines, and you may void the warranty by trying to fix certain things on your own.
Also, you should always turn off your sewing machine before troubleshooting. You don’t want your fingers beneath the needle if you accidentally step on the pedal while repairing!
1. Not Stitching
If your Janome sewing machine refuses to stitch, several different issues could be at play. Go through these steps to try to figure out the root cause!
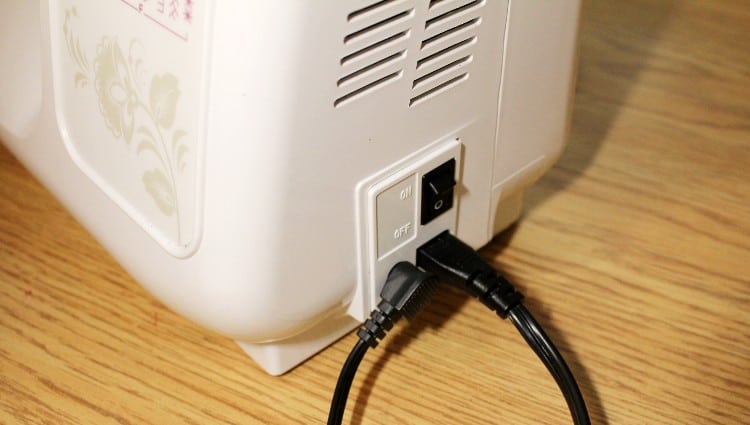
- Check the power cord and foot pedal plugs. It sounds silly, but if something wobbled loose, you might just need to reconnect a plug or cord!
- Along those lines, did you remember to turn your machine on? You may roll your eyes, but you’d be surprised how many times you can sit down to sew and step on the foot pedal only to realize you forgot to hit the power switch!
- Did you just wind a bobbin? Make sure you have reset the machine for sewing, not bobbin winding. It will not sew and may make a strange noise if you forgot and left it in bobbin-winding position or bobbin-winding mode on computerized models.
- If the machine turns on, but the handwheel will not turn, chances are pretty good that you have a thread tangle jamming up the works. In this case, check out the section on “jammed thread” below to resolve the problem!
2. Jamming
Sewing machine jams usually happen because something went wrong with the upper thread. Either the tension settings need adjusting or the thread may have slipped free of a tension disc or thread guide.
Both of these possibilities can cause a big tangle of thread on the underside of the fabric. Sometimes sewers refer to this particular kind of tangle as a ‘bird’s nest” because that’s what it looks like!
To fix the jam:
- Turn off and unplug your sewing machine. If you need light, prop up your cell phone with the flashlight option turned on!
- Lift the presser foot away from the fabric.
- If the handwheel will turn, raise the needle.
- Take a pair of small, sharp embroidery scissors and snip through the thread beneath the fabric until you can slide the fabric out.
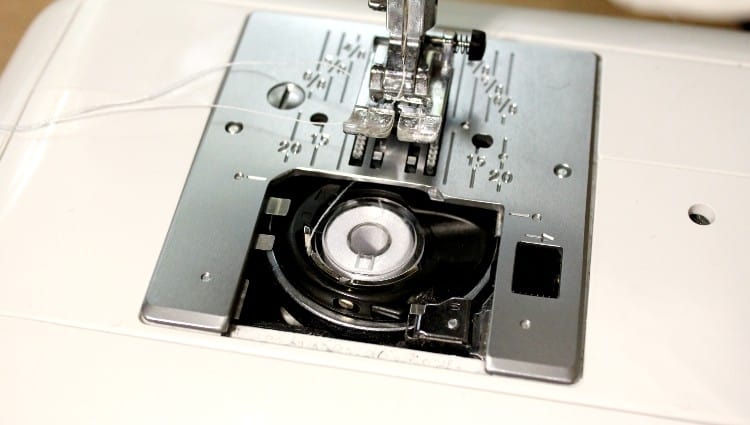
- Open up the bobbin casing and clear away any loose bits of thread that may cling to it.
- Use a small screwdriver to remove the needle plate and make sure no tangled threads got stuck beneath it. Typically, the appropriate screwdriver will come with your sewing machine! If not, you can always purchase a cheap eyeglass repair kit and use the screwdriver that comes with that.
- Re-insert the bobbin and rethread the upper thread. Make sure you raise the presser foot before threading to align the tension discs correctly. Use a scrap of fabric for a few test stitches to make sure everything is in working order!
- If you instantly get another jam, you probably need to adjust the upper tension. Check out the section on tension issues later in this article!
3. Fabric Stuck
Stuck fabric has several easy solutions!
- Sometimes fabric doesn’t feed through beneath the needle because you forgot to put the presser foot down before you began sewing.
- You may have forgotten to reset your machine after placing it in a special setting such as “darning” or “free motion.” Make sure you reset everything for normal sewing.
- Likewise, if you had a double-needle stitch setting engaged, you may need to reset for a regular straight stitch.
- An upper thread issue may have created a jammed thread beneath the fabric. Refer to the section above to find out how to remove the jam!
4. Thread Tangles
Most of the time, thread tangles happen because something went wrong with the upper thread. After removing the tangle, try re-threading the machine.
If you have not had a lot of experience threading a sewing machine or your Janome machine is new to you, begin by reading the section on threading in your owner’s manual. Alternatively, you can also find helpful videos on Janome’s website that show how to thread some of their most popular models.
In general, you can follow these basic steps to thread your Janome sewing machine:
- Remove the old thread by snipping it close to the spool and then gently drawing it down and out through the needle.
- Place the thread on the spool pin and unwind six to ten inches of loose thread.
- Next, follow the thread path. Some Janome machines use numbers to indicate each step along the path. Others offer a color-coded path to follow with the thread.
- Loop the thread past the first thread guide. Keep moving the thread left to the next thread guide.
- Make sure the needle is up so that you can clearly see the thread take-up level above the sewing machine body. Hook the thread through that as well.
- Now the thread path moves down toward the needle. Hook the thread in the last thread guide and then slot it behind the guide just to the left of the needle.
- Finally, use the automatic needle threader, or thread the needle yourself!
Sometimes thread tangles happen because you have tried to use the wrong kind of thread for the type of fabric. As a general rule of thumb, it’s a good idea to use thread made out of the same type of fibers as the material. For example, silk thread works well with silk, and cotton thread works well with cotton fabric.
Your sewing machine may not handle certain types of thread well, either. For example, buttonhole or heavyweight thread may jam up in some sewing machines.
5. Broken Needle
Needles break most often because you have the wrong type of needle for the type of thread or material. For example, you need a special topstitching needle when using thicker topstitching thread. It’s always a good idea to insert a new needle at the beginning of each new sewing project, so try taking an extra moment to research what kind of needle will work best as you do this!
Check out these common fixes for broken needles:
- Make sure you tighten the needle clamp screw all the way. If the needle falls down a fraction, it may catch in the bobbin area and snap.
- Check the size and type of needle and make sure it matches the weight and type of material you plan to use.
- Some fancy stitching patterns require certain presser feet or other attachments. If you do not have these aligned properly, the needle may snap off as you sew.
- Make sure you allow the feed dogs to move the fabric beneath the needle. Your hand can rest gently on the material to guide it in the right direction, but you don’t want to push or pull on the fabric, as this can also cause the needle to snap! Plus, it will skew your stitching.
6. Needle Unthreading
Beginning sewers often struggle a lot with thread problems such as the needle quickly unthreading the minute they begin to sew. The good news is, you can easily fix this problem!
- Make sure you lower the presser foot before beginning to sew. If you forgot and left it raised, your poor thread had no tension to hold it in place! It just whipped free the minute the needle began moving.
- Gently tug about six inches of bobbin thread and upper thread out to the side before you begin sewing.
- Pinch those thread tails between two fingers and hang onto them as you make the first couple of stitches.
After a while, all of this becomes second nature and you don’t even think about it every time you begin a seam!
7. Needle Threader Issues
Automatic needle threaders come built into many Janome sewing machines, and boy, do they make your life easier! Until they quit working, that is. Then you have to squint at that tiny needle eye and hope you eventually manage to poke the thread in the right direction.
Chances are pretty good that your threader is not broken, though! You may just need to double-check that you raised the needle. Turn the handwheel and stop when the needle does not lift any higher.
Often the needle threader won’t turn or align properly if you have not raised the needle high enough.
8. Bobbin Problems
Honestly, bobbin problems don’t happen that often as this simple mechanism doesn’t have loose or confusing parts like the upper thread path. That said, you may encounter a few basic bobbin problems while using your Janome machine.
If you see bobbin thread poking through your stitching, try these fixes:
- Take the bobbin out and pull the thread tail free. Then reinsert the bobbin and use the handwheel to raise and lower the needle, carrying the bobbin thread up with it. Simply resetting everything might fix the problem!
- Look at the bobbin itself and make sure you have a Janome bobbin, not a generic bobbin that may not fit precisely into the bobbin case.
- Sometimes the wrong size of the needle may not interact well with your bobbin. Look up the needle and make sure it fits your sewing machine.
- A bent or skewed bobbin will not turn correctly and may cause ripped bobbin thread, as well. Try laying the bobbin flat on your work table and lean over so you can see if the flat sides of the bobbin rest straight on the table.
9. Bobbin Tension
While much less common than upper thread tension issues, bobbin tension can sometimes require adjusting, too! That said, you should always adjust the upper thread tension first to see if that corrects the issue. Bobbin tension comes preset from the factory, and you typically only need to adjust it if you plan to sew with heavyweight thread or if your machine is getting up in years.
If the bobbin thread (the lower thread) looks wacky as you sew, you probably need to adjust the tension screw on the bobbin case.
What does this mean? The thread may look wavy or loose, often meaning that you need to tighten the tension. Or it may cause puckering or even break as you sew, meaning that you need less bobbin tension.
To adjust the bobbin tension:
- Remove the bobbin case.
- Set the bobbin aside.
- Find the screw on the bobbin case and use a Sharpie to note its current alignment. This way, you can return to the factory tension settings later if you want to!
- Use a tiny screwdriver to turn the screw. To increase tension, turn the screw in a clockwise direction. To decrease tension, turn it counterclockwise.
- You want to turn the screw in tiny increments. Take a moment to test sew a few stitches after each adjustment to see if you have corrected the tension issue.
10. Tension Issues

You may have tension issues if you notice loose or baggy stitching or if your seams get tight and puckered. If rethreading the upper thread does not fix the issue, you can safely blame any odd stitching on the upper tension settings!
Here’s the thing: most of the time, you can use the average tension settings on medium-weight fabric with basic cotton or polyester thread that come preset on your machine. But any time you switch things up with a different weight of the fabric or different types of thread, you can expect to spend some time playing with the tension.
The easiest way to correctly set the tension for your specific sewing project is to run a test on a sample piece of the fabric you plan to use.
- Look at the stitching. Do the stitches on the underside of the material look loose? Set the tension setting one number higher, and try sewing again to see if the higher tension fixes the problem.
- On the other hand, if the stitches on top of the material look loose, try moving the tension one number lower, and then test sew again.
- If you get tight or puckered seams, you need to lower the tension.
11. Squeaking Noise
If you’re sewing and you hear a squeaking noise, immediately stop sewing! You wouldn’t want to drive your car while it made a strange noise, would you?
You may find two different causes for a squeaking or peeping noise as you sew. If you’re working on an older all-metal machine, it might need oiling. Please keep in mind that modern machines come sealed and pre-lubricated, so you do not need to add oil unless your manual instructs you to do so!
Another possibility is that your computerized machine might issue a warning signal in some circumstances. Typically, this squeaking or piping noise will have an accompanying warning explanation to code on the scream in this case.
12. Grinding Noise
A loud grinding noise is like a red light: stop at once! Sometimes a thread jam can make the machine create this noise, as it struggles to sew but cannot move the fabric. This issue often arises when you have lint and dust building up between moving parts inside your machine.
Every machine, no matter how new and fancy, requires regular cleaning and maintenance! Please note that you should refer to your manual for detailed cleaning instructions specific to your Janome model.
Here’s a quick run-through of basic cleaning steps you can take to prevent that grinding noise from happening again.
- Clean the bobbin area with a lint brush or a clean makeup brush. Take out the bobbin case and bobbin and go to town! A lot of lint often builds up in this space beneath the needle.
- If you have a top-loading bobbin, you will need to remove the presser foot and needle before thoroughly cleaning the bobbin area. (As a pro tip, you can take this opportunity to replace the needle. Generally speaking, you should put in a new needle after every eight hours of sewing!).
- Carefully brush any lint away from the feed dogs.
- To clean the upper thread path, see if you can open up the side of the machine. If not, run a clean thread through the path to try to clean out any lint.
- Dust the body of the machine all over, and remember to put a cover over the machine when you aren’t sewing!
13. Broken Thread
Repeatedly snapping or fraying threads can happen for many different reasons. Go down this list of possible solutions and find one that fixes your problem!
- First and foremost, rethread the machine. Try a test run to see if that fixed the issue–you may have had a rogue thread slip free of a thread guide and get caught on something.
- Second, check the tension settings for the upper thread. Too-tight tension can make the thread snap.
- Does your machine have multiple different spool caps? You may need to use a different one to prevent the thread from wrapping around the spool pin and breaking.
- Check the bobbin, bobbin case, bobbin hook, needle, and needle plate for any scratches or rough spots. The thread may catch on these areas, causing it to fray or break.
- Google the brand of thread you have on the spool pin and find out if it’s good quality. Some cheap thread does not hold up well for extended sewing!
14. Loose Stitching
Most of the time, loose stitching happens when the machine is not correctly threaded. The thread has to loop through each tiny guide and tension disc exactly right or the machine can’t put tension on it. Without tension, it makes loose, wobbly stitches!
You may also want to make sure your needle and thread fit together well. Look up the size and type of needle to see if it is designed for use with the kind of thread and material you’re using.
Finally, you may also need to check your upper tension settings. You can refer to the section on tension issues earlier in this article for help!
15. Tight Stitching
Tight or puckered stitching can happen for many different reasons, including tension settings and type of material.
- Test the tensions settings to see if you need to lower the upper tension.
- Match the needle to the fabric. For example, knot material may pucker or stretch out unless you use a ballpoint needle.
- Check the thread, too! Even if you use the right type of thread, the weight may skew your stitching. The lightweight fabric needs a lightweight thread, not a heavyweight thread!
- You may need a stabilizer or interfacing between your fabric to prevent puckered seams. This is especially helpful for slinky or lightweight materials.
16. Skipped Stitches
If you look at a seam and see gaps between the stitches on the top of the fabric, you have a problem! Any time you have a stitching issue, you should begin by rethreading the machine. When that doesn’t work and you still see skipped stitches, try these steps:
- Replace the needle. A bent or dull needle may not correctly deliver the thread to the bobbin hook, meaning that the upper thread will not catch the bobbin thread to create stitches.
- Likewise, use the appropriate needle for each sewing project. Silky material requires a different kind of needle from canvas or cotton, for example.
- Finally, adjust the upper tension settings one number higher, and see if that has an impact. If it does not, try one number lower. Repeat this process to see if the tension can correct the skipped stitches.
17. Stretch Fabric Seams Loose
Sewing on stretch fabric presents a unique challenge, and loose or wobbly seams happen more often than you might think with this material!
To prevent this, try these solutions:
- Use a ballpoint needle. You can also find special stretch needles from high-quality brands that will work.
- Make sure you prewash the fabric as the manufacturer instructs. For instance, you may need to use cold water to avoid damaging the stretch recovery.
- Avoid using straight stitches. Zigzag or other patterns will stretch with the material.
18. Computer Warnings

Many modern Janome machines are fully computerized and have touch screens or display screens. You can use these screens to input stitching patterns and sewing settings. These screens also provide warning messages or codes when something goes wrong!
Check your owner’s manual to find a complete list of these codes and what to do about them. Sometimes you may just need to use a different presser foot for the task at hand. Other times, the machine may require professional servicing.
How to Take Apart a Janome Sewing Machine
Sometimes you need to remove the plastic casing to clean out your Janome sewing machine. Not every model operates in the same way, but you typically need a small screwdriver for this process.
- Snap a few pics before you take anything apart. You should also get out a small cup or bowl to place loose screws into.
- Turn off and unplug the machine.
- Locate the screws holding the plastic casing. Usually, you will find several of these on the bottom of the machine and on each side.
- Remove the bobbin winder screw as well.
- Take out the bobbin and bobbin case.
- Remove the needle plate so you can get good access to the bobbin area and feed dogs.
How Do I Reset My Janome Sewing Machine?
You can reset your Janome sewing machine in several different ways, depending on the make and model of your machine.
First, check whether or not you remember to switch the machine back after performing a specialized task. For instance, if you just wound the bobbin, you need to reset the machine to sewing or it will not sew!
Second, you can go through a more complex process on many new computerized models. This involves entering specific codes and patterns to put the machine into test mode or to reset it.
You need to refer to your manual or the Janome website for this process! It will differ from one machine to another.
Janome Sewing Machine Repair Manual
Your Janome sewing machine repair or owner’s manual will tell you how to perform basic maintenance and repairs. If you have misplaced your original copy, don’t worry! Janome provides downloadable manuals through its websites for most of its modern machines.
If you have an older model, you may want to search eBay or Etsy to find a used hard copy. You can also find sewing chat groups online full of enthusiastic fellow sewers who may willingly share a digital copy if you ask!
One key thing to keep in mind is using the manual specific to your Janome model. Every Janome machine has slight differences and therefore comes with different instructions!
How Do I Service My Janome Sewing Machine?
Probably 75% of the time, you can troubleshoot issues on your Janome sewing machine yourself, but you do need professional help once in a while!
For instance, any electrical or computer issues will require professional servicing. Plus, it’s a good idea to take an expensive machine once a year for an annual tune-up, anyway!
How do you find a qualified Janome repair person? Well, you can start by going to the company’s support website here. You can also search for Janome technicians near you, but make sure they have certifications to avoid voiding your Janome warranty!
Janome sewing machines have a great reputation and remain super popular globally, so many sewing repair shops will have a trained technician on hand.
Conclusion
Even the best sewing machines sometimes need troubleshooting, and Janome machines are no exception! When you run into an issue such as a broken needle or snapped thread, you should know how to fix the problem to keep sewing.
Other common problems you may encounter include tension issues, loose or too-tight stitching, and jammed fabric.
Have you ever dealt with a really strange sewing machine problem? How did you fix it? Leave a comment below to let us know!