Singer has stood the test of time as one of the most popular sewing machine brands in the world. If you don’t have a Singer yourself, you probably have a friend, mom, or grandma who does! Learning basic Singer sewing machine troubleshooting tips will make you better at sewing.
Singer sewing machines may need troubleshooting for jams, skipped stitches, or incorrect tension. Other common troubleshooting scenarios include correcting bobbin and bobbin case problems. Singer provides excellent troubleshooting and repair information through its website and certified technicians.
In this article, you will learn tips for how to approach a sewing machine problem. You will also find fourteen common Singer troubleshooting solutions. Finally, you will also discover advice for issues like tension and wonky stitching.
Sewing Machine Problems and Remedies
Learning how to handle basic sewing machine problems will help you master any kind of sewing because all sewing machines, old and new, sometimes have issues. Plus, you will enjoy your sewing time much more if you don’t feel frustrated and helpless every time something goes wrong!
Founded back in 1851, Singer has designed innovative sewing technology for more than 150 years! Unlike many companies that flourished in the 19th century but died out in the 20th, Singer continues to dominate the domestic sewing machine market today.
While it’s true that Singer doesn’t typically compete in the high-end sewing machine market, they do provide a variety of very reliable beginner and mid-line models. They also excel at customer service. The company offers support and information for free about both old and new models through its website.
You can download old user manuals, troubleshooting guides, and even purchase replacement parts through the company website. If that doesn’t sound like a big deal to you, it should! Most companies today only provide info and support for their current models.
Besides checking out the Singer website for help, you should always read your user’s manual before troubleshooting any new issue on your machine. Every sewing machine, even vintage models, would have originally had a user’s manual that describes how to clean and care for all of the mechanisms. If you’re missing this key document, you can always download a manual for free from the Singer website.
If you need to take apart elements of the machine for cleaning, replacing parts, or general maintenance, you should snap a picture with your phone before disassembling anything. This will help you put it all back together again.
If you’re a visual learner, you can find model-specific tutorials on Youtube for most sewing machine issues. Just make sure you type the model number of your machine into the Youtube search, so you don’t end up watching a tutorial for a different Singer machine!
Finally, you may surprise yourself with how quickly you learn how to handle basic troubleshooting. That said, there comes a time when you should leave the repairs to the professionals.
Unless you have a lot of experience working with electrical or computerized issues, these kinds of repairs usually need a certified sewing machine technician. For example, if the touch screen on your machine won’t light up, you may need to take your machine into the shop. Likewise, if you’re repairing a vintage model and you find a lot of frayed wires inside, you might want to leave the wiring to the experts.
Most of the time, though, you can sort out common sewing machine troubleshooting by yourself!
Singer Sewing Machine Troubleshooting: 14 Common Problems
Most Singer sewing machines deal with fourteen common problems like tangled thread and broken needles at one point or another. Here you will find quick tips to rescue you from each potential problem!
1. Thread Loops Below Fabric
Ugly thread nests on the underside of your material always mean that a thread has slipped free of the thread path somewhere between the spool and the needle. You will need to remove the fabric, use a seam ripper to delicately remove the tangled thread, and then completely rethread the machine.
2. Bobbin Thread on Top Of Fabric
If you notice little loops of bobbin thread poking up into the stitches on the top side of your fabric, you need to check two possible causes. The top thread tension might need a lower setting, or you might need to take out the bobbin and make sure you have it correctly slotted into the bobbin case. Finally, rethread the machine before stitching a test run to see if this worked.
3. Shredding Thread
If you see the thread fraying like a piece of shaggy yarn as you sew, you might have the wrong size of needle for the thread you’re using. Alternatively, you may need a newer thread spool. Thread becomes brittle over time, so sewing with vintage thread can cause lots of issues.
4. Fabric Stuck
If you step on the foot pedal or turn the handwheel and nothing happens, check to see if the presser foot is lowered. Other possible causes could be a thread nest caused by incorrect threading, jammed feed dogs, or stitch control settings set to “0.” You should also check the power cable and the foot pedal cord to make sure everything is plugged in and turned on correctly!
5. Broken Needle
Needles snap if you accidentally sew over a pin or zipper, but they can also break if they become dull or bent because of overuse. You should regularly change your needles–sewing machine needles cost practically nothing, and putting a new one in at the start of each project will make your life easier! Finally, needles can snap if you pull on the fabric too much while sewing instead of letting the feed dogs move the fabric for you.
6. Upper Thread Snapping
If the upper thread breaks as you sew, look for rough spots on the spool that might catch the thread as it unwinds. You may also need a lower tension setting. Just in case, rethread the thread path as well.
7. Lower Thread Snapping
If you find that the lower thread coming from the bobbin breaks as you sew, first try taking out the bobbin and then putting it back into the bobbin case. Rethread the upper thread as well, and check the upper tension level.
8. Skipped Stitches
If you get a wobbly line of stitches with crooked or skipped stitches as you sew, try replacing or reinserting the needle. This also happens when you don’t have the correct size of needle or type of thread for the material, so make sure you check that as well!
9. Loose Stitches
Loose stitches lead to seams that come apart, which you don’t want! First, try rethreading the machine. Usually, loose stitches stem from a thread slipped free from the tension discs. You may also need to test the tension settings to find the right setting for your material and thread.
10. Skewed Stitches
Distorted or skewed stitches usually happen because of incorrect threading or because you pulled on the fabric too much instead of letting the feed dogs move it beneath the needle. Try rethreading everything, including the bobbin, and sew while gently guiding the material instead of pushing or pulling it beneath the needle.
11. Puckered Fabric
Puckered fabric or seams usually occur because of incorrect tension settings, However, using thread and material that stretch at different rates could also cause this issue. In this case, you should make sure you use thread made of the same material as your fabric.
12. Fabric Threads Damaged
Sewing through fabric should never damage the weave of the material. If you see runs, fraying weave, or puckers as you sew, stop immediately. You may need a different size of needle to correctly handle your fabric. You will see this most often with dense or heavy-weight fabrics that require special needles and thread.
13. Machine Won’t Sew
A stalled machine can have multiple causes, including a bird’s nest of thread jamming things up or just incorrect threading. It can also happen with special fabrics like thick elastic, denim, or quilting layers. You may need a specific needle and thread to sew with these kinds of materials.
14. Machine Makes a Loud Noise
Just like you shouldn’t keep driving your car if it’s making a strange noise, you should immediately stop sewing if your machine makes an unfamiliar sound! Most likely, you need to clean your machine and remove any built-up lint. You may also need to replace a bent needle.
Of course, these helpful tips don’t cover every potential sewing machine issue! Knowing how to handle the fourteen most common errors will give you a good start, though. Keep reading for a more exhaustive look into several other typical problems like adjusting tension.
Why Is My Singer Sewing Machine Not Stitching Properly?
Common stitching problems include loose stitches, skipped stitches, zigzag patterns not working, and stitch length issues. Most of the time, you can easily replace a small part or adjust a setting to correct each of these problems.
If the stitches in a seam look loose or baggy, you probably need to clean the feed dogs. You may also need to replace the needle.
Lint in the feed dogs can mess with the speed at which the fabric moves through your machine. This can, in turn, create uneven or baggy stitches. To fix this, simply clean your sewing machine!
On the other hand, loose stitches sometimes happen because you have the wrong needle size or the wrong type of thread for your material. Universal needles in the generic 80/12 or 90/14 size work well on almost all medium-weight fabrics, but silky or heavyweight cloth requires special needles.
If your machine refuses to use the zigzag stitch, you may just need to give everything a good cleaning. Sometimes the parts that need to shift to create different stitch patterns can get clogged up with lint or old oil.
Alternatively, check to see if you left the double-needle setting turned on. If your machine has this feature, it will block stitch patterns that don’t use a double needle. Turn it off, and you can zigzag again!
Skipped stitches almost always occur because of either a dull or bent needle that isn’t catching on the bobbin thread or a timing problem. Timing issues get complex, but you can easily replace the needle. This will get rid of those annoying missing stitches most of the time!
Stitch length issues may require professional help. If a machine can’t accept the settings you program in for a certain stitch length, it usually means that the plastic gears inside the stitch-length mechanism have worn out. Replacing these internal workings gets a bit complicated unless you have a lot of experience with small appliances!
How to Adjust Tension on Singer Sewing Machines
 Adjusting tension in your Singer sewing machine will help you avoid tangled threads as you sew.
So, what is tension? Tension applied to the thread keeps your stitching regular. Good tension settings result in balanced stitching on both sides of your material.
Sewing machines use two different tension mechanisms. The one you need to adjust most often uses discs to apply tension to the upper thread. This keeps the thread slightly taunt as it enters the needle’s eye, preventing a floppy, loose thread that would tangle in everything.
The second tension mechanism resides in the bobbin case, and you don’t have to alter that one very often!
While every Singer model features slight differences, these steps will guide you through the basics of how to adjust tension for the upper thread.
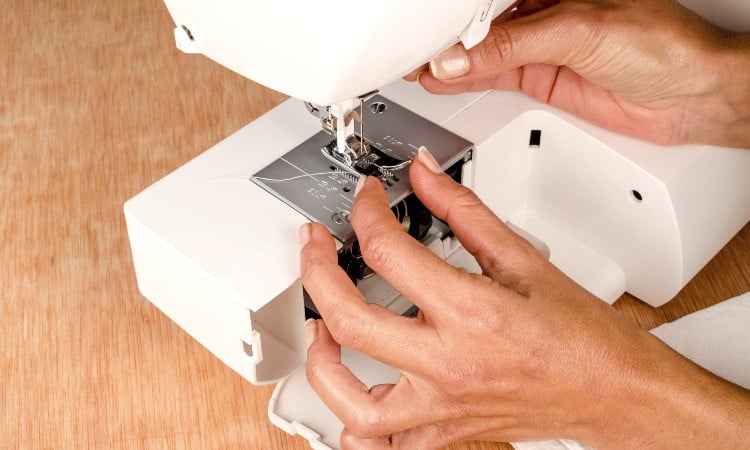
- Familiarize yourself with the thread guides that make up the thread path. The way the thread moves from the spool to the needle impacts everything you do as you sew. Check your manual if you can’t figure out the thread path from looking at your machine.
- As part of that thread path, you will find the tension disc and regulator. Together, these are called the tension assembly. The upper thread runs through these discs on its way to the needle.
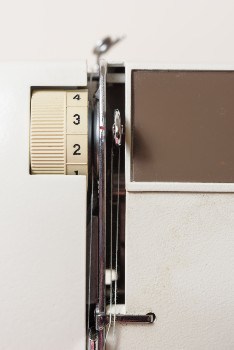
- Locate the tension-setting device. On some Singer models, you will find a small numbered dial. On others, you may use a touchscreen to input tension settings.
- Before messing with that dial, though, do a test run! Put contrasting colors of thread in the bobbin and on the thread spool, sew a line of stitches, and analyze what the stitching looks like.
- If you see loose stitches or puckers, you will need to adjust the tension. Try setting it one number higher, and sew again. If that doesn’t work, go one number lower than the original tension setting, and try again until you have a regular line of stitches!
The most typical tension setting is a 4, which works for medium-weight fabrics on most sewing machines. Lower numbers cause the machine to apply less tension. You may need this for heavy-weight fabrics. Higher numbers apply more tension, which may prove necessary for silky or lightweight cloth.
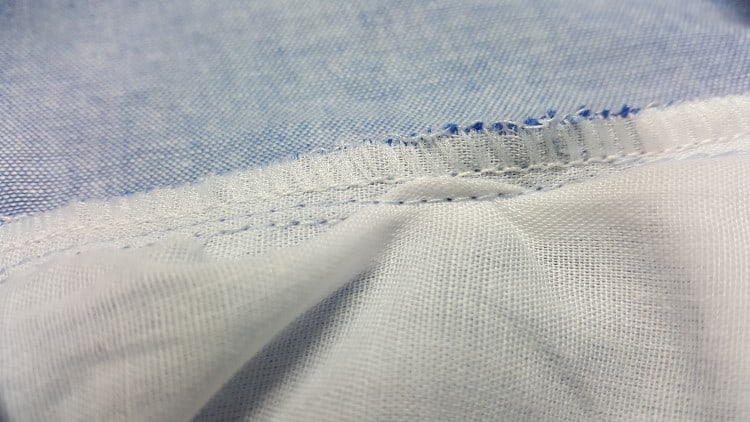
Why is My Sewing Machine Jamming Underneath?
Sewing machine jams beneath the fabric, sometimes called thread nests, usually occur because of incorrect threading or lack of tension on the upper thread.
To fix this issue:
- Take your time removing the jammed material and thread. Hopefully, you can raise the presser foot and slide everything free. If it’s knotted up too well for that, use scissors to carefully snip everything free.
- Completely unthread the machine. Remove the bobbin as well.
- Rethread the upper thread and reinsert the bobbin.
- Use a scrap of fabric for a test run of stitches. If you get another tangle, stop immediately. Your machine will probably make an unhappy noise to let you know about the jam!
- At this point, you may need to reset the upper tension. Follow the steps described earlier in this article to reset the tension and then perform another test run of stitches.
- In rare cases, this may not resolve the jamming. You may have lint or debris clogging up the feed dogs or another mechanism. Try giving your machine a thorough cleaning!
Honestly, at least nine out of ten times, most sewing machine issues occur because the upper thread slipped free from the tension discs, and you just need to rethread it to get back on track!
Why Will My Sewing Machine Not Stitch?
If your sewing machine does not stitch at all, you could have several different problems, including a power failure or a jam.
Go down this handy checklist and see if any of the possible causes apply to your situation!
- Turn your machine off and back on again, just if this resets everything and solves the problem!
- Look for any error codes on the LED screen if your machine has one.
- Check the machine’s power cord and foot pedal cord to make sure all the connections are secure.
- Rethread the upper thread path in case a thread slipped loose of the thread guides or tension discs.
- Look for a “bird’s nest” of thread beneath the material, and remove it if necessary.
- Check the thread spool to find out what kind of thread you have loaded. Then check your manual or Google to find out if the thread pairs well with your needle and the type of material. Too-thick thread in a needle could cause a jam.
- Is the needle bent, broken, or crooked? If a bent needle strikes the needle plate, the machine may refuse to sew. You can also look for any scratches on the needle plate to see if this issue has happened repeatedly.
- Also, make sure the needle rests securely in the needle bar. You may need to tighten its screw a little.
- Remove the bobbin and inspect it for any warping or scratching. Replace it with a new bobbin if you find any defects.
- For vintage models, remove the throat plate, clean everything beneath, and then put it back together again.
- For all models, perform a good basic cleaning to remove any lint or debris.
If none of these possible solutions worked for you, consider taking your machine to a certified Singer technician. You may have an electrical wiring issue or a computer code malfunction on your hands.
Singer Sewing Machine Troubleshooting Bobbin
Troubleshooting Singer bobbins isn’t that challenging. This simple mechanism provides the lower thread that hooks beneath the upper thread, creating stitches as you sew. A bobbin essentially serves as a second mini-spool of thread.
Most modern Singer models have a drop-in bobbin and a simple bobbin case. You usually have to wind the bobbin yourself using the winding mechanism provided on the machine. This way, you can use matching upper and lower threads to create one smooth seam.
Actual issues with the bobbin itself are quite rare. Stitching issues and tangled thread happen most often because of incorrect threading of the upper thread. Rethreading the machine or adjusting the upper tension will solve most problems.
That said, clogged lint in the race (the area that houses the bobbin case) can jam things up. Occasionally, a broken or bent bobbin could cause problems, in which case you need to replace it.
Also, if you wound a bobbin by hand, the thread may loosen and cause unstable stitching. Use the winding device on your machine whenever possible to avoid this.
Finally, a blunt or damaged needle may not interact correctly with the bobbin and hook. In this case, replace the needle and see if that leads to smoother sewing!
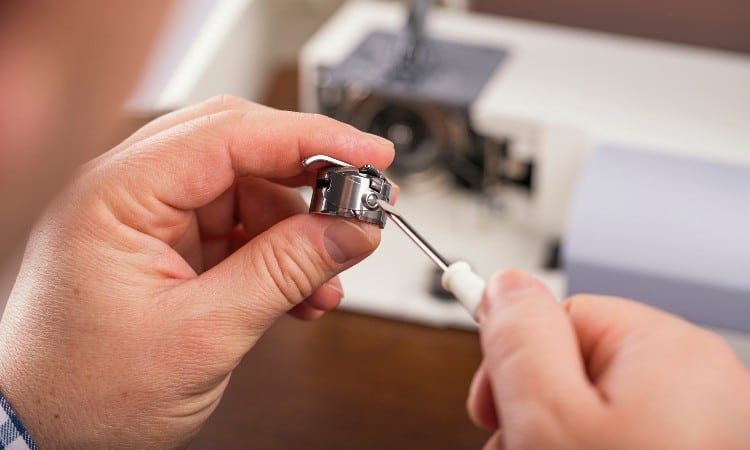
Singer Sewing Machine Bobbin Case Problems
The case that holds the bobbin can also occasionally cause problems in a Singer sewing machine. If the lower thread doesn’t pull smoothly, you need to stop sewing and remove the bobbin case to find out what’s happening.
You may not have slotted the bobbin into its case correctly–it happens to everyone once in a while! Reassemble this component and then rethread the upper thread for good measure. Nine times out of ten, this will fix the issue.
If that doesn’t work, you may need to clean this area. Lint builds up rapidly around the bobbin and bobbin case. Use a small brush to tidy up down there! (As a pro tip: if your machine has collected enough lint to clog up the works, you need to clean the whole thing!).
Finally, the bobbin case houses a tiny screw that determines bobbin tension in most Singer models. You don’t often need to adjust this, unlike the upper tension settings.
That said, in rare instances, it may cause trouble with the lower thread feed. You will need to refer to your manual to carefully adjust this screw and alter the bobbin tension.
Singer Sewing Machine Repair Manual PDF
Singer generously provides sewing machine manuals and repair guides on its company website, free of charge!
All you have to do is type in the model number of your machine to locate its PDF manual. The manual will guide you through the most basic maintenance and some simple repairs. It also usually illustrates step-by-step how to thread the machine.
It’s pretty awesome that Singer continues to offer even its old, vintage manuals for free on the website! Vintage models may operate in quite a different manner from modern machines, so the manual gives you essential help in getting things set up and running.
You can also find a stitch application guide, free sewing tips, and an easy way to search for machine accessories from this portal.
Singer Sewing Machine Error Codes
Many computerized Singer sewing machines will display an error code on the LED or touchscreen when things go wrong. The machine will often make a beeping noise and refuse to operate until you address the issue.
If you know how to find out what the error code means, you will quickly diagnose problems. For example, on some models, “C4” indicates a problem with the bobbin thread. Knowing what this code means allows you to quickly remove the bobbin and resolve the issue without aimlessly poking about the whole machine to find out what’s wrong!
Most importantly, check your manual! Your user’s manual should provide a chart of error codes and what they mean.
If you don’t have a manual or find that it didn’t provide enough info, you can often find helpful tips for each error code discussed in online sewing forums. Many other sewers use the same Singer model you do, so they may have encountered the same issues!
Other Common Singer Sewing Machine Questions
You may find yourself facing other common sewing machine questions like what thread or needle to use in your Singer machine.
While your user’s manual can provide some guidance, you can also find many support online from sewing forums.
And, of course, you can check out the common questions answered here as well!
What Thread Should I Use on My Singer Machine?
Ideally, you should match the thread to the type of material for each project you sew on your Singer machine.
Cotton thread pairs well with most medium-weight fabric. Polyester thread has a tiny bit of stretch in its fibers, allowing it to work well with almost all kinds of cloth. You should usually reserve nylon thread for heavy-duty sewing projects.
On top of this, some specialty fabrics work best with specialty thread. For instance, you may need to use silk thread for sewing on silk.
Finally, consider the thread weight and make sure the thickness of the thread matches the size of your needle.
What Needle Should I Use?
You should match the needle size and type to the characteristics of the fabric you selected. You can buy Singer needles, but you can use any brand. Choosing the right length, type, and size of the needle matters a lot more than the brand.
This handy Singer needle guide will help you match up the right needle with the right fabric!
You can use many different kinds of sewing machine needles depending on what you plan to sew. The most commonly used types of needles are the universal, sharp, and ballpoint styles.
Universal needles work well on most woven materials and come in various sizes to suit the density of the material.
Sharp needles work well on slippery fabrics like silk or chiffon. You may also need a slender needle for these materials.
Ballpoint needles have a blunt tip that allows them to sew knit fabric without catching on the fiber loops.
How Does a Singer Needle Threader Work?
Some Singer models come with a needle threader mechanism to learn to operate in a few easy steps.
- Use the handwheel to raise the needle as high as possible.
- Pass the thread behind the final thread guide located just above the needle. This usually looks like a tiny metal bar.
- Next, pull the thread to the left and loop it under the triangle metal hook on the needle threader.
- Hold the free end of the thread loosely, so it remains in this hook.
- Press down on the needle-threader lever gently but firmly.
- Release the lever, and watch as it passes the thread through the eye of the needle!
How Do I Clean My Singer Machine?
To clean your Singer sewing machine, you can follow the guidance laid out in your user’s manual, or check out the simple step-by-step instructions in this section!
Cleaning your Singer sewing machine regularly will prevent any possible problems down the road. You should try to perform a good basic cleaning at least once a month to get rid of any sneaky lint that might ball up in mechanisms.
- Unplug your machine and pull out your trusty manual to make sure you don’t clean anything you shouldn’t!
- Remove the throat plate. Sometimes you will need a small screwdriver for this.
- Remove the bobbin, bobbin case, and race. (You should probably snap a pic before you take all this apart!).
- Use a small paintbrush or toothbrush to gently remove any lint from these areas. As a pro tip, experts advise against using the kind of canned air you clean computer keyboards with. It can put too much pressure on delicate elements.
- For some Singer models, apply sewing machine oil. Please note that all sewing machines require oil, so always check your manual first! To apply oil, turn the handwheel and place a small drop of oil anywhere that metal parts rub against each other.
- Put everything back together.
- Wipe down the outside of your machine.
- Perform a test run on a scrap of fabric to catch any lingering oil and make sure all is well!
As a final note, some vintage Singer models require special additional cleaning steps. Always check your manual before doing any maintenance!
Conclusion
Singer sewing machines have a great reputation for reliability. That said, all sewing machines run into problems once in a while! Learning how to replace needles, fix jams, and adjust tension will make your sewing time happy and stress-free.
Getting in the habit of cleaning your machine once a month will also prevent many problems down the road.
What is the worst sewing machine problem you ever encountered on your Singer model? Were you able to fix it? Leave a comment below to let us know!