While testing a new sewing pattern the other day, I came across a step requiring interfacing. Interfacing is a sewing product that can easily confuse new sewers, especially since many patterns don’t fully explain how to use it. So what is interfacing in sewing?
Interfacing is a permanent lining attached to fabrics, giving them added stability and strength. It is typically added to the inside of clothing, especially areas of a garment with a lot of wear and tear. Interfacing is generally available in iron-on or sew-in options, as well as a variety of weights and thicknesses.
There are many different types of interfacing to choose from, and you’ll want to be sure to select the right option for your project.
Keep reading as I break down the different types of interfacing and how to select the best choice for your needs. This article will be your ultimate resource for understanding all things related to interfacing.
Quick Navigation
- What is Interfacing in Sewing?
- Do You Have to Use Interfacing?
- When to Use Interfacing
- Types of Interfacing in Sewing
- Does Interfacing Make Fabric Stiff
- How to Choose the Right Interfacing For Your Project
- How to Use Fusible Interfacing
- How to Use Sew-In Interfacing
- Should I Pre-Wash My Interfacing?
- Does Interfacing Soften When Washed?
- Interfacing Substitute
- Fabric Stabilizer vs Interfacing
- Conclusion
What is Interfacing in Sewing?
Interfacing is a fabric lining used to stabilize and strengthen other fabrics during the sewing process. It is most commonly used when making clothes to strengthen areas with a lot of wear and tear. Most collars, cuffs, waistbands, pockets, buttonholes, and straps will have some sort of interfacing on their inside.
Interfacing can take your handmade garments to the next level. It can help you to give better shape to a piece, allowing it to fit or drape more comfortably on your figure. It adds firmness, structure, and support to even the most flimsy fabrics.
Do You Have to Use Interfacing?
Generally, yes – though some projects will require it more than others. Most of the time, if your sewing pattern calls for you to use interfacing, it is because the original pattern maker realized there were vulnerable spots in the garment that needed reinforcing.
Buttonholes, straps, and other structural elements of your garments will need to be reinforced. This is especially true when you’re using thin fabrics like cotton. There’s nothing worse than finishing a garment, only to tear out a snap the first time you try to wear it.
The more decorative areas of clothing may not necessarily need to be reinforced, even if recommended. This is true for areas like pockets and collars on shirts.
When to Use Interfacing
You’ll want to use interfacing when working with thin fabrics that need added strength. Interfacing is also useful when you want to give shape to a piece, which is why you add it to your fabrics during assembly and not after.
Generally, you’ll find interfacing useful when making clothing. Jackets, bags, shoes, hats, and even household curtains can all call for interfacing to be used. You’ll even see it added to buttonholes, collars, straps, and ties on everyday clothing to keep them from tearing during use.
Types of Interfacing in Sewing
Several different types of interfacing available on the market today, which one you use will ultimately depend on your project.
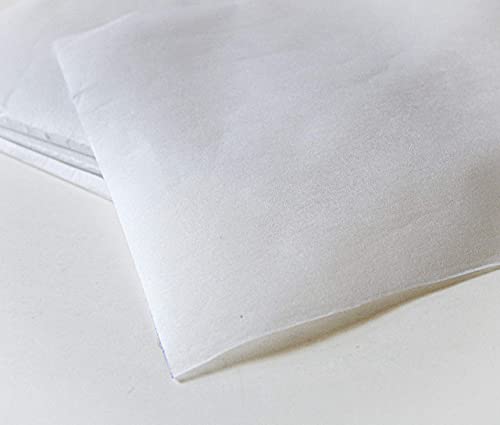
Fusible or Iron-on Interfacing
 Fusible interfacing is a type of fabric lining that has a heat-activated adhesive on one side of the fabric. This allows you to permanently stick the lining to your projects by applying heat with your iron. No sewing is needed, making this an extremely beginner-friendly interfacing.
Fusible interfacing can be used on most fabrics, except those that are heat sensitive. It may not adhere very well to fabrics with a loose weave or a lot of texture since it won’t be able to fully stick to every bump or groove. But on the whole, fusible interfacing is a good choice for most clothesmaking.
Fusible interfacing is a type of fabric lining that has a heat-activated adhesive on one side of the fabric. This allows you to permanently stick the lining to your projects by applying heat with your iron. No sewing is needed, making this an extremely beginner-friendly interfacing.
Fusible interfacing can be used on most fabrics, except those that are heat sensitive. It may not adhere very well to fabrics with a loose weave or a lot of texture since it won’t be able to fully stick to every bump or groove. But on the whole, fusible interfacing is a good choice for most clothesmaking.
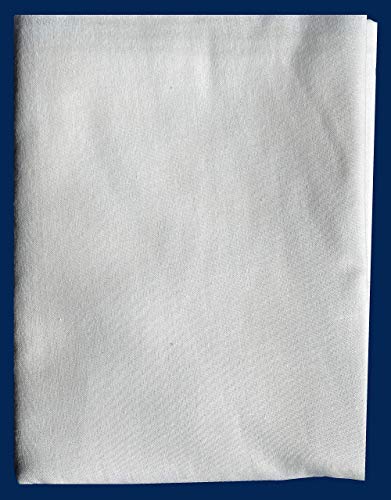
Non-Fusible or Sew-In Interfacing
 Sew-in interfacing is a bit less beginner-friendly since it has to be sewn directly onto the fabric you wish to strengthen. It does not have any sort of adhesive and more closely resembles a thick fabric. This fabric lining lays on top of whatever material you are working with.
To use sew-in interfacing, you must baste it to another fabric before sewing. While this is a bit more difficult to do than iron-on options, it does give a more natural drape and feel to any clothing you make. As a bonus, this can be sewn onto any fabric – even thick or textured options.
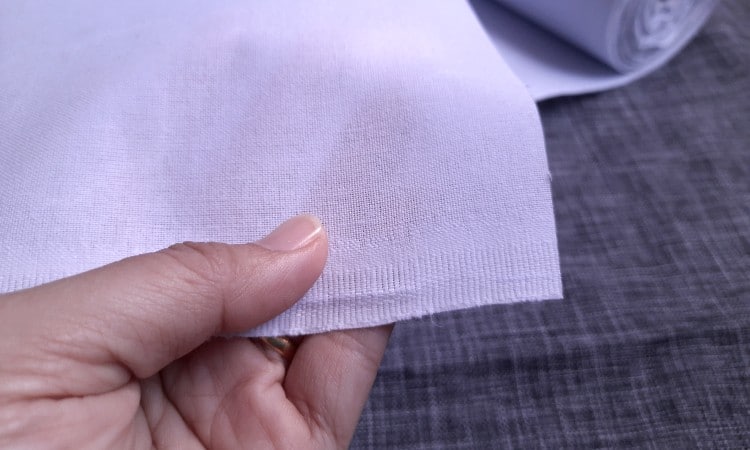
Woven Interfacing
 Woven interfacing, as the name implies, has a weave to its threads that makes it look and feel like a thick fabric. This type of interfacing will even have selvage and a grainline to pay attention to, making it feel like ordinary fabric. Because of how it is woven, this type of interfacing tends to be sewn in.
Woven interfacing can be a bit trickier to work with than non-woven types since it has to be sewn onto any fabrics you use.
Woven interfacing, as the name implies, has a weave to its threads that makes it look and feel like a thick fabric. This type of interfacing will even have selvage and a grainline to pay attention to, making it feel like ordinary fabric. Because of how it is woven, this type of interfacing tends to be sewn in.
Woven interfacing can be a bit trickier to work with than non-woven types since it has to be sewn onto any fabrics you use.
Beginners to using interfacing may find it difficult to work with multiple layers of fabric that aren’t fully adhered to each other and may prefer to use fusible alternatives instead.
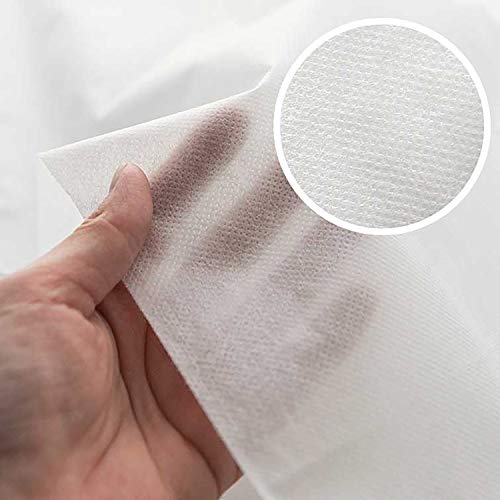
Non-Woven Interfacing
 Non-woven interfacing is manufactured from fibers laid out and compressed together instead of woven. This type of interfacing feels more like a thin, flexible piece of paper instead of thick fabric. This makes it a lightweight option that drapes and moves well with your fabrics.
Non-woven interfacing tends to be fusible, meaning you can iron it onto your projects. It can be cut in any direction since it does not have a grainline. It also will not fray like many woven options, making it easier to use overall.
Knit Interfacing
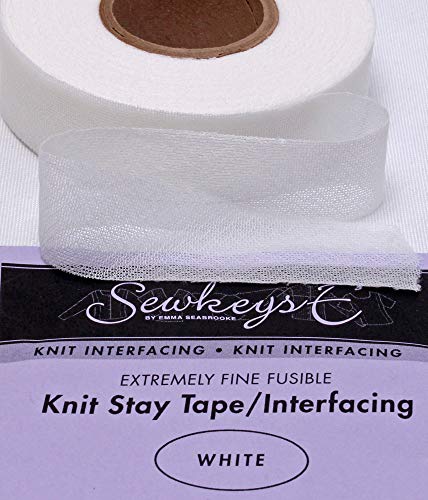 Knit interfacing is naturally stretchy, which is essential for lining fabrics that are designed to be flexible and expand as you move. The natural stretch of this interfacing comes from how its fibers are knit together, which allows them to stretch in the same ways your standard knit fabrics will. This makes it a good option for fabrics that contain jersey or spandex fibers.
Woven and non-woven interfaces, by comparison, are notorious for having little or no stretch. They can cause knit fabrics to become more rigid and ruin the feel of these otherwise stretchy materials. If your pattern calls for knit fabric, you want to use knit interfacing and avoid these other options.
Does Interfacing Make Fabric Stiff
Interfacing can make fabric feel stiff, but only if you use the wrong interfacing for your project. Most of the time, the unnaturally stiff feeling you get from interfacing comes from using a product that is too thick or heavy for your fabric. This will weigh it down and not allow it to flex freely.
Additionally, using woven or non-woven interfacing on knit fabrics can feel unnaturally stiff. Knit fabrics need interfacing that stretches, and neither of these options will do so.
However, if you choose the correct interfacing for your project, your fabric should not feel overly stiff. Interfacing should add some strength and reinforcement but should still allow the fabric to flow and drape in the ways you mean it to.
How to Choose the Right Interfacing For Your Project

If you are following a sewing pattern, it’s very likely that the pattern will tell you exactly what type of interfacing you need. However, if you’re choosing interfacing on your own, there are a few things you should consider.
Fabric Type
The type of fabric you are working with influences what type of interfacing you should choose. You should first ask yourself if you need interfacing that stretches, particularly when working with knit fabrics. If you need interfacing that stretches, go for a knit option that will be sewn in.
If you don’t need stretch, you’ll want to decide if your fabric can withstand the heat of an iron. If it cannot, you’ll want to steer clear of any fusible interfacing types. However, if it is a fabric that is heat tolerant- fusible interfacing is probably the easiest route to take.
Weight or Thickness of Interfacing
Interfacing comes in many different weights, and you’ll want to choose the one that best suits your project. A good rule to follow is to try and match the thickness of your interfacing to the thickness of your fabric. However, that rule may not always work.
Lightweight interfacing is recommended for fabrics that need to be able to move and drape freely. It will work best for loose-fitting clothing, such as dresses and skirts with a lot of flow. Lightweight options are good for fabrics that need a slight reinforcement but won’t experience a lot of wear and tear.
Medium-weight interfacing is good for reinforcing areas of clothing that see a bit more use. It is generally the best choice for collars, buttonholes, and other structural elements of a garment. This type of interfacing will add strength to the fabric but still maintain flexibility to keep the clothing comfortable.
Heavy-weight interfacing is much stiffer and thicker than the other options available and is used in projects requiring a more rigid structure. This type of interfacing is generally only used in clothing like jackets, coats, or even shoes. It won’t necessarily be comfortable for your average, everyday clothing needs.
How to Use Fusible Interfacing
To begin, you will want to first pre-treat your fusible interfacing. You will not want to wash and dry this product. Instead, soak it in warm water for 5-10 minutes, then lay it flat to dry. Too much heat will melt the adhesive.
Then, trace your pattern pieces onto your fusible interfacing before cutting them out. You’ll want to be sure that the adhesive side is facing up when you trace your pieces so that it will have the right orientation when you iron it on.
Once you have your pieces cut, you can iron them on the back of your fabric. Move the iron slowly across the back of the interfacing, keeping even pressure as you go. You’ll want to avoid using any steam settings on your iron since this will dampen the fabric and prevent it from sticking.
You’ll want to carefully iron the correct side of the interfacing. Always ensure you aren’t placing your hot iron onto the side with the adhesive since it will stick to the iron and damage it. If you get adhesive on the iron, you can clean the iron by running the hot iron over a wet dryer sheet or by running the hot iron over a pile of salt poured onto your ironing board.
Before you proceed to sewing, allow the interfacing to cool completely. This may take as long as 20 minutes, but it is essential to allow the adhesive to be fully set. Always check to make sure the pieces firmly adhere and apply additional heat to any areas that haven’t been attached.
Once the interfacing is cool, you can sew as usual – following the instructions of your pattern if you are using one. Some patterns may have you sew another piece of fabric over the interfacing to hide it. Others may leave the interfacing as-is.
How to Use Sew-In Interfacing
Sew-in interfacing is typically woven, and you’ll want to be sure to pre-treat it by washing and drying it before you work. This will keep it from shrinking or puckering in strange places, ruining the overall look of the lining.
You’ll want to find the grainline of your woven interface so that you can align your pattern pieces in the correct direction. Then, cut your pieces out of the interface and pin the interface to your main fabric.
From there, baste around the outer edge of the interfacing to keep it in place as you work. You’ll want to use a thread that matches your fabric. You’ll also want to ensure you keep your basting stitches within the seam allowance so they do not show on the finished project.
Once you have basted the interfacing in place, you can sew as normal. Be sure to follow the pattern instructions since they may require you to add additional fabric to hide the interfacing.
Should I Pre-Wash My Interfacing?
Yes, you should pre-wash your interfacing. Otherwise, it can shrink when you do eventually wash your new clothing. This can cause it to pull or form air bubbles between the layers, ruining the overall look of your outfit.
Fusible interfacing should not be pre-shrunk in a standard dryer. Instead, you’ll want to soak the interfacing in warm water before allowing it to air dry. This helps the interfacing not bunch up later while keeping the adhesive from melting due to excessive heat.
Sew-in interfacing should be washed and dried as usual before you use it. This is especially the case for woven interfacing, which tends to shrink the most.
As a general disclaimer, always check the packaging information of the interfacing you purchase. Some interfacing may not require any pretreatment at all. Another interfacing may have special handling instructions you will need to follow.
Does Interfacing Soften When Washed?
Some interfacing may soften when washed, but not by much. Interfacing is meant to give strength and stability to your fabrics. If it were to become overly soft after washing, this would defeat the purpose of adding the interfacing.
If the interfacing feels too rough on your bare skin, consider adding another layer of fabric lining to hide it. Additionally, if your interfacing feels too stiff, you may want to consider trying a lighter option. You won’t be able to go back and change your interfacing after your project is complete, so it’s better to find interfacing you like from the start.
Interfacing Substitute
While true interfacing works the best for stabilizing and stiffening fabrics, there are other alternatives you can use in a pinch. Which you use will depend on what you hope to accomplish with the interfacing and the overall type of project you are doing.
Regular fabric can be a substitution for woven interfacing. It can be thinner than interfacing is, so you may want to choose a thick fabric for this purpose. You’ll also want to choose one that is light in color to prevent it from showing through on the surface of your main fabric.
Batting can also be used in the place of thicker interfacing. It’s especially useful for things you want to add warmth to – such as a jacket, coat, or winter hat. Keep in mind that this will add padding to your clothing, which will change the overall look of your garment.
Fusible fleece options accomplish the same thing. These options tend to be very thick but also give stability and padding to your garments. You can use these options similarly to batting or heavyweight interfacing, but with the added convenience of its built-in adhesive.
Finally, some foam stabilizers or puffy foams can be used in certain applications. The foam tends to be the thickest option available and isn’t practical for many clothing applications. However, it can be useful for making tote bags or some jackets with a great deal of extra padding.
Fabric Stabilizer vs Interfacing
Fabric stabilizers and interfacing are used to give more structure to fabrics, with some subtle differences. Interfacing is permanently attached to fabrics, either by sewing or iron-on adhesives. It stays within a garment, even after your project has been finished.
Fabric stabilizer, by comparison, is used only as part of the creation process. Its main purpose is to help keep the fabric from stretching or pulling while you work with it. This helps make handling tricky fabrics much easier to manage.
Fabric stabilizer is removed after your project is completed. Sometimes you remove this product by hand yourself. Other products are water soluble, meaning that they’ll dissolve the first time you wash the clothing.
Conclusion
Interfacing can be a bit intimidating to work with at first, but it is worth the effort because of the strength and stability it adds to your fabrics. Remember to always keep this guide handy as you work so that you can be sure to choose the right interfacing for your next project.