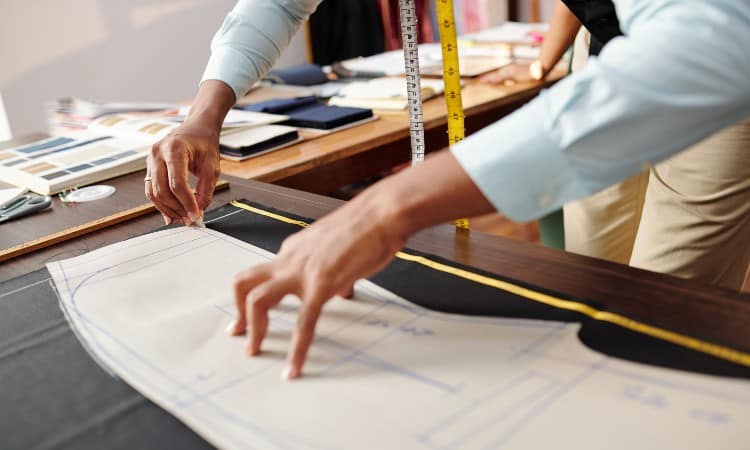
Whether you make clothes for yourself or others, transferring the pattern onto fabric is essential for making clothes that look and fit like they’re supposed to. Two common ways to transfer patterns to the fabric are by cutting or tracing. In this article, we will explore how to trace a sewing pattern onto fabric.
Follow these steps to trace your sewing pattern onto your fabric.
- Press your pattern to flatten it.
- Lay out your pattern pieces following the included instructions.
- Trace around the edges of the pattern.
- Use a marking tool to mark lines, darts, and other details.
- Remove the pattern.
There are many methods and best practices for transferring sewing patterns onto fabric. Keep reading to learn about different tools, tracing papers, PDF patterns, and more.
Do Sewing Patterns Come With Instructions?
Sewing patterns should come with instructions that tell you how to use the pattern and assemble the finished product. Most sewing pattern instructions consist of 10 components. Each of these components helps to walk you through the sewing process.
Garment Sketch
The first page should be a garment sketch showing what each piece of the pattern should look like. It usually shows the front and back view of each piece. Using this sketch is a great way to make sure that all your pattern pieces are there.
Pattern Piece List
This is a list and picture of each piece included with the pattern. The pictures are usually labeled with a letter and a number. The list tells you what each piece is for. Match the letter and number of each piece to the list below to figure out what piece you need for which part of the garment.
Pattern Markings
This part of the sewing instructions resembles a glossary. It tells you what the markings and symbols mean on the specific pattern you’re working on. The markings and symbols give you specific directions for laying out and sewing together your pattern so that it fits properly.
Here are some of the most common symbols you will see on a sewing pattern and what they mean.
- Grain lines- arrows that tell you which way to follow the grain for better quality garments.
- Fold lines- indicate for you to place a particular pattern piece on a folded edge of the fabric to help with the symmetry of fabric pieces.
- Notches- triangles or diamonds that need to be marked so that you can match the pattern while sewing.
- Button and buttonholes- indicate where to place buttons and buttonholes and the size of buttonholes.
- Dots, squares, other shapes- help to match up pattern pieces and indicate specific details.
- Stitching lines- dotted lines that show where the pieces should be stitched together.
- Darts- dotted triangles or diamonds that show you where to add shape, such as in the waist.
Adjustments
This section of the instructions tells you how to adjust the length of a pattern, making it longer or shorter. Adjustment lines are shown on the pattern pieces and are used if you want or need to adjust the length of your garment.
Cutting and Marking
This section shows you what to do before you cut the fabric for your garment. For example, some fabrics need to be shrunk before cutting them. This section also provides instructions for using cutting lines, if applicable, marking things such as notches, and the importance of laying out all your pattern pieces before cutting.
Cutting Layouts
This section explains which side of the fabric your pattern pieces should be laid out on and how they should be laid out depending on the material of the fabric you’re using and the width of the fabric and the size of the pattern.
Sewing Information Fabric Key
This key is used when you’re sewing the pieces together. It provides information on the right and wrong side of the fabric and a key to different aspects of the seam.
Glossary
The glossary is designed to help you understand how to stitch some of the stitches indicated in the sewing instructions.
Sewing Instructions
These are the instructions that show you how to sew your garment. They usually include both pictures and written instructions so that your finished garment is put together properly, fits like it’s supposed to, and looks good.
How to Properly Lay Out a Sewing Pattern on Fabric
Laying out your sewing pattern properly on your fabric is important because you want to get the most out of your fabric as you can and ensure that the pieces of the fabric fit together properly. You don’t want to waste fabric because your pattern was laid out incorrectly. Below are the steps for properly laying out your sewing pattern.
Press Your Pattern Pieces
Whether your pattern pieces are new or older, they have probably been folded up either in an envelope or wherever you chose to store them. You will want to press your pattern pieces so that they lay as flat as possible. If your pieces don’t lay flat, it can affect the amount of fabric needed and the fit of your finished garment.
To press your pattern pieces, turn your iron onto a low temperature setting so that you don’t burn the pattern. Iron the pattern until any wrinkles or creases are gone and the pattern is as flat as you can make it. Do not use water on the patterns to remove wrinkles, as this can ruin them.
Pay Attention to Grainlines
The grainlines tell you in which direction your pattern pieces should be placed to prevent fraying. Following the grainlines on your pattern ensures that the finished garment fits onto your body correctly by helping you to lay the pattern piece as straight as possible. Grainlines should be laid parallel to the selvage, or the finished edge, of the fabric. You may have to extend the grainline so that it stretches across the entire length of the pattern.
Watch this video for more information about grainlines”
To make sure your pattern piece is straight, pin one end of the pattern piece down and use a tape measure to measure the distance between that end of the pattern piece and the selvage. Then, measure the distance between the other end of the pattern piece and the selvage. If the measurements are different, adjust the unpinned edge until they match up, then pin it down.
Laying Your Pattern Pieces
Sewing patterns come with a layout guide. The layout guide gives possible layouts for your particular pattern. The different layouts are associated with fabric type and width. The layout you need to use will be based on the type of fabric that you have.
Threads Magazine recommends choosing your layout from the guide based on the type of garment you are trying to make, as many layout guides list multiple different layouts. Here’s how to choose the right layout.
- Find the style you want to make.
- Find the width of the fabric you’re using.
- Find your size.
Once you’ve chosen the layout you want, you can begin placing the pieces. Start by folding the fabric like the layout shows. Place the larger pieces first, making sure to follow and measure the grainline as described above.
If your pattern indicates a line to “place on the fold,” place that line on the fabric’s fold and pin the pattern along the fold.
The layout guide will indicate if any pieces need to be placed with the printed side down, so make sure to make a note of these pieces and place them accordingly. You can place the pieces closely together, but not so close that the cutting lines overlap.
When every piece has been placed and grainlines are straight, pin the corners of each piece, smoothing them out first and inserting pins diagonally.
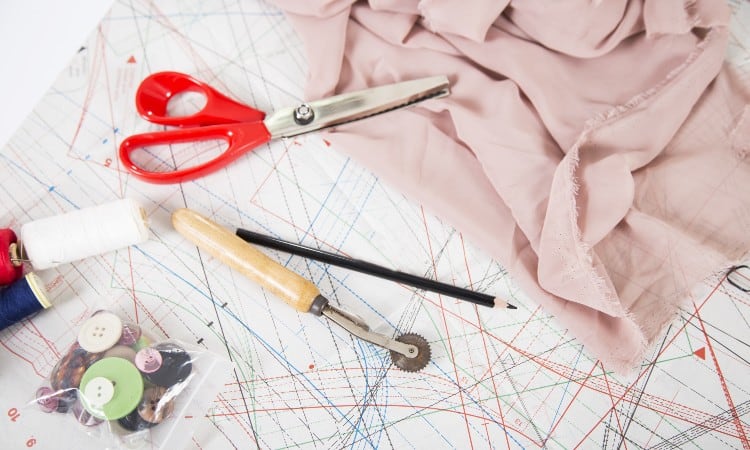
How To Trace a Pattern onto Fabric

Tracing is a quick and easy way to transfer patterns onto fabric. There are many ways that tracing can be done using a variety of tools. Let’s take a look at each tool and the pros and cons of each.
Fabric Pen
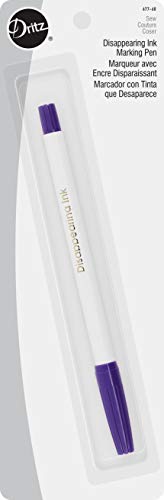 You can use many types of pens for marking fabric, but the best ones are water-soluble. With water-soluble pens, the markings will disappear with water or after washing.
Pros
- Marks smoothly on most fabric
- Will wash off
- Easy to see
Cons
- Will dry up
- Hard to write on chunky fabrics
Tracing Wheel
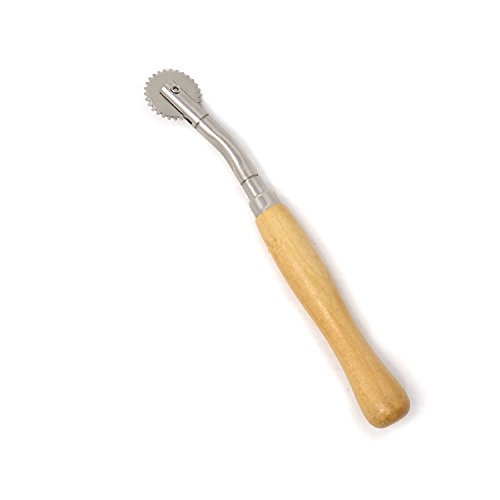 A tracing wheel is a tool with a plastic handle and metal wheel that can be used along with tracing paper, colored on one side. Place the tracing paper between the pattern and the fabric, then roll the wheel over the pattern to transfer the coloring onto the fabric in the form of markings.
Pros
- Won’t rub off
- Great for when you need to make a lot of marks
- Accurate
Cons
- Time-consuming
- Doesn’t work on thicker fabrics
- Hard to remove marks
Soap
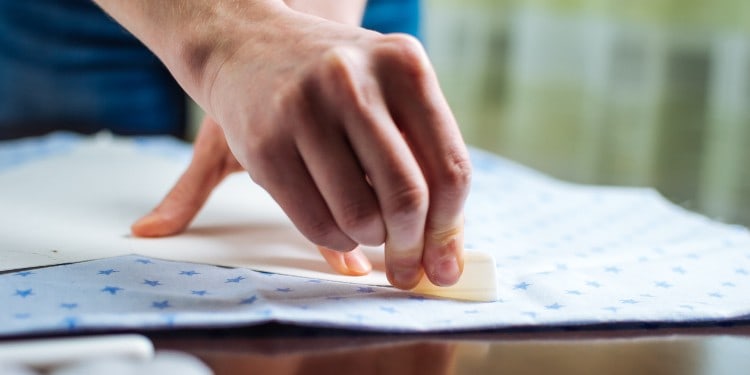
Thin slivers of soap can be used to mark fabrics. Thinner soap works better because it is more controllable than thicker bars and can make lines and markings that are finer. Using it against a piece of paper can help make straight lines.
Pros
- Can be carved into different shapes
- Washes off easily
- Uses what you already have
Cons
- Only works well on dark fabrics
- Can leave chunks of soap behind after marking
- Can be messy
Tailor’s Fabric Marker Chalk
 Tailor’s chalk is a hard chalk used for marking fabric, such as tracing patterns or marking where alterations need to be made or details need to go. It comes in different shapes and colors so that it can be seen on different colors of fabric.
Pros
- Inexpensive
- Marks smoothly on fabric
- Easy to transfer patterns from one fabric to another
Cons
- Shakes off easily
- Can burn into fabric after ironing
- Doesn’t wash off on lighter fabrics
Hera Marker
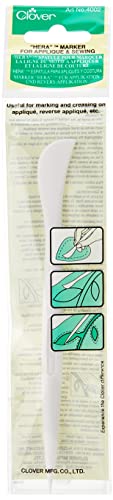 A Hera Marker is a tool that is made of plastic.
It is used for making lines on fabric by creating a thin crease.
You can create a line by running the tool along the edge of a ruler.
Pros
- Quick and easy to use
- Great for marking straight lines
- Lines disappear after washing
Cons
- Doesn’t work on thicker fabrics
- Can distort fabric on certain grains
Marking with Pins
Pins can be used to mark edges and details like darts and buttonholes. To do this, just stick a pin through the pattern where the mark should be transferred, then lift the pattern and mark it on the fabric.
Pros
- Easy to see
- Uses what you already have
Cons
- Limited use
- Not as accurate as other methods
- Can fall out
Tailors Tacks

This marking method uses a needle and thread to mark lines and dots. You can use a running stitch to mark lines and thread through the pattern and fabric, leaving a tail to mark dots. Use a thread color that stands out against the fabric.
Pros
- Accurate
- Inexpensive
- Easy to see
- Does not leave stains
Cons
- Time-consuming
- Threads can get pulled out
How to Trace a Pattern Onto Tracing Paper

Tracing a pattern onto tracing paper can help to keep the original pattern in good shape, especially if it’s one you use frequently. You can also use the same pattern if you need to make adjustments or multiple sizes by making the needed changes on the tracing paper. Follow these steps to learn how to trace a pattern onto tracing paper.
- Lay your pattern on a flat surface.
- Place the tracing paper on top of the pattern.
- Place weights on top of the tracing paper so that it doesn’t shift.
- Use a pencil and a ruler to trace the outline of the pattern. Try to make your lines the same size.
- Trace any notches or markings either after you’ve finished the outline or as you go.
- Add grainline arrows, fold arrows, cutting lines, and any other markings that you haven’t already traced.
- Write the name of the pattern, size, and any other indications on the original pattern.
Now you can use the tracing and store the original pattern away for safekeeping.
What is the Best Fabric Tracing Paper?
Many types of paper can be used for tracing sewing patterns. There is no “best” choice for everyone. Whatever you use is up to your individual preference and what works best for you. You may have to try out different ones to find the one you like best. If you’re unsure, here are some commonly used types and why they work well.
Artist Tracing Paper
- Great for tracing multiple size patterns
- Can be easily seen through
- Can be purchased in different widths for tracing different size patterns.
- Con- extremely thin, tears easily
Medical Exam Paper
- Easy to see through
- Inexpensive
- Con- too thin and not large enough to fit wide pattern pieces
Bonded Textile Paper
- Found under many brand names
- Doesn’t tear easily
- Thicker but still see through
- Grips fabric to reduce shifting and the number of pins needed
- Con- more expensive
How Do I Transfer a PDF Pattern to Fabric?
PDF patterns are digital versions of printed patterns. Since PDF patterns are electronic, you can print them off at home as needed so that they can be used over and over again without having to purchase a new one if the old ones get damaged or thrown away.
According to pattern company Cashmerette, when you print a PDF pattern, there are some things to keep in mind. They recommend only printing the first page at first, to make sure the size of the pattern is correct. If the sizing is correct, print the whole pattern by selecting “no scaling” on the print screen. You should also make sure the pattern is centered on the page.
Once you’ve printed your pattern, follow these steps to use it.
- Trim off the right and bottom margins of each page.
- Tape the pattern pieces together according to the instructions.
- Trace or cut out the pattern.
- Transfer to fabric the same way you would a non-PDF pattern.
How To Use A Sewing Pattern Without Cutting It?
There are many reasons why you might not want to cut your sewing pattern. Maybe it was expensive, you need multiple sizes, or use it frequently and want to preserve it for as long as possible. Besides tracing paper, which we’ve already mentioned, here are a couple of other ways to use a sewing pattern without cutting it.
Trace it onto a sturdy material such as posterboard or cardstock.
- Trace the pattern onto tracing paper.
- Stencil the pattern from the tracing paper onto the heavier material or use a thick marker to go over the tracing paper so that the pattern bleeds through.
- Cut out the pattern on the heavier material and fill in any details that were left off.
Use carbon paper and a tracing wheel.
- Get a tracing wheel and carbon tracing paper.
- Place the tracing paper carbon-side down between the fabric/another type of paper and the pattern.
- Use the tracing wheel to trace over the pattern.
How Do You Trace a Multi-Size Pattern?
Multi-size patterns are great because you can make the same garment in multiple sizes using one pattern. Many people want to preserve their patterns for as long as possible and wonder how to trace a multi-size pattern. It’s actually really easy.
Since many patterns have different types of solid, dashed, or dotted lines to indicate the different sizes, you can trace all the lines on the same tracing paper. Just use one or multiple bright-colored pencils to indicate the lines for each of the different sizes.
Conclusion
We hope this guide helped you learn how to trace sewing patterns onto fabric. Remember that there is no one “best” method; rather it’s whatever works best for you. Leave us a comment to let us know which method worked for you and share this article with others so that they can learn too.