If you like bold splashes of color or subtle swirling patterns of color, you may want to try a pair of tie-dye pants. While tie-dye t-shirts remain a staple of many summer camp uniforms and around-the-house outfits, tie-dye pants have also begun to gain popularity. Plus, you can easily learn how to tie-dye pants at home to create your own artistic masterpiece!
One of the most popular ways to tie-dye pants is to use an accordion-like scrunching pattern that creates stripes and swirls on white pants or leggings. Other popular techniques include making bleached patterns on dark jeans or adding one-color scrunches to trousers. Any pants that contain at least 90% cotton in the fabric will hold a tie-dye pattern.
In this article, you will learn what dyes and supplies you need for this project. You will discover six ways to tie-dye pants at home. Finally, you will find tips on how to safely set up a tie-dye project at home.
Quick Navigation
Can You Dye Pants?
You can dye pants most easily when they contain a high percentage of cotton and use a fiber-reactive dye.
Cotton fibers absorb water well, which makes them an ideal choice for a dye that dissolves in water. You can find out how much cotton your pants contain by checking the manufacturer’s label, often located inside the waistband. The label might say “100%” cotton,” which is ideal!
On the other hand, if it says “100% polyester” or even “50% polyester/50% cotton,” you should set aside those pants and find another pair to tie-dye.
Also, try to find a fiber-reactive dye to work with. Most commercial tie-dye kits like this popular choice from the Tulip brand use this kind of dye. You want to avoid all-purpose dye, as this will not develop a strong hold on the fabric.
How to Tie Dye Pants at Home: 6 Methods
This handy guide will show you how to tie-dye fabric pants step by step in six different ways.
1. Jeans
Tie-dye can work on denim, so you can easily tie-dye jeans at home!
There is one big caveat here, though, which is that you should always apply dye to a fabric that is lighter than the dye. Unlike acrylic paint, the dye will not sit on top of the fabric and hide what is behind it. Instead, it will soak into the fabric and disappear into a pre-dyed dark color of denim.
This means you should use this tie-dye method on white or light-colored jeans, not dark blue or black jeans.
- First, run your jeans through a warm water cycle in your washing machine using regular detergent but no fabric softener. Ordinarily, it is better to use cold water for washing jeans–but in this case, you want to ensure that sizing or finishing products do not remain in the denim.
- When the washer finishes, take the wet jeans to your workstation. Spread and tape down a large plastic trashbag or a plastic tablecloth to protect your space, and set the damp jeans on top of the plastic.
- You should also wear gloves and a smock of some sort during this process unless you want to have tie-dyed hands for a week or so!
- Next, pick one folding method described in this article and use it to prep your pants for the dye. For example, the accordion fold method will give you a striped pattern in your pants, and the scrunch method will give you starbursts of color on your pants.
- Mix up your dye according to the package instructions or simply open a squirt bottle if you buy a tie-dye kit.
- Liberally apply the dye to the folded or scrunched jeans. You can use just one color or multiple colors of dye. Just squirt a bit of each color next to each other on a wet paper towel to make sure they blend well before applying one shade next to another on your jeans!
- After you dye the top side of the folded jeans, flip them over and apply dye to the back.
- Scoop up the dye-soaked denim and seal it into a large five-gallon Ziploc bag. The dye kit should tell you how long to let the dye set. Usually, this process takes several hours or even as long as overnight.
- Finally, you will want to rinse the jeans in your sink and then wash them separately, as some oversaturation of dye particles will flood away during the first wash.
2. Bleach Tie-Dye
The best way to tie-dye dark jeans is to use a bleaching method. This method can create a stark and eye-catching tie-dye pattern in black jeans.
Since you need to use chlorine bleach for this process, make sure you work in a ventilated area.
- Wash your jeans in warm water using detergent but nothing else to get them ready.
- Take the damp jeans out once the washer finishes running. Settle yourself somewhere comfortable with the jeans and a big bag of regular-sized rubber bands.
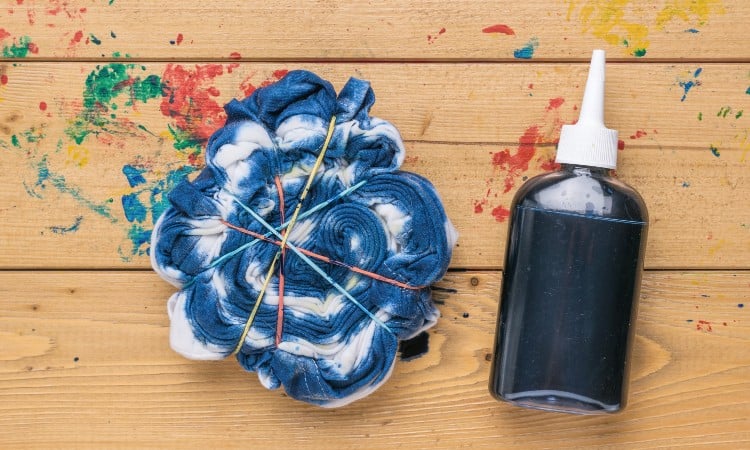
- You can use pretty much any folding or twisting tie-dye pattern you like with the bleach method. However, this guide will focus on a cool starburst scrunch design using dozens of rubber bands.
- All you have to do is scrunch a small handful of the black denim in one hand and wrap a rubber band around it to hold the scrunch in place. Do this all over the jeans, using as many rubber bands as possible.
- Next, fill a large bucket a little over halfway with two parts hot water and one part bleach. This will smell quite strong, so brace yourself!
- Lower the rubber-banded jeans into the bleach mix.
- Leave the jeans to soak for an hour, but stir the water every ten minutes to make sure the bleach evenly soaks the denim. You should see the water progressively growing darker as some of the black dye in the jeans leaks away.
- Use tongs or a big spoon to lift the jeans into a clean sink. Run cold water over them to rinse away most of the bleach.
- Even after the rinsing, you should wear gloves to protect your hands as you get rid of all the rubber bands. You can unwrap them, but you will find it much quicker to use scissors carefully.
- Wash your jeans right away. You need to remove any lingering bleach or it could continue to eat at the fibers in the denim. Plus, more of the dye will disappear in the wash.
3. Trousers/Scrunch Tie-dye
If you want to tie-dye lightweight white pants such as trousers, the scrunch method is the easiest technique to try.
- Run the white trousers through the wash to remove any fabric softener buildup from the cloth. Don’t put the pants in the dryer–the dying process works best on damp fabric.
- Cover a large flat space with plastic. A kitchen table works well for this!
- Spread your wet trousers out onto the plastic. Starting at the center, scrunch the trousers up by taking handfuls of the wet fabric and squeezing. Repeat this over the entire garment till it makes a roughly oval-shaped mound of crumples on top of the plastic.
- Use a squeeze bottle to apply the dye.
- Carefully slide the scrunched pants into a large plastic bag and seal them up to rest overnight.
- In the morning, rinse the trousers in your sink until you do not see dye running down the drain.
- Finally, wash the pants in a cold water cycle in your washing machine one more time.
4. Leggings
You can tie-dye some leggings, but the success of the dye job depends largely on the kind of fabric used in the garment. Some yoga-pants-style leggings may contain 100% cotton. This should tie dye just fine!
But leggings made entirely out of Spandex, or leggings that contain a large percentage of elastic fibers, will not due as well. The elastic fibers will not absorb the dye, so once you wash the leggings just once, those flecks of fabric will turn white again.
You may also find that many athletic-wear leggings contain a large percentage of polyester. This will not tie-dye easily, either.
To create a cool rainbow tie-dye pattern on your leggings:
- Prewash the leggings according to the care label inside the waistband of the pants.
- Prep the dyes in a tie-dye kit (for rainbow tie-dye, when you need five or six colors that blend well, it’s a great idea to buy a kit instead of mixing your own fabric dyes!).
- Fold the damp leggings in half longways. This way, the dye you apply will look the same on both sides of the leggings.
- Next, use large rubber bands to circle the pants at roughly even points in seven different locations along the length of the jeans.
- Spread a large plastic sheet over a flat work area as long as the rubber-banded leggings. Arrange two wire racks, like the kind used to cool freshly baked cookies, down the length of the plastic.
- Set the leggings on top of the rack.
- To apply the dye, use the Roy G. Biv color pattern to get a true rainbow style. Simply squirt with one color below the first rubber band, then move through the color spectrum, squirting dye between each set of dividing rubber bands.
- Flip over the leggings and use the same process on the reverse side.
- Slide the dyed leggings into a big bag for six hours or overnight.
- After the resting period, remove the rubber bands and rinse the leggings in cold water.
5. Sweatpants
You can tie-dye most kinds of sweatpants using the same methods you would employ for jeans or leggings. But you need to check the label inside the sweats to ensure they contain at least 60% cotton, or the dye will not hold.
This guide shows how to use an ice tie-dye method to create a muted swirl of watercolor-like designs all over fleece sweatpants.
- Wash your sweatpants as usual.
- Clean out a kitchen sink and place a wire rack in the center of the sink.
- Make sure you have one or two trays of ice cubes frozen and ready to go. You can use crushed ice or the kind of chunky ice you buy at a gas station, but these will create different patterns as they melt.
- Crumple up the sweats, so they fit on top of the wire rack. You can use twine or large rubber bands to hold the sweats onto the rack if you want.
- Next, layer the ice all over the sweats.
- Open up a fiber-reactive dye packet or use unmixed dye powder from a tie-dye kit. Sprinkle the powder generously over the ice.
- Let the ice melt entirely.
- Secure the dye-soaked sweats inside a bag, or just wrap the sweats and the wire rack inside plastic wrap if you find that easier.
- Let this sit overnight.
- Remove the plastic and any ties or bands you used. Rinse the wears in cold water.
- Admire the fun tie-dye pattern, and then wash the sweat in the washing machine to remove any excess dye.
6. One Color Tie-Dye
You can use any tie-dye folding or twisting method to create a one-color design on pants, leggings, or jeans. While a complete rainbow of color in your leggings does sound fun, a more monochromatic style may have a sharper definition and also more easily match with other clothes to make nice outfits.
- The ice cube tie dye method works especially well with just one color. All you have to do is sprinkle the contents of a powdered dye packet over the surface of your ice cubes.
- More complex folding methods, like the accordion technique, also look nice with just one color.
- The scrunch method looks galaxy-like when made out of just one color, though it is also fun with multiple shades of dye!
Tie-Dye Folding Techniques for Pants
 If you want to move beyond the basic methods described above, try one of these popular tie-dye folding techniques for pants!
Of course, you can employ dozens or hundreds of different folding, twisting, and shaping methods for your pants. Each technique will give you a slightly different tie-dye pattern.
- An accordion fold method will give your pants a fantastic colorful spiral effect. Fold the pants in half longways, and then begin making even two-inch accordion folds, starting at the cuff and working your way up. Secure the folds with several rubber bands before applying the dye.
- If you want a giant sunburst or bullseye design, use a rubberband to gather up a center point and secure it. Then loosely roll the pants into a log shape down from that point, and wrap rubber bands around the rolled pants every three or four inches.
- If you want a striped look, use twine or rubber bands around the legs of the pants individually. Then apply different colors between each band as you add the dye.
Do You Tie-Dye on Wet or Dry Fabric?
You should tie-dye on wet pants rather than dry fabric because most dyes dissolve in water, meaning they can more easily soak into the damp cloth.
It’s also a good idea to wash your pants before dying them because this will remove any dirt, body oils, or even old fabric softener that may have clogged up the fibers in the fabric.
How Do You Tie-Dye Clothes at Home?
You can easily tie-dye clothes at home by prepping your workspace, checking the fabric content in your pants, and making sure you get the right kind of dye.
It’s a good idea to put down protective plastic sheeting where you plan to work. You should also wear old clothes and rubber gloves to avoid getting dye all over yourself. This is doubly true if you want to tie-dye with kids!
As you saw earlier in this article, tie-dye projects work best on 100% cotton fabric. Make sure you check the tag inside your pants before you try to dye them. You don’t want to put in all that effort and create a gorgeous design only to have it wash away the first time you launder your pants!
Finally, fiber-reactive dyes work best for this kind of tie-dye project. They will effectively dye jeans, cotton leggings, trousers, or khakis! Most commercial tie-dye kits contain this type of dye, but always read the product description.
How Do You Dip-Dye Jeans?
You can dip-dye jeans at home by creating a dye bath and using a dowel rod to help evenly submerge the pant legs in the dye. This gives you a clean section of dye on the lower legs of the jeans!
- To try this trendy style, start by finding white or light-colored jeans.
- Create a dye bath in a large bucket following the instructions on a fiber-reactive dye packet.
- Next, wrap the waistband of your jeans around a thick dowel rod or curtain rod. Keep rolling up the jeans around the rod until you have only about two feet of the jean legs left free.
- Use a woodworking clamp or a large hair clip to pin the rolled jeans to the rod.
- Set two chairs of the same height on either side of the bucket.
- Lower the bottom section of the legs into the dye bath and keep them at an even height by propping the sides of the rod across the tops of the two chairs.
- Let the jeans legs soak for thirty minutes.
- Follow the directions on the dye packet to rest the dye if necessary.
- Rinse the dyed section under cool water and then wash the jeans alone in the washing machine to make sure the dye will hold.
Conclusion
You can tie-dye pants at home easily so long as you use cotton pants and fiber-reactive dyes. You can add fun tie-dye designs to jeans, leggings, sweatpants, and even trousers! This process does work best on white pants unless you want to use a bleach tie-dye method that works well on black pants or jeans.
You can choose from all kinds of designs when you tie-dye your pants at home. Super simple methods include scrunching up the pants to create mini starbursts or galaxies. You can also make a big starburst or bullseye by folding the pants more precisely or a watercolor style by using the ice tie-dye method.