When the winter blues hit and your wardrobe starts to feel very blah, get out your tie-dye supplies and brighten things up! Contrary to what you may remember from summer camp arts and crafts, you can combine more than one vibrant color in a tie-dye pattern. You just have to learn the best tie-dye color combos before you get started!
The best tie-dye color combos feature two or more primary colors and avoid contrasting complementary colors. The easiest tie-dye patterns use one vibrant color in many creative patterns, including spiral or starbursts. More advanced patterns use multi-color tie-dye designs.
In this article, you will learn how to select colors for tie-dye. You will find instructions on how to make popular single and multi-color designs. Finally, you will get tips on what color combos to avoid based on the color wheel.
Colors for Tie-Dye
You can use pretty much any color to create a beautiful tie-dye design, but some colors will blend with other colors more nicely than others. This all goes back to the simple rules of color science, which you can easily master!
Do you remember the color wheel? You probably learned about it in second-grade art class, where you first discovered the delight of blending blue and yellow paint to create green. The color wheel visualizes the wavelengths of light that create each color.
You can check out this fun, free online version of a color wheel for easy reference if you don’t have one at hand.
In practical terms, it helps artists and designers understand how colors blend and/or contrast with each other. The wheel breaks down primary and secondary colors and also shows which colors complement each other.
Primary colors are the three basic colors that can create all other colors when mixed. Red, blue, and yellow are the most basic set of primary colors, though, in printing circles, you will see cyan, magenta, and yellow instead as a slight variation.
Mixing various amounts of these three colors can create any other color. However, you cannot mix secondary colors to create a primary color!
So, what is a secondary color? This is a color made by mixing two primary colors, such as blending blue and yellow to make green. You can also create a tertiary color by mixing a primary and a secondary color together.
Don’t worry about diving too deeply into color science unless you have a deep passion for art! You will find simple guidelines to help you understand which primary, secondary, and tertiary colors you can mix and match in your tie-dye later in this article.
It’s all fine and good to know what colors you want, but first, you need to know where to get the right dyes! You can buy ready-made tie-dye kits at any craft store. These work best on 100% cotton items such as shirts or scarves, though. If you plan to dye another type of fabric, such as polyester, you will have to use a different kind of dye.
Alternatively, you can use any water-soluble fabric dye to create your own tie-dye design. Popular brands like RIT sell fabric dyes with easy instructions.
Another thing to keep in mind is that you will probably get the best results from mixing your own shades out of primary color dyes rather than purchasing pre-mixed shades. The premixed dyes will not mix well with each other, as they already contain a mixture of various colors.
Best Tie Dye Color Combos
The best tie-dye color combos offer vivid pops of color without any muddy bleeding patches in between. You can create these vivid color mixes quite easily by learning what colors pair well together!
Some of the simplest, most popular tie-dye color combos include:
- Red + Blue
- Red + Yellow
- Blue + Yellow
You will find more advanced color mixing ideas later on in this article!
You may also want to consider what type of colors you want to use, such as neon vs jewel tones or cool tones. Other color schemes include using pastels or earth tones, often achieved by using all-natural dyes.
You can often purchase a ready-made kit that includes dyes in this style ready to go!
Cool Tie Dye Colors
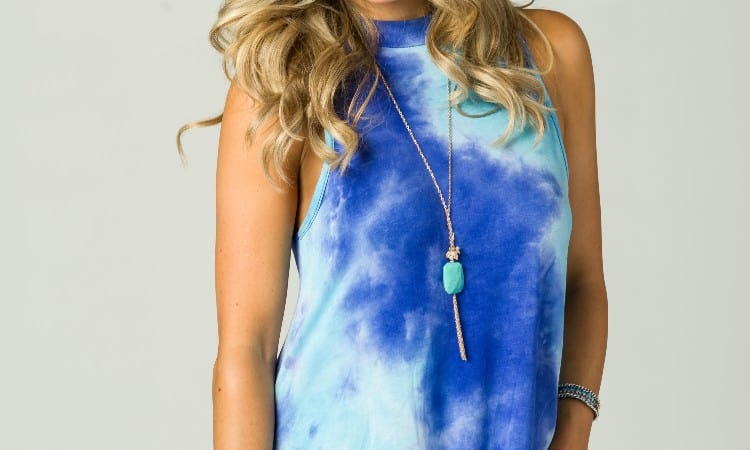
A cool color scheme contains only colors with undertones of blue, such as blue, green, and light purples. These colors have a soothing and gentle quality to them.
You can use just two cool color tones, like blue and lavender, or combine several together for a more complex design, such as using the ice melt method (you can find instructions for that method later in this article).
To make a diagonally striped t-shirt using cool tones:
- Select cool dyes that have blue undertones, like green and blue or lavender and teal. For this design, you just need two colors.
- Arrange your damp T-shirt on a floor or table, spreading it out smoothly.
- Make accordion folds one-inch wide, starting at the left sleeve and working across the shirt.
- Use rubber bands to hold all the folds in place up the length of the shirt, placing the bands every two inches.
- Apply dye between the rubber bands, alternating which color you use.
- After setting and rinsing the shirt, you will have cool-toned stripes up and down the tee!
Jewel Tones
A jewel-tone color scheme contains deep, saturated colors with rich vibrancy, such as emerald, ruby, sapphire, or amethyst tones. You can see how this color scheme gets its name! These colors will create a flashy and bold tie-dye design, but you do have to take care in which colors you mix to avoid clashing tones or brown splotches.
For best results, go with two primary colors such as ruby and sapphire. Or mix a primary color with a secondary color, such as ruby and amber.
After you select two or three vivid, jewel-toned dyes, try making a fun bullseye pattern:
- Start with your damp shirt spread out flat in front of you.
- Find the center of the shirt and pinch up about an inch of it between your fingers.
- Use your other hand to run down over the shirt from that center point, forming a cone shape with your original point at the top.
- Apply rubber bands every two inches down the cone.
- Squirt dye in alternating colors in between the rubber bands.
- Rest, rinse, and wash the shirt according to the dye instructions.
- When you cut away the rubber bands, you will have a bright, jewel-toned bullseye pattern on your shirt!
Neon Colors
A neon color palette uses glaringly bright neon colors to create flashy, bold tie-dye in that authentically groovy 70s style.
You can create pretty much any tie-dye pattern using neon colors. That said, you will find it easiest to create these vivid hues if you purchase a ready-made dye kit, such as Tulip’s handy neon dye pack. You will not find these shades in nature, so this is not a case where you can DIY the colors at home!
Keep in mind that even with neon colors, it does matter which shades go next to each other. As always, two primary colors can safely blend. Three primary colors, even in neon shades, will create a splotchy brown.
Tie-Dye Color Patterns
You can find dozens of fun tie-dye patterns to try, including classics like a spiral or a starburst or complex designs such as a shibori folding method. In general, you can create most designs using a single color, two colors, or even several colors together.
Single-color designs offer the easiest option, but two-color designs look even more fun and allow you to play with more of your favorite colors.
Single-Color
You can use pretty much any pattern, from a square shibori design to a spiral to a starburst with a single color. The single-color method also lets you choose absolutely any color you want to highlight without worrying about mixing and matching! For this reason, single-color designs make an excellent place to start if you are new to the world of tie-dye.
One cool way to level up a single-color design is to mix several different concentrations of the color in separate squeeze bottles. If you add a smaller amount of dye to the water in one bottle, and then a medium amount in the second bottle, and then a strong concentration in the third bottle, you will have a pastel, faded, and vivid set of colors to create an ombre-style tie-dye design!
Two-Color
You can create many tie-dye designs using two colors, including the very popular and simple scrunch pattern.
To make this design, first select two colors that do not mix into brown. You can use any two primary colors or a primary and a secondary color to get great results!
- Prepare your cotton shirt by washing it.
- Prep your dyes according to the package instructions. If you want pastel colors, use less concentrated dye. For more vivid colors, use more dye in the water.
- To create the special scrunched design, lay the shirt on a flat surface. Start at one sleeve, scratch a handful of the shirt, then let go, creating a wrinkled section. Repeat this all over the surface of the shirt.
- Once you have a scrunched and bunched shirt, ease it into roughly a football-sized oval.
- Use rubber bands to secure the shirt in this shape.
- Apply the dye using squeeze bottles. The easiest method is to alternate a squirt from one then a squirt from the other color, spacing them apart. Don’t worry if the colors bleed a bit, as your careful color matching will just create a border color that looks nice, such as green between blue and yellow.
- Follow the instructions on the dye package to let the dye set.
- Finally, rinse and wash the shirt, and admire your design!
Color Combinations for Tie-Dye Shirt
Whether you want a two-toned or rainbow-style design, you will need to select just the right color combination for your tie-dye shirt!
To do this, you have to understand a few basics about mixing colors. This matters because when you soak your t-shirt in different dyes or squirt dye out of squeeze bottles onto the shirt, the colors will blend together wherever they touch. Ideally, this mixing should create a new, pretty color in between the two original colors!
When you mix the three primary colors with each other, you get:
- Yellow + Blue = Green
- Blue + Red = Purple
- Red + Yellow = Orange
You can also make tertiary colors by mixing a primary color with a secondary color. For example:
- Red + Purple = burgundy or magenta
- Blue + Green = teal
- Red + Orange = vermillion
- Yellow + Orange = amber
Keep in mind that while mixing red and blue together will always make purple, varying the amount of red or blue will create many different shades of purple. Likewise, you can make everything from olive to emerald green by varying the amount of yellow and blue you combine.
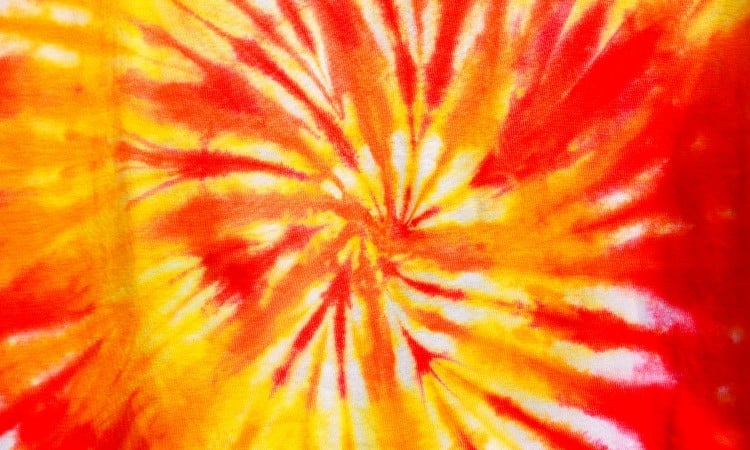
Spiral Tie-Dye Color Combinations
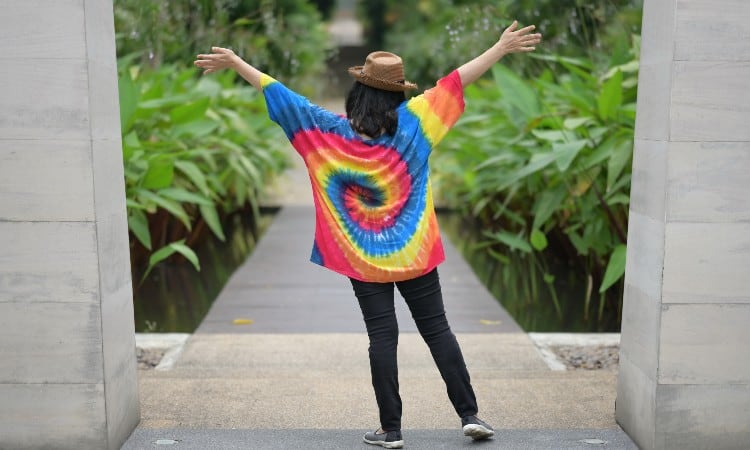
Perhaps the most iconic tie-dye design of all is the classic spiral, which you can make using one color or a whole rainbow of colors!
To make a gorgeous rainbow spiral:
- Find the center of the shirt and pinch it together in your fingers. Use your other hand to twist the shirt into a spiral around this center point. This should create a snail-like shape when you finish.
- Secure the shirt with four large rubber bands. Crisscross them over each other across the top of the snail shape. This should make pie-slice-like shapes around the circle of the shirt between each rubber band.
- Next, mix up your dyes according to the instructions on the dye package. You will want a dye for each of the ROYGBIV colors of the rainbow.
- Working in the ROYGBIV order (Red Orange Yellow Green Indigo Violet), apply one color to each pie-slice shape in between the rubber bands. Make sure you apply the dye liberally, allowing it to saturate through the twisted T-shirt.
- Allow the shirt to rest and set according to the instructions on the dye package.
- Rinse out the excess dye under cold running water, and then wash the shirt to finish setting the dye.
- Enjoy your vivid rainbow t-shirt!
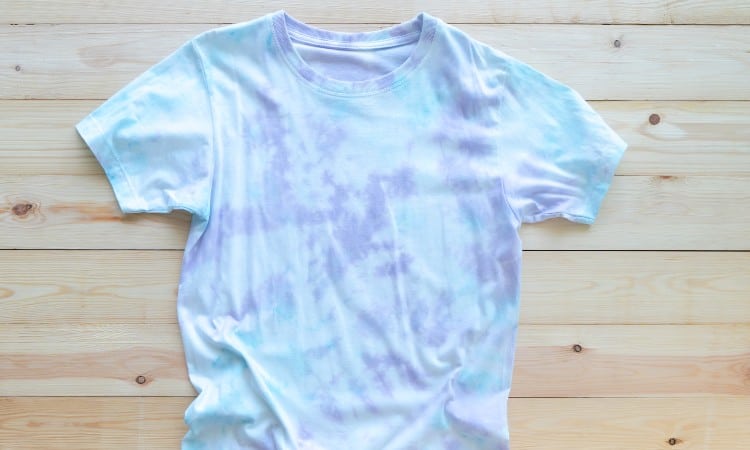
Ice Dye Color Combinations
You can pair any colors that mix together into another color when creating ice dye designs. Follow the same color science rules as you do for regular tie-dye! The main difference is that you will need to use powdered fiber-reactive dye instead of regular water-soluble dye for this project.
Ice tie-dye creates a unique and random design based on icemelt patterns. It has a water-color appearance that sets it apart from classic tie-dye. This happens because some of the dye tends to split into sub colors as the ice melts.
To try this method:
- Arrange your white shirt in a slightly scrunched position on top of a metal rack.
- Spread ice cubes thickly over the shirt.
- Sprinkle powdered dye on top of the ice. If you plan to use more than one color, sprinkle the colors in separate patches without too much crossover.
- Allow the ice to melt completely.
- Let the shirt sit for 24 hours, then wash it in your washing machine using cold water.
Multi-Color Patterns
Multi-color patterns look remarkable when done well but also offer the greatest challenge. As a general rule of thumb, fewer colors mean less bleeding and less chance of ugly brown spots in your design. That said if you feel brave and you want to go for broke, try a multi-color design!
Check out these excellent multi-color combinations:
- Use the colors of the rainbow in the ROYGBIV sequence to avoid mixing mishaps.
- Use varying shades of the same primary color, such as lavender, violet, and royal purple.
- For a cool five-color design, try yellow + red + purple + blue + green.
- Any three colors on the wheel that sit next to each other should pair well for a three-color design, such as red + orange + yellow will look great.
If you want to dye a rainbow, just keep in mind that not all seven colors should sit next to each other. For this reason, you need to apply the dye in the sequence of ROYGBIV, just like the colors in a real rainbow! You can reference the earlier section in this article on how to make a rainbow spiral for tips!
What are the Best Tie Dye Color Combinations?
The best tie-dye color combinations often start with just two primary colors boldly contrasting each other and creating a secondary color at the edges where they blend. That said, you can make lovely multi-color designs as well, so long as you follow the color science rules and do not put two colors that blend to make brown next to each other.
Single-color designs may have a more muted appeal, but they still look whimsical and fun. Plus, these designs give beginners a great place to start without worrying about how to mix and match shades of color!
The big danger in tie-dye designs is accidentally mixing together shades that create a murky brownish tint. Some artists call these spots “fused colors.” These ugly patches often lurk at the borders of the main colors in your design if you did not correctly match your shades of color.
Take a look at these general guidelines to help you pick suitable colors for a dual or multi-colored design:
- Single color designs offer the safest type of design that avoids bad color mixes
- Two primary colors always go well together
- One primary color and one secondary color pair well together
- Colors next to each other in the color wheel often go well together
- If you want a rainbow of color, arrange the colors in the ROYGBIV order of the rainbow to avoid ugly bleeding
What Colors Not to Put Together When Tie-Dying
Just like you can find colors that go well together, you can also find colors that you should not put together when tie-dying. These poorly matched colors combine to make those ugly brown splotches.
Try not to use:
- Three primary colors that bleed into each other. Three primary colors together always merge into brown.
- Two or more secondary colors together. Secondary colors also always mix together into brown.
- Two complementary colors. These are a pair of primary colors and the secondary color across from it on the color wheel, such as yellow and purple. Complementary colors will always mix into brown, though they do look great next to each other!
Of course, these guidelines aren’t hard-and-fast rules! With some care and practice, you can learn to use dangerous dyes apart from each other in your design so that they can not mix into brown. But in general, you will want to avoid using these color combinations in the same project.
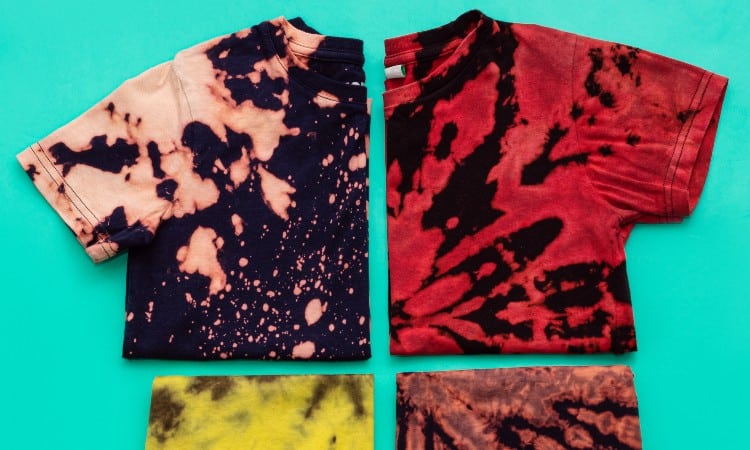
Can You Tie-Dye a Black Shirt?
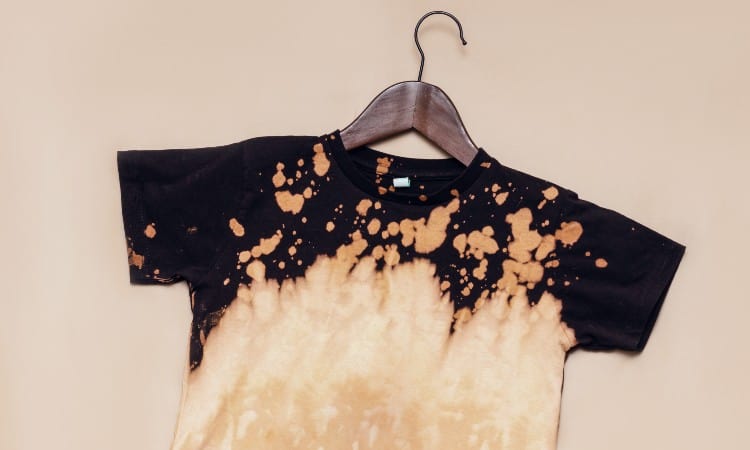
You can’t tie-dye a black shirt in a conventional manner, but you can use a reverse tie-dye method to create a vibrant and gorgeous pattern on a black shirt!
Using water-soluble dyes on a black shirt will not work well because the dye will not show up. Think of trying to color with crayons on a piece of black construction paper. The colors will not pop out at you.
Reverse tie-dye involves more steps than a normal dyeing process. First, you set up your black shirt in the folds or twists you want. Then you use color remover or bleach to remove the black dye from the pattern you want.
After that, you go through several rinsing and washing stages to remove the bleach. Finally, you refold or twist the shirt and then add the dye, which will adhere to the bleached pattern. This will create a colorful design offset by the original black of the shirt!
If you want a more monochromatic look, you can also use a bleach tie-dye method on a black shirt, creating a white pattern against the black fabric. The danger here is that it’s quite difficult to fully bleah black dye out of fabric, meaning that you could end up with a yellow or brownish design instead.
Best Tie-Dye Color Brands
You can use pretty much any water-soluble dye to create vivid designs, but some of the most popular tie-dye color brands include Tulip and RIT. These prominent dye brands offer easy dying kits and individual colors you can buy if you want to mix your own color variations.
Tulip One Step 18-Color Tie-Dye Kit
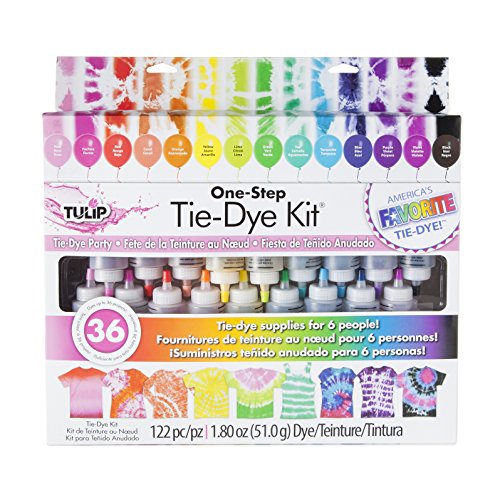 This popular Tulip starter pack comes with 18 different colors and precise, simple instructions to get you started on your first tie-dye project. You will only need to mix the dyes in water and then you can get started dying. Plus, the kit offers enough dye for six uses.
Tulip provides reliable, washer-friendly dyes that will remain vibrant for a long time. You can use this kit to create up to 9 basic designs explained in the instructions, or simply use the dyes to create an unlimited number of designs of your own choosing!
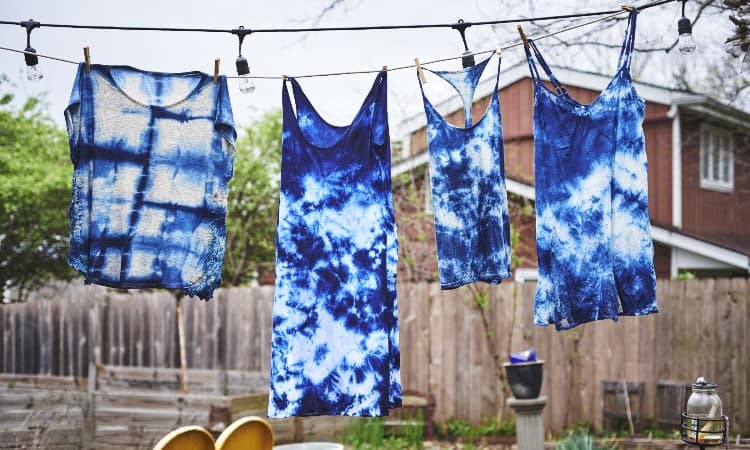
Rit Indigo Shibori Tie Dye Kit
 This lovely and unique kit offers all the supplies and instructions you need to create a blue and white shibori tie-dye project. RIT provides not just the indigo dye of authentic Japanese shibori designs but also gloves and safety tools to help you complete your dying project. Plus, you can set your dye with RIT’s trademark ColorStay Fixative, also included in the package!
The indigo RIT dye provided will work best on cotton, silk, rayon, wool, and nylon. You can also swap out a different shade of RIT dye purchased separately if you want to shibori dye in another color!
Conclusion
The best tie-dye color combos match colors that mix together to create another color rather than forming a brown shade. Two primary colors will mix to make a secondary color, and a primary and secondary color mixed together to create a tertiary color. You do not want to mix three primary colors, or two secondary colors, as these combos will create ugly brown stains.
You will also want to select a color scheme such as neon colors or jewel tones to help you match the right colors together. And, of course, you can choose from dozens of fun tie-dye techniques such as a twisted spiral pattern or a watercolor-like icemelt pattern!
Have you ever tried tie-dye before? What colors did you use, and how did it turn out? Leave a comment below to let us know!