Mesh fabric is versatile and useful. Great material for sports and athletic wear, bridal wear, lingerie, bags and more. Mesh fabric comes in many different weights and types and can be found in every rainbow color. Mesh can be super handy in many applications – but working with this material can be intimidating. So – how do you sew mesh fabric?
Mesh fabric should be treated like other delicate or lightweight fabrics when sewing. This slippery – and often stretchy – material should be sewn with a very sharp or ballpoint needle using short straight stitches or a narrowing zigzag stitch. Mesh fabrics should be sewn at a slow and steady speed to help keep pieces in place, keep stitching even and help prevent snagging.
In this article, we will cover everything you need to know about how to sew mesh fabric – including necessary supplies and sewing machine settings. We will also go over how to sew mesh by hand, sew seams, finish edges, and hem mesh fabrics.

How to Sew Mesh Fabric
Mesh is a very useful material and irreplaceable in many of its applications. Mesh – in most cases – is a synthetic fabric made from nylon or polyester. It is extremely lightweight and breathable, can be water resistant, and quickly dry.
This lightweight material usually has at least a small amount of stretch, can be slippery, and its differing hole sizes can make it somewhat finicky to work with.
As with most sewing projects – if you work carefully – measure twice, cut once – and have a bit of patience, sewing mesh fabric isn’t all that difficult. Gather your patience and the right supplies and sewing mesh will be no problem!
There are many nuances to working with mesh fabric, but most come with relatively easy solutions. Below you will find all the supplies necessary to sew mesh successfully, as well as guidelines for setting up the machine and the best techniques to use.
Needle
 When sewing any stretchy fabric by machine, the needle you use is especially important. Stretchy fabrics can easily knick, pull, get stuck, or skip stitches – causing lots of frustration for you and a messy situation for the machine.
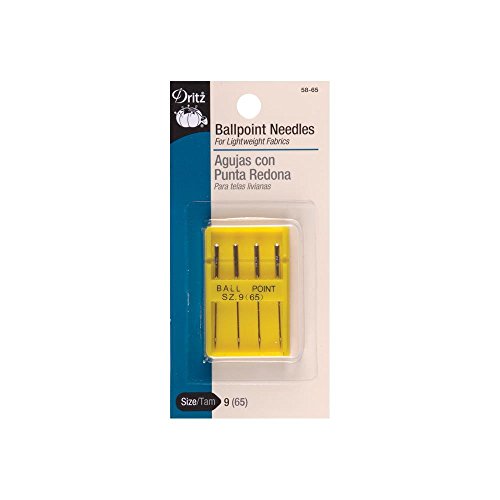
A ballpoint needle is ideal for sewing mesh or any fabric that is slippery or has stretch. This type of needle works by sliding between the threads of the material – rather than piercing through it – which is where most snags usually occur.
Using a ballpoint needle will allow you to slide your mesh material more smoothly under the presser foot, which means there will be a less unwanted pull. In turn, this will keep stitches more even, help keep stitches from breaking, and keep unwanted puckering to a minimum.
If a ballpoint needle is unavailable – don’t give up! While a ballpoint needle can make things a bit easier – it’s not the only way to get the job done. Mesh can be sewn successfully using a universal needle size of 70/10 or 80/12. The most important thing is that it’s as sharp as possible so that it will pierce the fabric easily.
Thread
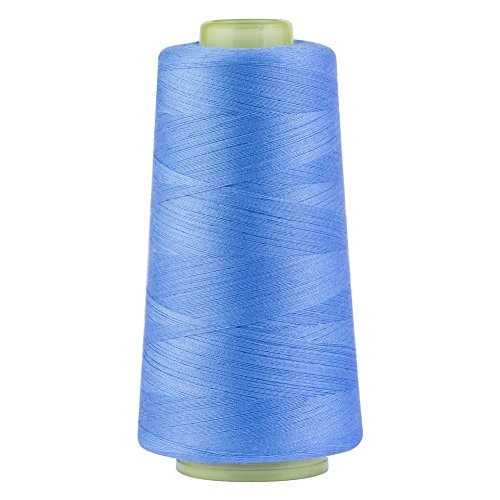 When sewing mesh, you will want a strong thread that can hold up to wear and hold the mesh solidly in place. An easy rule of thumb is to select a thread made from the same fiber as the mesh.
If you’re unsure what fiber the mesh is made up of or don’t have anything similar on hand – a multi-use durable polyester thread is always a safe choice. Polyester thread is one of the strongest types of standard thread on the market and it also naturally provides a small amount of stretch. Having a thread that can stretch decreases breakage during the sewing process and while using the finished product.
If you are working with a type of mesh that is especially stretchy it can be a good idea to work with an elasticized thread for the bottom stitches. Elasticized thread has a lot more give. It won’t break when pulled – during sewing or after.
Elasticized thread can be thicker than standard types and it’s best when working with it to hand wind your bobbin before loading it into the machine.
Both bottom and top thread colors can be chosen to match or contrast with the mesh fabric they’ll use. Depending on the finished item – you may want the thread to blend seamlessly with the fabric and, therefore, want a color that matches as closely as possible. If the mesh is an accent and/or you don’t mind stitching that stands out – choosing a complementary or contrasting color could look nice.
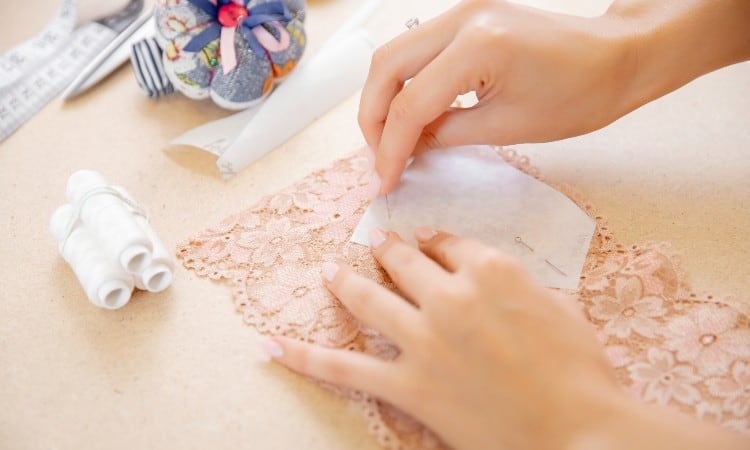
Marking
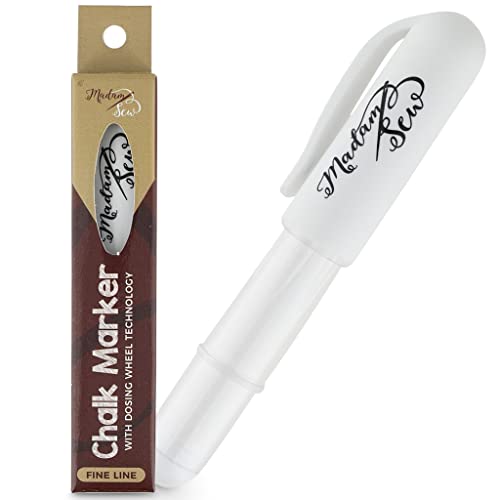 Marking mesh can be a bit tricky since the material can be stretchy and slippery – and not to mention full of holes. Chalk or erasable pens are the best marking tools since both won’t be perceptible once the product is finished.
When marking mesh – hold the fabric taut and as still as possible with one hand while marking small sections at a time.
Markings on mesh can be less easy to see than on many other fabrics – especially if you’re working with a mesh with larger holes. To make things easier on yourself – try marking using a color that stands out obviously against the color of the mesh fabric. Using similarly colored chalk can be even more difficult to see, leading to frustration and possible miss-cuts.
Cutting
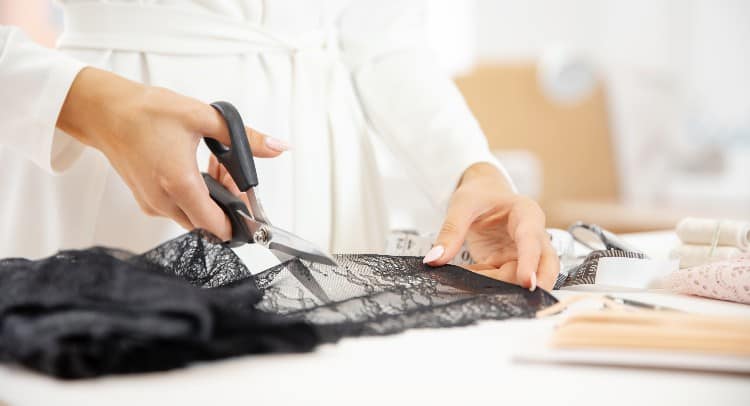
Cutting mesh fabric is similar to cutting any other fabric – but there are a few key things that can keep any difficulties to a minimum.
It’s always a good idea to pre-wash and dry your mesh before measuring or cutting – as is best practice for most materials. Follow the manufacturer’s instructions for washing and drying. Once it’s done, you can move on to marking and cutting.
Mesh can be cut with a sharp pair of scissors – but this will take much more time and patience. The ideal method for cutting mesh fabric is with a rotary cutter and a self-healing mat. Trying to keep track of your marks while working with a pair of scissors and a slippery material in your hands is not my idea of fun!
Another useful tip when cutting mesh is always cutting it in a single layer! You may think you could save time by cutting multiple layers at once, but this isn’t necessarily the case. With such a slippery fabric, the layers can easily slide apart while cutting – leaving you with inaccurate pieces and the potential need to recut and waste material.
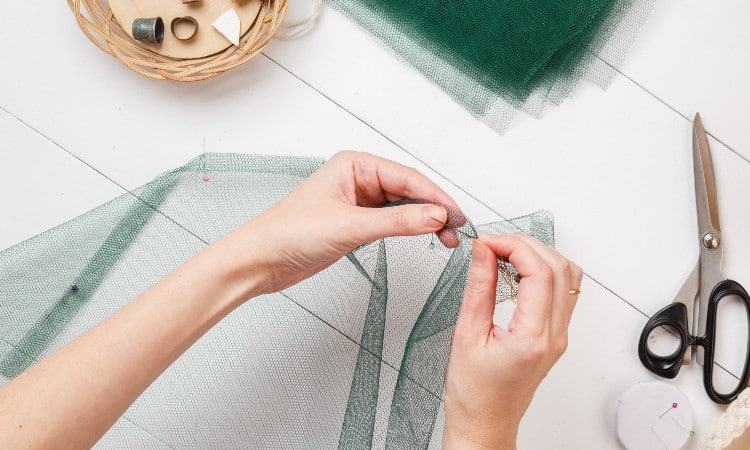
Pinning
Pinning mesh is another area that can be somewhat finicky. Getting this slippery, stretchy material perfectly lined up and pinned together can be quite trying.
The easiest method to get your pieces to stay put is by using quilter’s clips. Quilter’s clips are easy to get into place and sturdy. They don’t require piercing any fabric – which can be tricky depending on the type of mesh. They also remove any difficulty lining up and attaching two pieces of material filled with holes.
If you don’t have a supply of quilter’s slips on hand – your second best choice will be using ballpoint pins or extra fine pins. Both of these methods will do just as good of a job in the end, though getting there may take a bit more time and patience.
Sewing Machine Settings
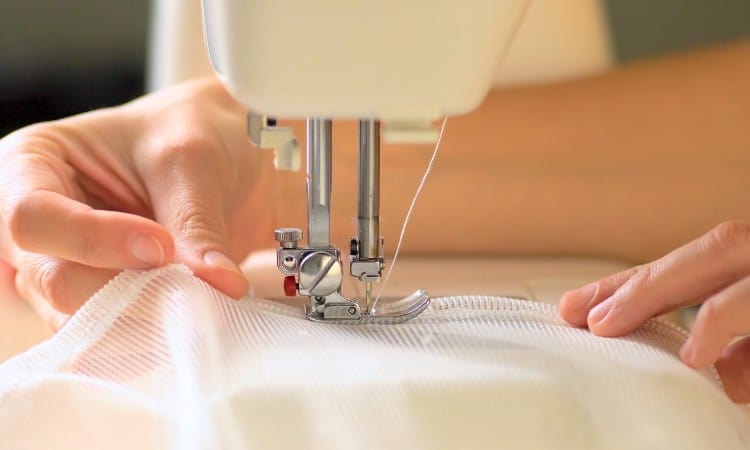
Setting up your machine properly for each project is one of the greatest keys to success. The wrong accessories or settings can make even the easiest project impossible.
When working with an already particular type of material – it’s especially important to ensure everything is set up properly to be successful. Below we will cover the best machine feet and settings for sewing your mesh projects.
Machine Feet
A standard presser foot can work for sewing mesh – but similar to the pins and needles, it will take a little more patience and careful work.
To optimize your mesh fabric work, a walking foot will help guide your fabric smoothly underfoot, leading to more even stitches, fewer stitches or thread breaking, and less snagging.
A walking foot has two sets of feed dogs that work to ease the material through. This type of foot is a great tool when working with many types of unique materials – anything stretchy or especially thick.
Another trick you can use when sewing mesh fabric – especially if you’ll be working with a standard foot – is to loosen the presser foot itself. Having the foot be slightly less tight can put a bit of extra space between the material and the machine – helping to avoid bothersome stretching and pulling.
Stitch Length
Setting your stitch length is more important than it may appear and can make all the difference between a smooth or frustrating sewing process.
When sewing mesh, you will want to work with short straight stitches – somewhere in the 1.75 to 2.5 range. Smaller stitches are necessary to hold this lightweight, hole-filled material securely together. If you are working with a mesh fabric with holes on the larger size, you may want to use stitches on the longer side of this range.
Alternatively – a narrow zigzag stitch is another option for sewing mesh fabric. Zigzag stitching helps to avoid catching and thread breaks. By stitching in a zigzag pattern, mesh can be adhered sturdily and works especially well for fabric containing holes.
Zigzag is also the best stitch to choose if you need any sort of stretch or are working with stretchy mesh. Zigzag stitches allow the material to stretch without breaking the stitches – which can be extremely frustrating after you’ve just spent all that time sewing!
Sewing Speed
Once your foot and settings are in place – it’s best to do a test run on a sample of the exact material you’ll be sewing to see how everything works together. If you are sewing multiple layers of the same mesh together – use this for your sample. If the mesh will be attached to another material, the same combo should be used when running the test.
If anything looks off after your test sew – do some tweaks until everything looks perfectly how you want it to. And now you can move on to the real thing.
Sewing mesh should be done at a slow and steady pace. Slippery and stretchy fabrics move a lot more than materials such as cotton when sewn, so it’s important to stick with it. Sewing too fast can also cause stretchy fabrics to pull or get stuck.
It may be tempting to zoom through the process once you feel you’ve gotten the hang of it. But more often than not, this will usually lead to more problems and wasted time than if you had stuck with a steady pace from the get-go.
Positioning
One more optional tool you can use to help add ease to your mesh sewing projects is the tear away stabilizer. Using a stabilizer between layers – especially when sewing two layers of mesh together – can be extremely helpful.
A stabilizer gives you a sturdy surface when working with a delicate, thin material. This can make sewing much easier. And once you’ve finished, you simply tear away the unwanted piece!
If sewing mesh to another fabric – as when sewing a mesh pocket onto a bag – you will always want to dew with the mesh on top. You want the mesh to be in view to ensure that it stays in place and the stitches are right where you want them to be. Sliding a project with the mesh on the underside through a sewing machine leaves far too many opportunities for things to slip out of place.
How to Sew Mesh Fabric by Hand
Mesh fabric can be sewn by hand – just like most other materials. It should be treated like any other lightweight or delicate fabric. Mesh can be tricky to work with because it can be slippery and slinky. It can drape quite easily when you want it to stay in place – but sewing mesh by hand can be done with some patience.
To sew mesh by hand, you will want to work with a sharp needle and a durable thread. Choose a thread made from the same fiber as the mesh fabric itself – or use a durable polyester variety.
When stitching mesh by hand you will want to sew with small straight stitches. Don’t use a needle that is too thick which can make sewing smaller stitches more difficult. Small stitches will help secure the mesh better than longer stitches – since the material is so delicate.
Ultimately – take your time and work with care and you can get the job done.
How to Sew Seams on Mesh Fabric
There are multiple ways that seams can be sewn on mesh fabric, but you will almost always want to start by choosing a matching thread. The thread should ideally match in fiber – polyester thread being a safe choice – as well as in color so that the seams are discreet.
A standard overlocking stitch is one way to easily create seams on mesh. Overlocking stitches can be done by hand with some practice or by machine. An overlock – or serger – the machine is the easiest way to obtain this type of seam. However, an overlocking foot can be purchased and used on a standard home sewing machine, providing very similar results.
A double straight line is another easy way to sew seams on mesh fabric. This can be done by hand – by sewing two parallel lines. Or quickly and easily by machine with a double needle presser foot. If you don’t have this special presser foot, you can sew two parallel lines right next to each other – just as you would when sewing by hand.
Two slightly more complicated methods for sewing seams on mesh would be to enclose the seam with bias tape – which creates an extra step but provides a more finished look. Or a French seam. French seams use a series of folds and stitch lines to create another neat looking seam where all raw edges are hidden.
How to Finish Edges on Mesh Fabric
Mesh fabric is created in a way that doesn’t allow the fabric to unravel – so leaving the edges raw can be a perfectly suitable finish. If you don’t want your finished product to have a raw-edged look enclosing any open edges is your best bet.
To create a neat and polished finished edge you can fully enclose it with bias binding. Bias tape comes – or can be made – in an infinite selection of colors and patterns and can be a great way to add a special accent to any project. In addition to bias binding, any type of trim or ribbon could include your personal touch on an enclosed finished edge.
If you want a gathered top on your mesh edge – elastic is another great option that can be functional while also giving you a finished edge. Fold-over elastic is a nice choice since it will get both jobs done at once and is a great choice for any sort of expandable pocket or pouch.
How to Hem Mesh Fabric
Hemming mesh fabric can be tricky because it is so lightweight and smooth – the last thing you want to do is add a big bulky edge to your project. It’s important to work with care for this thin and slippery material. Hemming mesh can be tedious, but the finished product will make it all worthwhile.
The best way to hem mesh is essentially creating a rolled hem, but with three lines of stitching. The first step is to sew a straight line along the raw edge you want to hem. Once you have finished the first line of stitches – fold the edge over and press to crease.
The second line of stretches should be sewn along this crease – right over or as close to the original stitch line as possible. Once this line is finished – trim away any additional fabric clutter outside the stitch line. Using a pair of duckbill scissors can be helpful here as it will protect the edge from being cut and help you work precisely where trimming needs to take place.
The last step in sewing the hem on the mesh is to repeat the same step one more time. Fold the edge over, press, and sew a third line of stitches. This time you will be stitching the folded over edge – the original raw edge of the fabric will be enclosed in the roll. Here you will want to stitch as close to the edge as possible to leave the hemline as delicate and without bulk.
How to Sew Power Mesh
Power mesh is a popular and versatile material used for linings, compression garments, activewear, dancewear, swimwear and lingerie. Power mesh, which also goes by the moniker stretch mesh – is – as its name suggests – very stretchy. It can come in weights, from sheer and super light to heavy.
Sewing power mesh requires the same precautions and instructions as given, but requires an extra bit of care due to its extreme stretchiness.
Always pre-wash power mesh before starting a sewing project. In most cases – stretch mesh should be washed in cold water on a delicate cycle and line dried. It’s always best to check manufacturers’ care instructions if they’re available. If not – hand washing with cold water and air drying will always be a safe bet for power mesh.
Power mesh should be cut with care using a flat rotary cutter on a self-healing mat. This type of fabric can be especially smooth, silky and slippery – so work with extra care to cut precisely. It will also be super stretchy, so you want to be careful when pinning and cutting not to stretch the fabric too much.
And always cut one layer at a time!
Since power mesh is about as stretchy as it gets – this is where you’ll want to use a ballpoint needle if available. A zigzag stitch is the ideal setting since it will allow the material and stitches to stretch together. An overlock machine is also a great tool to use on stretch mesh.
When sewing power mesh, always work at a slow and steady pace. Pause and check the work often to make sure that all of your pieces are lining up correctly, stitches are in the correct place and there is no bunching or puckering. Power mesh can snag easily – so this is an important step!
Power mesh hems can be left unfinished, finished on a serger or using a twin needle on a standard sewing machine. Simply fold the hem over the desired amount and sew. The same effect can be achieved by sewing two parallel lines if a double needle isn’t readily available.
Conclusion
Sewing mesh can seem like an intimidating undertaking! There is a lot to remember to do it right. But this doesn’t mean you shouldn’t give it a go. Mesh comes in so many varieties – it is a very versatile material that can provide many neat and useful products. Even though it might take a bit of extra work – creating something with mesh can be a fun new craft adventure and give you a useful end product. Let this article be your guide and start your mesh sewing project today!