Canvas is known for being a durable, heavy-duty fabric, often used for making backpacks and bags, sails, tents, and even shoes – items that require some level of sturdiness. Being a thicker fabric, you may wonder how you might be able to sew canvas at home.
There are several methods you can use to sew canvas cloth. You can use a sewing machine or there are multiple methods by hand, including with a needle and thread, or using a specialized tool called a sewing awl. However, since canvas is a heavy-duty fabric, there are some specifics you should keep in mind when doing so.
In this article, we will explain everything you need to know about how to sew canvas, how to sew it on a regular sewing machine and by hand, how to prepare your cloth, and what specific equipment will make the entire process the smoothest. We will also discuss what you can sew using canvas and what type of sewing machine will give you the best results.
Quick Navigation
- Can You Sew Canvas With a Regular Sewing Machine?
- What Needle to Use for Canvas?
- Best Thread for Sewing Canvas
- What is the Best Stitch for Canvas?
- How to Sew Canvas Using a Sewing Machine
- What is the Best Hand Stitch for Canvas?
- Sewing Canvas by Hand
- Best Sewing Machine for Canvas
- What to Sew With Canvas Fabric
- Can You Stitch on Canvas?
- Do You Need Interfacing With Canvas?
- Conclusion
Can You Sew Canvas With a Regular Sewing Machine?
You might take a look at canvas, get intimidated by how different it feels and wonder if you can sew it on your home sewing machine, and the answer is yes. There are many fun and useful items you can make using canvas and a regular home sewing machine can do the job. However, a heavy-duty machine is going to give you the best results, especially if you plan on sewing heavy-weight fabrics often. There are just a few things you will want to keep in mind since you will be working with a fabric that is much thicker and stiffer than many other classic fabrics such as jerseys, flannel, or quilting cotton.
Since canvas is such a durable cloth, you will want to make sure that you have a needle to match its durability, a tough thread that will be able to hold it all together, and a walking foot if you want to make things easier for yourself. A walking foot allows you to feed much thicker stacks of fabric, like quilts or seams, through the machine using an additional set of feed dogs that help push it through.
Remember you will be sewing together at least two layers of fabric, specifically when dealing with seams or hems, so you will want all the help you can get. Stitch length is going to play a role here as well, since canvas is a very tightly woven fabric, and using clips and double-sided tape will hold patterns in place much better than using pins when trying to go through multiple layers of thick canvas.
What Needle to Use for Canvas?
 When sewing canvas on a machine, as with any thick fabric, it is important to use a sharp heavy-duty needle that will be able to pierce the fabric without bending or snapping. If you use an inappropriately sized needle, there is a good chance it might not make it through the fabric at all and it is almost certain to break at some point when sewing canvas. If you’ve ever dealt with a mid-project broken needle, you know that it is no fun when you have to pause to switch out a damaged needle, not to mention the injuries a snapped needle could cause.
A 90 to 100 Universal needle is recommended, although a Jeans needle is ideal too. A Jeans needle has a smaller point and is designed to sew through multiple layers of denim. This helps the needle penetrate the thick fabric more smoothly. Choose a needle size 100/16 or 110/18.
Best Thread for Sewing Canvas
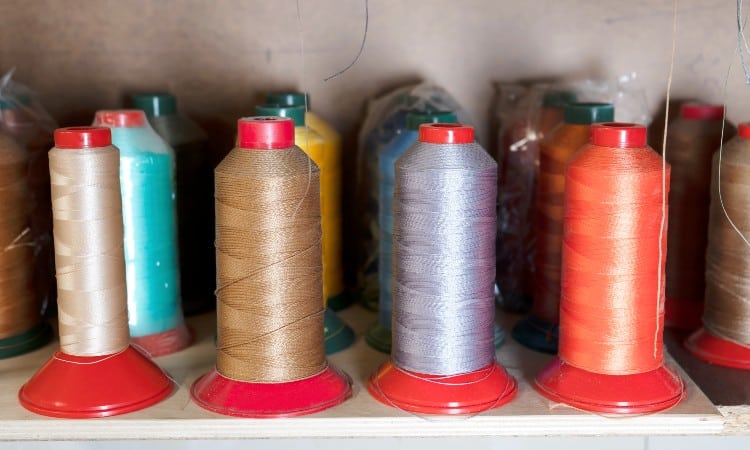
As with almost any sewing project, there is likely to be a specific thread type that is going to give you the best results, it’s no different when sewing with canvas. Since canvas is a heavy-duty and just plain heavy fabric, you will need to choose a thread that will be strong enough to match the strength of the cloth.
The best thread to use for sewing canvas is heavy-duty jeans or upholstery thread. There are many types of heavy-duty thread but a size 40 cotton, polyester, or cotton-wrapped polyester thread is going to be your best option.
While wool and other types of very thick upholstery thread can be options, the bobbins of many home sewing machines can’t handle the weight. Using them would be much more successful with a sturdier type of machine that is meant to handle a bigger load.
If you use a thread that gives you trouble in the bobbin, you can try using a similar colored regular thread in the bobbin while using the thicker thread you have selected for the topstitching. Just make sure you do a test and work with caution.
Depending on what the end use of the project is, there may also be other factors to consider in addition to the standard size of the thread. If you are making cushions for an outdoor sofa or chair that will spend much of its life sitting in the sun, rain, and other elements choose a thread that can hold up to UV exposure. For indoor furniture that will see more daily action, consider a thread that has more abrasion resistance and elasticity.
Remember, you also must adjust the tension on your machine, as well as on your bobbin to accommodate the heavier thread weight. Heavy-duty thread and fabrics tend to need much less tension, which helps them glide through the machine much more easily. If adjusting the tension is not an option on the bobbin, try using a specialized bobbin casing, or using standard thread in the bobbin, while keeping the heavy-duty thread up top, as mentioned above.
What is the Best Stitch for Canvas?
Canvas is a tightly woven, thick fabric, especially when sewing multiple layers together, so it is important to use a slightly longer straight stitch. A stitch length between 3.0 and 3.5 will help keep the fabric moving along under the foot without getting stuck, as well as give a nicer, more professional-looking finish. Using a straight stitch is going to give you more power than a zig-zag stitch, and also helps to keep things moving smoothly and minimize bunching.
How to Sew Canvas Using a Sewing Machine
Now that you have all the details and a good idea of what it takes to successfully sew canvas cloth with your sewing machine, here are the steps for putting it all together to begin your next project:
Gather Your Equipment
- For the machine:
- Needle: size 90 – 100 Universal or 100/16 or 110/18 Jeans needle
- Thread: size 40 heavy-duty cotton, polyester or cotton-wrapped polyester, or other equivalent upholstery thread
- Walking foot
- Canvas Fabric
- Marking tools
- Sharp sewing scissors
- Clips and double-sided tape
Once you have all of your equipment together, install the walking foot and the appropriate needle. Adjust the pressure on the foot as heavier fabrics need less pressure to slide smoothly underneath. Once you’ve wound your bobbin and threaded the machine with a heavy-duty thread, set the tension. It should be somewhere between 3.0 – 3.5 and choose a straight stitch.
Prepare Fabric
Canvas cloth is commonly made from cotton or linen. Both are fibers that tend to shrink significantly with heat, and therefore washing and/or drying. It is important to prewash and shrink your fabric before sewing it. This will help avoid having the finished project shrink beyond recognition when washed and dried after it is completion. Pre-washing your canvas can also soften the fabric somewhat, making it a bit easier to work with.
To ensure the maximum amount of shrinkage is achieved prior to beginning your project, machine wash the canvas in warm water and tumble dry. Canvas is a dense material that tends to ward off wrinkles, but after a cycle in the dryer, there may be some wrinkling present.
To make sure your fabric is crisp and flat before sewing, set your iron to a hot linen setting, adding steam is even better, and iron away. This durable cloth can withstand a good amount of heat so don’t be afraid to apply a significant amount of pressure. You can also spray any hard-to-flatten wrinkles with water if the dry iron isn’t doing the job on its own.
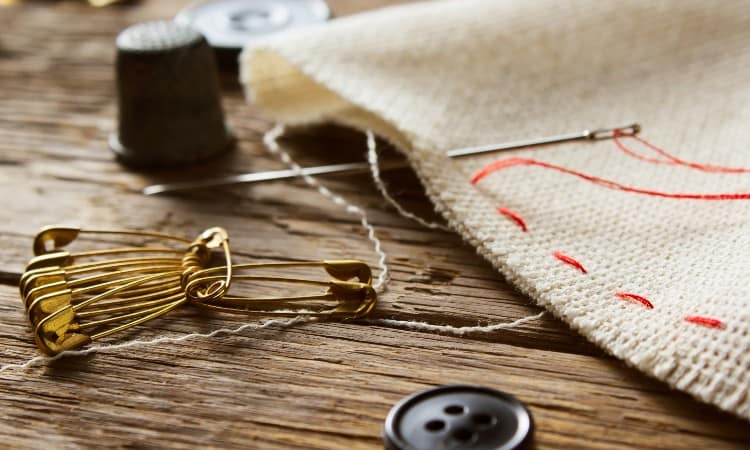
Mark Canvas
When marking your canvas you want to use something visible, so you can see precisely where you want to cut or sew. However, it also needs to wash off easily so that you aren’t left with marks on the finished product. The list below covers several options to use for marking canvas:
- Soapstone Pencils are natural and lightweight marking tools that write in white. They are visible on any darker material, but not so much on white or light-colored fabric. Markings can be removed easily by rubbing the fabric or washing it with water.
- Water-Soluble Marking Pencils function just as they sound, their marks wash away easily with a damp cloth. These pencils come in both light and dark colors, so are a good option when working with various types and colors of fabric.
- Tailor’s Chalk, also known as marking chalk, is clay-based chalk that is easy, sometimes too easily, removed by rubbing the fabric. Tailor’s chalk comes in several different colors, making it a good option for marking a variety of different fabrics. Just keep in mind that marks made with this tool will be very temporary, so make sure you aren’t going to be handling the cloth a lot between marking and sewing.
- Washable Ink Markers are an option for use on lighter-colored fabrics since their ink is usually blue. These markers are meant to wash off with just plain water. The problem is that some materials can react with the ink in a way that makes it difficult to remove. If using an ink marking pen be sure to test it on a scrap of fabric first, before marking an area of the fabric that is going to be visible on the finished piece.
Cutting the Fabric
Due to its rigidity, make sure that the scissors are very sharp with elongated blades, to ensure nice clean cuts. Since canvas is such thick material, it also tends to be easier to cut patterns in a single layer.
How to Cut Canvas
- Lay your pre-washed canvas flat on a counter, tabletop, or cutting board.
- Mark the pattern on your fabric with the marking tool of your choice.
- Secure one side of the cloth, marked side up, to the cutting surface with sturdy clips, or, if you have a free or helping hand, by holding the cloth firmly against the surface.
- Use your free hand or helper’s hand to pull or keep the loose end of the fabric taught.
- Using very sharp scissors, slowly cut along the marks with steady, smooth cuts, inching forward with the scissors, remembering to readjusting the holding hand to keep the fabric tight.
- Trim away any stray threads that may be sticking out from the freshly cut piece.
General Techniques for Sewing
When starting out with any project it is important to do a test sew on a scrap piece of the same fabric. This will ensure that the equipment and settings are adjusted for the best results possible. Make sure that the stitch length is correct so that the fabric moves smoothly under the foot without bunching or getting stuck. Also, make sure that the bobbin thread isn’t too tight or too loose, causing loops, breaks, or tangles.
When sewing through thick or bulky material it is best to work slowly, never forcing or pulling the fabric, this is especially important when backstitching. Always use extra care when working with heavy-duty threads and fabrics The sewing machine will be working harder than it would sewing a simple cotton dress or a set of napkins, and you don’t want to damage or negatively affect the machine.
After carefully sewing a few straight lines, each with slightly different tension settings, it should be clear which will give the best result. One more thing to note when sewing canvas is that it should be cleaned out often as the heavy-duty thread and thick material tend to leave more fuzz behind. This can increase the risk of getting tangled up.
Sewing Canvas Seams
Sewing seams may be the trickiest part when sewing canvas due to the amount of bulk. Ther needle will be going through the thickest layers of fabric. When sewing seams carefully sew at a slow and steady pace to keep the stitches straight and even. It may be necessary at times to turn the wheel by hand to avoid breaking the thread or damaging the needle.
Backstitching through the seam of a canvas project may not be possible, so if a back stitch is called for, try a reinforcing stitch instead by going over the initial stitch with a second stitch in the same direction.
When you are working with canvas, there are three types of seams that are used most often. These are the overlapping seam, the semi-flat felled seam, and the full flat felled seam. Here are the differences between the three:
The Overlapping Seam
The overlapping seam is the simplest to work with to sew two pieces of canvas together. It creates the least amount of bulk and is simply two pieces of fabric overlapping each other. Simply place the edge of one piece of fabric over the other, both right sides facing up with enough allowances for the seam, and sew along the overlaping edges of each piece, creating a double line of stitching. The seam will look identical on the front and back.
The overlapping seam is easy to achieve and efficient in material usage. Keep in mind, though, that the stitching will be exposed, so for something that needs to be more water-tight or UV protected, this may not be your best choice.
The Semi Flat Felled Seam
The semi-flat felled seam produces a very clean, finished edge on only the top side of the fabric. It provides a slightly stronger connection, as well as better water resistance, and has only one of its two stitch lines exposed to the elements. It requires slightly more material for this method and will need double the working seam width.
To achieve the semi-flat felled seam, place two pieces of fabric right sides facing each other, leaving twice the distance of the seam allowance, and sew along the inner seam line to connect.
Next, fold open the newly attached fabric so that both right sides are facing up, pull taught, and sew a second line along the top of the fabric, connecting it at the edges of both layers. Here, you should be sewing through three layers of fabric, covering and securing the initial stitch line with the fabric as it is folded open.
The Full Flat Felled Seam
The full flat felled seam is a bit more complicated but leaves no exposed raw edges. This creates a seam that is extremely sturdy and nearly waterproof while providing a clean, finished edge on both sides. This seam will need 3 times the material for the seam width.
For the full flat felled seam, place one piece of fabric right side up and the other on top, face down. The edge of the top piece of fabric should be 1 seam width up from the edge of the bottom piece of fabric. Stitch through both layers, 2 seam widths distance from the furthest edge of the fabric.
Now, fold the edge of the bottom fabric up over the edge of the top piece, wrapping the bottom edge of the upper-most piece of fabric. Next, fold open the top layer of fabric to cover the edge of the lower fabric that was just placed on top, creating an s-curve between the two fabrics’ edges.
Sew along the top of the canvas, making sure to also sew through the fold of the bottom piece fabric as well as the bottom edge of the top piece sandwiched between, sewing through four layers altogether.
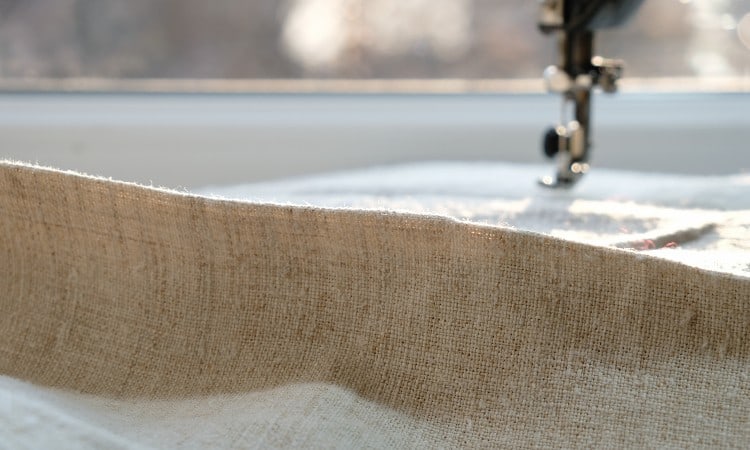
Hemming
Hemming a thick material like canvas is another area with a lot of bulk and may be difficult on a regular home sewing machine. To achieve a single, double, or rolled hem, just make sure to work slowly and carefully, turning the wheel by hand in particularly tricky spots, and be extra cautious if or when backstitching.
When working with canvas, it is important to finish the edges as they tend to unravel rather easily when left raw. To help keep those loose threads at bay while sewing, try applying a thin layer of mod podge just along the raw edge of the fabric.
Hem tape is another good option to use in place of a sewn hem. It is easy to use the tape to turn a hem under without worrying about working through all those layers. A serger is another choice for finishing edges.
What is the Best Hand Stitch for Canvas?
There is no doubt that sewing by hand takes more time and effort than sewing by machine, but there are always projects that are going to need the precise detail that only a hand can deliver. If looking for the most durability when sewing canvas by hand, a backstitch is going to provide the most strength.
Sewing through multiple layers in order to create seams is also going to be more of a workout, in this case, using a basic round stitch should do the job to create a basic seam. It may help to secure the material to a work surface, especially if working on a larger scale.
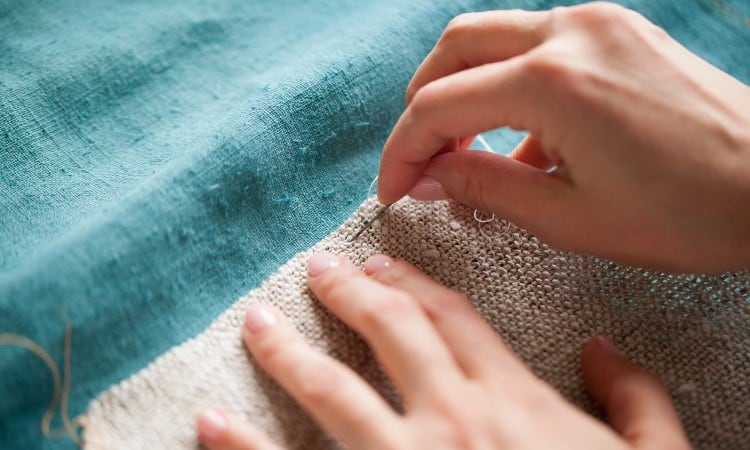
Sewing Canvas by Hand
Just like when sewing with a machine, sewing canvas by hand will require a sturdy needle as well as heavy-duty thread. If your needle and or thread are too flimsy, the material won’t hold together securely. An upholstery hand sewing or leather needle are commonly used to sew canvas by hand in the traditional sense. Repeatedly pulling that needle through the dense fabric is hard on fingers and may leave them pretty sore, so wear a thimble, or consider using a small pair of pliers to help do the job.
The best thread for hand sewing canvas is going to be similar to what you would use for machine sewing. A heavy-duty or upholstery thread of polyester, cotton, or cotton-wrapped polyester is thebest bet for keeping things in place. You can also opt for the thicker wool upholstery threads since there’s no worry about them getting stuck in the bobbin.
A sewing awl, most commonly known as the Speedy Stitcher, is a tool specifically designed to help sew any heavy material much easier. The Speedy Stitcher looks like an awl with a needle eye at the tip, much like that of a sewing machine. It is connected to an easy-to-grip handle, which also houses a spool of heavy-duty thread.
This thread is threaded through the needle tip which can then easily puncture the thick material, thanks to the leverage of the handle. The technique may take a little practice to master, but once you get it, you’ll never want to sew canvas by hand without one.
Best Sewing Machine for Canvas
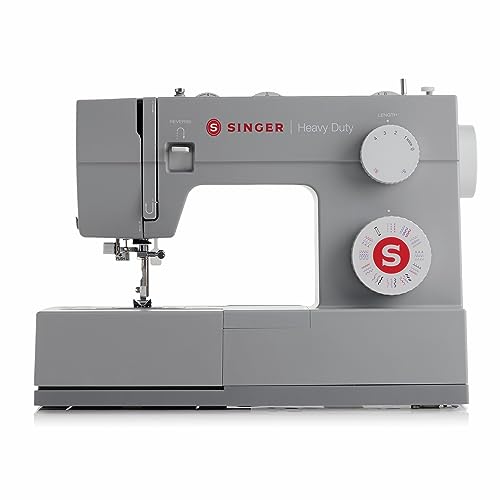 There are hundreds if not thousands of different sewing machines on the market these days at a wide range of prices. If looking for a heavy-duty sewing machine that can stand up to regular use for sewing projects with canvas and other heavy materials, the SINGER Heavy Duty 4432 is a good choice.
The SINGER Heavy Duty 4432 is great for beginners and experienced sewers alike. This sewing machine is extremely sturdy, thanks to its metal frame, and boasts extra-high sewing speeds, up to 1,100 stitches per minute! It has a powerful motor that is 60% stronger than that of a standard machine.
This free arm sewing machine allows easier access to areas that can be otherwise difficult to reach and has a stainless steel bedplate that helps fabrics glide right through. The SINGER Heavy Duty 4432 has many adjustments and capabilities that will whiz through many types of heavy-weight fabrics. It is a highly rated choice when it comes to a good quality machine, and it won’t break the bank!
What to Sew With Canvas Fabric
Canvas is a very versatile material and ideal when looking to create something sturdy or that will last. Classically used for ship sails, tents, and tarps, canvas has an even wider array of uses today.
Canvas is often used for all manner of bags from small pencil or makeup cases to backpacks and totes, to large, sturdy duffle bags. It makes a great material for upholstered items, cushions of all sorts, and many other home decor items.
Canvas is used for many apparel items and accessories as well, and is especially suited for anything that will needs a little stiffness, such as an apron or a bucket hat. Plus, canvas is a very popular material for shoes.
Can You Stitch on Canvas?
Canvas makes a great material to stitch on. It can hold a lot of tension and be stretched tightly, which is paramount when embroidering. Its durability allows it to support the weight of any amount of thread you wish to stitch to it. Embroidering is a great way to add a personal touch to any of the many things you can make with canvas!
To stitch on canvas, select a sharp, heavy-duty needle. Even though canvas is durable on its own, pairing it with a cutaway-stabilizer in a medium weight can help achieve even better results.
Do You Need Interfacing With Canvas?
Canvas by itself is an extremely strong and durable fabric, so using interfacing isn’t necessary in many cases. The desired look of the finished product will determine whether or not some sort of interfacing should be used. Not using interfacing will produce a product that is slouchier and more flexible, for something stiffer or that will stand up on its own, an interface may help.
A quick tip: if using stiff interfacing on a sewing project with canvas only add the interfacing up to the edge of the seam. Seams already have multiple layers of fabric when sewing layers together, adding another layer into the mix is only going to increase the difficulty of working through it all.
Conclusion
There are many useful items you can make with canvas, the list seems almost endless! There are also many different methods to try when making these items as well. Hopefully, you now have a better understanding of how to successfully sew all of your canvas projects, both by hand and machine. The only question left is, what are you going to make first?!