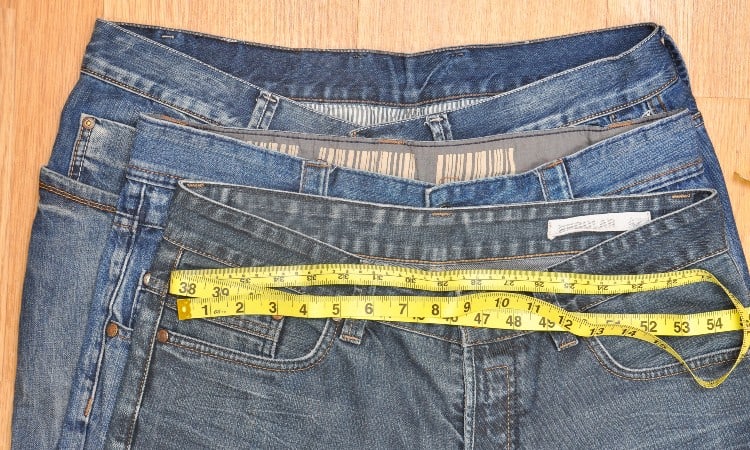
Buying jeans or dress pants can easily become an exercise in frustration if your hips and waist never quite fit the same pair of pants. Next time you come across a pair of jeans that fits in your legs and hips but bags a bit at the waist, you don’t have to pass on them! Instead, learn how to make the pants’ waist smaller in a few easy steps, and you can wear whatever pants you like.
The best way to make pants waist smaller is to sew a dart at the center of the back or at both side seams. Methods to make pants smaller at the waist without sewing include adding a strip of elastic inside the waistband and using safety pins or a folding method. Simple hacks to make pants smaller at the waist include using a jeans button pin or purchasing a clip-in elastic strip.
In this article, you will learn twelve basic methods to make your pants smaller at the waist, plus a couple of hacks for good measure! You will also discover tips for how to make pants smaller without sewing. Finally, you will find strategies to find the right waist fit for your body.

Can You Alter the Waist Size on Pants?
You can alter the waist size on pants by sewing or by using some temporary fixes like safety pins. Making pants smaller at the waist by one or two sizes is a very common alteration. Not everyone in the world has legs, hips, and a waist that fit precisely into the generic sizes of ready-wear clothing!
That said, pants come in many different shapes and styles. You can adjust some more easily than others.
If you want to make a sewn alteration, for example, you may find that your sewing machine can’t handle stitching through layers of denim fabric to sew your jeans. If you have pants with a drawstring or elastic waist, on the other hand, you can probably solve the issue just by inserting a smaller piece of elastic!
Most tailors will make a waist adjustment for you in just a few hours. Professional tailors charge from $10-$45 for this kind of alteration, depending on the size and complexity of the pants in question.
Of course, if you want to make this size adjustment yourself, you can keep reading to find out twelve ways to get the task done!
How to Make Pants or Jeans Waist Smaller: 12 Methods
You can make your pants or jeans waist smaller by using any of these twelve handy methods. Some take more time or equipment. If you’re in a hurry or have limited supplies at hand, you may want to scroll down to the hacks and quick fixes provided later in this article.
You will find four methods that require sewing listed first. Sewing your pants or jeans creates a permanent and more professional alteration. Once you master these sewing methods, you can easily make any waist smaller and it will look like you bought it that way!
Of course, you can also make your pants waist smaller without sewing. Some of these methods look nicer than others, but in a desperate situation, it’s all about finding any tool that will do the trick!
1. Sewing
When you take your pants to a professional tailor for alteration, the tailor will remove the waistband from the pants and insert a dart at the center back of the pants. This neatly takes up excess fabric from the waist and does not leave a trace once the tailor sews the waistband back on.
This is by far the most professional and sleek-looking of the methods provided in this article. That said, it is also not the easiest. You will need several sewing tools like a seam ripper and a sewing machine to complete this alteration.
If you have these tools and a bit of patience, you can master this method and then feel prepared to handle any baggy pants that come your way in life!
- First, try your jeans on inside out. Reach behind you and find the center back of the waistband. Pinch up the extra fabric and keep that fold in place with a sewing clip or sewing pin (but don’t poke yourself!).
- Feel just below this point and keep pinching a little farther down the seat of the pants, inserting pins to hold the excess fabric. You want to taper down toward the seam that runs up the middle of the seat of the pants so that your triangle matches up with the original seam at its skinniest point.
- Take the pants off carefully to keep the pins in place.
- Use a fabric marker or tailor’s chalk to draw a straight line from the top pin to the bottom pin. Do this on both sides of the fold. This should create a triangle of excess fabric with a wider portion of the triangle at the top of the waistband.
- Use a seam ripper to tear out the stitches holding the waistband to the jeans. Start one-half inch outside of your chalk lines and work till you reach one-half inch outside the second line. You may need to use embroidery scissors to make a little hole to get you started.
- If you have a belt loop inside the chalk lines, you will need to use your seam ripper to remove that.
- You should now have a gap between the seat of the jeans and the waistband.
- Locate the top line of stitching on this portion of the waistband, and use your seam ripper to remove that as well. At this point, the waistband should come apart in two halves.
- This part gets a little tricky. You will want to sew three different areas, beginning with the inner section of the waistband. Locate your chalk markings and ping the inner waist along these lines. Then sew down the chalk line with the right sides of the denim together.
- If this created a large fold of excess fabric on the wrong side of the denim, trim this to one-fourth of an inch.
- Now go through the same process for the outer section of the waistband, pinning and sewing along the chalk line and then cutting away the excess fabric in the fold. Both layers of the waistband should have the same smaller size now!
- For the third chunk of sewing, pin the seat of the pants down the tapering triangle. Sew along this line with the right side of the denim together, meaning that you will sew on the inside of the jeans. Start at the bottom of the dart, where your stitching meets the old seat seam, and then sew up to the top of the ripped-out waist.
- Reattaching the waistband may seem daunting. As a pro tip, try laying your jeans on a tough surface and hammering at the seams to flatten them out. This will help your sewing machine handle the thick material.
- To reattach the waistband, you will make a denim sandwich with the seat in between the inner and outer layers of the waistband Pin this in place and then sew along the waistband to secure it.
- Finally, topstitch along the top edge of the waistband to sew this edge back together.
- Reattach any belt loops as necessary.
This process is easier on dress pants than khakis or jeans. Not all sewing machines can sew through multiple layers of denim. If your machine makes a loud grinding noise or the needle freezes while stuck in denim, you may have to give up and try another method!
If you want to alter your jeans using this method, you should have denim thread and topstitching thread on hand. For the most professional finish, you can add topstitching that matches the original design on your jeans after you finish the alteration.
2. Sideseam Sewing
You can approach the sideseam method in two different ways.
First, you can remove the waistband as described in the previous section and sew two darts, one at each side of the waist. If you have curvy hips, this method gives you a professional, fitted curve that narrows in at your waist.
That said, taking the waistband off, adding two darts, and resewing the waistband takes quite a lot of work. If you want a slightly less professional approach, you can try this method that adds the darts and does not remove the waistband!
- Try on your pants inside out. Use both hands to pinch up the same amount of slack on each side of the waistband. Use large safety pins or binder clips to hold the pinched waistband in place.
- Next, use pins or safety pins to connect the new inner edge of the waistband down to the side seam. You may want to curve the line you pin to fit your body more closely.
- Carefully remove the pants and draw a chalk line just outside your pins to allow room for a seam allowance. Do this on both side seams.
- Sew along both chalk lines, starting at the bottom of the dart, where your tapered point meets the old sideseam. If you have more than a half-inch of extra fabric at the top of the waistband, trim the extra material away to avoid a bulky finish.
- Turn the pants right side out and try them on again!
3. Triangle Stitch Hack
For the triangle stitch option, all you need is a needle and thread that matches your pants! This handy technique may not deliver quite the level of results you get with a sewing machine, but it is quicker and a lot easier to try.
- As always, try your pants on inside out and note the extra fabric at the waist. Pinch this up at the center of your back, and then pin all the loose fabric in a triangle down to where the skinny end of the triangle meets the old seat seam.
- Turn your pants right side out. You want to sew on the outside of the jeans for this method.
- Draw a nice chalk line on both sides of the pinned triangle. Your triangle should look the same on both sides of the old center seam.
- Tie a knot at the end of your thread. Push the needle through at the right chalk line at the very top of the waistband, from the inside of the jeans to the outside (so the knot will hide inside the waist).
- Now you will use a ladder stitch to connect both chalk lines of your triangle, moving from the top to the bottom.
- Take a giant stitch all the way to the left chalk line. Push the needle through the jeans so that it comes out on the inside of the jeans.
- Make a small stitch on the inside of the jeans, moving straight down about an eighth of an inch. Bring the needle back through to the outside of the jeans.
- Now make a giant stitch across the triangle to the right chalk line.
- Repeat this process, with your large stitches getting smaller as you reach the narrow point of the triangle.
- Once you get to the tapered point that meets the original center seam, pull on the thread, making all the ladder stitches close up and disappear!
- Finally, knot off the thread on the inside of the jeans.
4. Jeans Button
One easy way to make the waist of your pants a bit smaller is to move the button farther away from the buttonhole. This way, when you button your jeans, the circumference of the waist will be a little smaller!
- Use small embroidery scissors or a seam ripper to remove the button from the pants.
- Try on the pants and move the buttonhole past the old button spot, stopping when the waist gets comfortably tight.
- Mark this point on the button side of the waistband.
- Take the jeans off and use a needle and thread to sew the button back on at the new location.
How to Take In Jeans or Pants Waist Without Sewing
In this section, you will find quick and easy methods for making the waist of your pants temporarily smaller without sewing. None of these methods will look as classy as adding a tailored dart with a sewing machine, but they do give you a variety of ways to use whatever you have at hand to solve the problem of baggy pants!
5. Safety Pins
In this method, you use safety pins to make temporary “darts” at the side seams of your pants!
You can typically use safety pins as a rough-and-ready substitute for stitching under most circumstances. Of course, the result will look bulky and may not feel super comfortable. You will want to wear something that can hang down over your pants for sure!
- Put your pants on inside out and pinch both sides of the waist until the fit feels comfortable.
- Secure each side with several safety pins. If you have a large pin, use that for the inside of the waistband. Then use smaller pins to take in the extra material farther down each side of your leg.
- Take your pants off and turn them right side out.
- Finally, try them on and smooth out the pinned sides as much as you can!
6. Safety Pins and Elastic
This method takes a bit of measuring but allows you to easily insert a strip of elastic to tighten up the waist of your pants!
- First, put on the pants and pinch the extra material at the back of the waistband. Use a safety pin or clip to hold this in place, and then take the pants back off.
- Mark both sides of the waist at the bottom of the pinched area, showing the point that makes the pants fit you.
- Measure the amount of extra fabric with a tape measure.
- Cut a piece of elastic slightly shorter than this measurement. The shorter you cut the elastic, the more it will tighten your pants!
- Now, look at the inside of the waistband.
- Transfer your two marks to the inside of the waist, and cut two careful slits on top of those marks. Only cut through the inside layer of the waistband. You will need sharp sewing scissors or a seam ripper to do this.
- Attach a small safety pin to one end of your elastic. Slide this through one slit and out the other. Pin the elastic firmly to the inside of the jeans using the safety pin.
- Finally, pin the remaining end of the elastic to the second slit!
7. Rubber Band
You can use a rubber band or elastic ponytail as a temporary cinch at the back of your waistband. This emergency fix will keep your pants up but will look pretty obvious unless you can hide it under a baggy shirt!
- Loop one end of the rubber band through a belt loop at the back of your pants.
- Draw the rubber band back through itself so that it cinches around the belt loop.
- Now, find another beltloop equally distant from the center back of your pants on the other side.
- Repeat the rubber band trick with the other end of the rubber band, going through the belt loop and then drawing the band through itself to cinch it around the belt loop.
8. Binder Clip
This method is so simple it’s not even a technique, just a last-minute solution!
All you have to do is put on your pants and pinch a fold of loose material at each side of the waist. Fold the extra fabric down flat toward the back of the waistband. Hold the fold in place with a small binder clip!
It will not look great, but it will do the job!
9. Folding
If you find yourself in a situation where you have no tools available to you, you can always try turning over the waistband to make it a tiny bit tighter.
Simply button the waist closed and then fold over two to three inches of the waistband. You can fold it to the inside of the pants for a neater look on the outside if you don’t mind the button poking you in the stomach all day.
You can fold the inside of the waistband to the outside, which feels more comfortable but does not look as nice.
10. Belt Loop Button
Looping a belt loop over the original button is a super-simple trick that will temporarily make your pants tighter. This method works especially well if you plan to wear a sweater or blazer that can hang down over your waistband, hiding the little emergency rescue mission going on down there!
- To try this method, unbutton your pants.
- Ignore the real buttonhole. Instead, find the closest belt loop on the buttonhole side of the opening.
- Loop this belt loop over the button as if it were the buttonhole!
- This will gather the extra material between the belt loop and the button, making the waist tighter.
Please note that this method is not the most secure or professional looking, but it can do in a pinch!
11. Alter Elastic Waist
Sometimes the elastic in your favorite sweatpants stretches out and the sweats get baggy. Fortunately, you can super easily alter an elastic waist using nothing but a piece of elastic, scissors, and a couple of small safety pins!
- Find the seam at the center back of the elastic waistband. Careful cut this open. Do not cut through to the outer layer of the pants!
- Pull out a loop of the old elastic and snip through it. Then pull the old elastic out entirely.
- Measure around yourself at the point where you like the waistband to sit. For example, if you want the waistband around your actual waist, measure there. If you prefer that the waistband sits at your hips, measure there!
- Now cut a length of elastic one to two inches shorter than that length.
- Attach one end of the elastic beside the slit in the waistband with a safety pin. Leave that there for now.
- Attach another safety pin to the other end of the elastic. Poke this into the slit. You will now worm the safety pin all the way around the inside of the waistband, pushing it through the tunnel of fabric with your fingers.
- Once you get all the way back around to the slit in the waistband, pull this end free by just a bit.
- Use a safety pin to firmly attach both ends of the elastic to each other. Then wiggle the pinned elastic back inside the waistband.
- Finally, use one last small safety pin to close up the slit you cut in the waistband!
You can also complete this method by sewing the elastic instead of using safety pins if you want a more permanent fix!
12. Boiling Water
If you want to make your pants tighter all over, you can try shrinking them using the boiling water method. Please note that this will not tighten just a select area of the pants, such as the waist. It simply makes the pants smaller all over!
On top of that, this method will work on jeans or other pants made out of cotton. It may not turn out so well on pants made from synthetic material like polyester. You should not try this on leggings or stretchy pants, as the boiling water will damage the elastic fibers inside the fabric!
To shrink your pants down a few sizes:
- Find a stockpot that can hold several gallons of water and your pants at the same time. Fill it with water and set it on your stovetop, on high heat.
- Once the water comes to a boil, use tongues to lower your pants into the boiling water.
- Use a long-handled spoon to shove all of the material down into the water.
- Turn the water down to a simmering heat and allow the pants to soak for twenty minutes.
- Turn off the burner on your stove and carry the pot to your kitchen sink. Carefully drain the hot water. Don’t worry if you see some dye in the water!
- Allow the wet jeans to cool enough to touch. Then either hang them up outside to air dry or place them in your dryer to shrink them even more.
How to Make Pants Waist Smaller Easy Hack
![Taoqiao [Upgraded] 8 Sets Perfect Fit Instant Button, Adjustable Jeans Button Instant, 1 inch Buttons Adds Or Reduces an Inch to Any Pants Waist in Seconds](https://m.media-amazon.com/images/I/41XBSqazAGL.jpg) You simply can’t find an easier solution than these two products that offer an easy hack for making your pants waist smaller!
You simply can’t find an easier solution than these two products that offer an easy hack for making your pants waist smaller!
First, check out this pin-on replacement button. All you have to do is stick the new button pin farther over on the waist and then close the original buttonhole over it!
You can move the pin-on button to whatever spot on the waistband that you like. You can buy a set of 8 button pins!
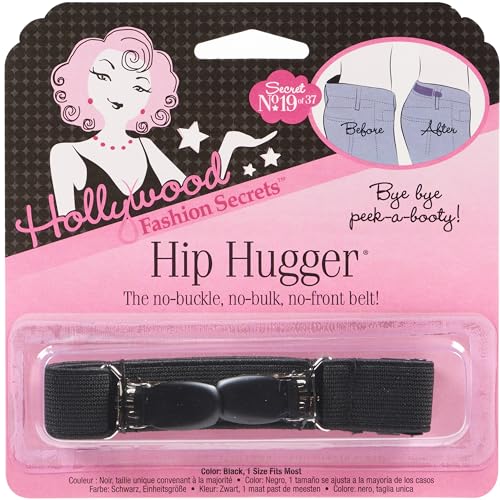 Or you can take a look at this handy clip-in elastic strip.
It hides inside your waistband and clips to each side of the waist. Then it cinches that extra fabric up, giving you a smaller waist!
You can find this fashionable “hip hugger” on Amazon.
Conclusion
You can alter your pants at the waist by using many simple methods that include inserting safety pins, binder clips, or rubber bands for a quick fix. You can also move the button to the side and then pull the original buttonhole over it to tighten the waistband just a bit. For pants with an elastic waist, you can insert a new, tighter strip of elastic to make the waist smaller.
For a more professional approach, you can remove the waistband and add a dart at the waist to take up the extra fabric. Alternatively, you can add a dart at each side seam, allowing for curvier hips. If all else fails, you can shrink the pants all over by soaking them in a pot of boiling water and then placing them in the high heat of a dryer.
Have you ever tried to make too-big pants fit you? What method did you use? Leave a comment below to let us know!