It may look like the needle does all the heavy lifting as you run your sewing machine, but the bobbin plays a crucial role in supplying half of the thread that goes into every stitch. No matter what brand or type of sewing machine you use, it will operate by pulling a top thread and a bottom thread together through the fabric. But before you can use this crucial bottom thread, you need to know how to wind a bobbin!
The first step to wind a bobbin successfully is locating it and removing it from its casing. Every machine has a mechanism for loading thread onto the bobbin, typically located on the top of the machine’s body. Finally, the machine will have a setting for running this mechanism and twisting thread onto the bobbin cylinder.
In this article, you will find out how a bobbin works. You will learn six simple ways to wind a bobbin depending on the kind of machine you own. Finally, you will find some pro tips for troubleshooting any bobbin issues you come across as you sew!
Quick Navigation
What is a Bobbin?
 A bobbin is a small wheel-shaped cylinder that holds the lower thread in a sewing machine. Many machines that work with thread, yarn, or wire use various types of bobbins! In a sewing machine, this special cylinder acts as an auxiliary spool, just like the spool of thread on top of the machine but in a smaller shape to fit inside the machine’s mechanisms.
So, what exactly does a bobbin do inside the machine? Every time the sewing machine makes a stitch, the needle comes down through the fabric, carrying the upper thread with it. This thread catches on a special hook on the shuttle below the needle plate.
The bobbin spins inside its case and allows a small amount of the lower thread free. The upper thread on its shuttle hook loops around the lower thread.
The lower thread keeps the upper thread from just pulling right back out to the top of the fabric, and the upper thread also secures the lower thread, holding it to the fabric as well! This kind of double-thread stitching is called a lock stitch pattern.
The bobbin’s key function is to continuously provide the lower thread to secure every stitch.
Not every machine that sews uses this kind of mechanism. For instance, a serger or an embroidery machine will use multiple spools of thread and a different shuttle hook to create stitching. But every modern domestic sewing machine uses the same basic lock stitch mechanism!
That said, different brands and models of sewing machines will use different shapes and sizes of bobbins. The Class 15 bobbin, invented way back in the 1800s, remains one of the most widely used today, but there are dozens of different kinds out there!
Some bobbins come in plastic and others are made of metal. Your owner’s manual will list the exact specification of the size and type of bobbin needed in your machine.
You can find the bobbin in your machine inside something called a bobbin case. Once again, different machines will have slight variations in the size and appearance of the bobbin case. This important mechanism holds the bobbin and provides a tiny amount of tension on the lower thread so that it does not just unravel wildly as you sew!
Most machines use either a removable or an inset bobbin case. As you might expect, the removable case comes out of the machine as you insert the bobbin. The inset kind does not come out of the machine.
On top of this, you can find machines that use front loading, side loading, or drop-in bobbins as well! This means that the bobbin and its case may live in different machine parts, depending on its brand and design.
Most machines that use a removable case will have a front-loading bobbin. To get to this, you will generally need to open a hatch in the front of the machine (the side facing you as you sew). Some older machines with a removable case may use a side-loading bobbin that you access from the side of the machine–to the left as you sit facing it.
Drop-in bobbins usually have inset cases located on the sewing surface of the machine in front of the needle plate.
As you can see, sewing machines have a lot of variety when it comes to the type and placement of a bobbin! The good news is that every bobbin accomplishes the same basic task. You will just need to learn a few basic processes to get the most out of that simple device!
How to Wind a Bobbin on a Sewing Machine 6 Ways
Whether you have a Singer or a Brother, an Elna or a Janome, you need to learn how to wind the bobbin before you can use your sewing machine.
1. For Beginners
This guide will help you locate the key parts of your sewing machine you need to master before you can wind a bobbin successfully.
- First, pull out your handy sewing machine owner’s manual. Somewhere near the beginning of this booklet, you will find a diagram that lists all the key parts in your machine. Use this to locate the bobbin and its casing. (As a pro tip, many sewing machine brands will provide a digital copy of the manual for free if you can’t find yours!)
- Take the bobbin out of the machine. For a drop-in bobbin, you will simply lift the small wheel out of the casing. For a front-loading bobbin, you will take the whole casing out and then the bobbin will fall out of the casing into your hand.
- You can reuse the bobbin currently in place by emptying it and adding new thread, or you can buy a set of new bobbins to fill as you go. Make sure you buy the exact model of bobbin described in your manual if you decide to buy new ones.
- Now that you have found the bobbin, it’s time to add the thread! Once again, reference your manual to find the location of the spool pin, the thread guide, and the bobbin winder. On most modern machines, you will find all of these on the top of the machine.
- Place your thread spool onto the spool pin and hold it in place with a spool cap. This prevents the thread from flying off once you start sewing!
- Unwind about ten inches of thread and loop it around the thread guides that lead from the spool to the bobbin winder. Most beginner-level machines will have one or two thread guides to help keep the thread taut between the spool and the bobbin.
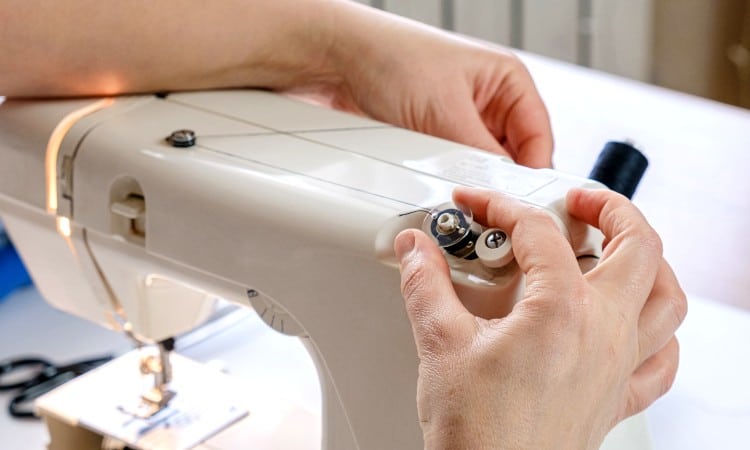
- Place the empty bobbin onto the winder, which looks like a small spool pin. Insert the loose thread tail from inside the bobbin up out of one of the holes on top of the bobbin. Use your fingers to wind the loose thread around the center of the bobbin two or three times, just to secure the thread in place.
- This key step tends to confuse some beginning sewers! Before you can tell the machine to start filling the bobbin, you must shift the bobbin-winder pin from its current position. Gently push the whole bobbin and pin to the right until it clicks into place.
- On most machines, this movement will automatically put your machine into bobbin winding mode. You may see a small image of a bobbin appear on the LED or digital screen if your machine has one.
- Put very gentle pressure onto the foot pedal. The bobbin should spin and begin to fill with thread!
- Your machine will automatically stop spinning once it gets too full. However, you may want to stop yourself once it starts to look close to full. An over-full bobbin can cause trouble as you try to sew.
- Finally, slide the winding pin back to the left. Lift the bobbin back off the pin and cut the thread. You now have a loaded bobbin ready to go back into the machine!
2. Manually
Winding a bobbin simply means wrapping the thread around it until the spool fills up, so you can technically wind your bobbin by hand if you really want to. This is not a recommended method because it takes forever. This is why sewing machine inventors added the winding mechanisms almost as soon as they invented sewing machines!
That said, you could encounter a situation where your winder breaks. Just in case, here is how you can wind your bobbin manually:
- Set the spool of thread on a flat surface in front of you.
- Insert the tail end of the thread inside the bobbin and out the top of one of the holes. Pin this loose end down with one of your fingers and hold it in place.
- Wind the thread around the center spool. Make sure you keep winding in the same direction!
- Stop winding when you have filled in three-quarters of the space under the flanges of the bobbin.
Alternatively, you can purchase bobbin winding machines to do this for you. Some people recommend using a power drill or Dremel to wind the thread onto the bobbin, but that seems risky when you could just wrap the thread yourself in a pinch!
3. On a Singer Machine
Many years ago, most Singer models use essentially the same bobbin system. Singer sewing machines have a reputation for simplicity, making them an excellent choice for a beginning sewer.
Most Singer sewing machines hold a Class 15 bobbin, though some older models such as the famous Featherweight use a different kind of bobbin.
To wind a bobbin on a Singer sewing machine:
- Insert a spool of thread onto the spool pin and secure it there.
- Loop the tail of the thread through the thread guides on top of the machine. On most Singer models, you will find this marked with color-coding or numbers for extra-easy threading!
- Slide the thread through a hole in the bobbin from inside the bobbin to the outside.
- Place the bobbin on the winding pin and then slide it to the right until it hits the handy stopper jutting out from the top of the machine.
- Press down on the foot pedal and watch the bobbin fill up!
4. On a Brother Machine
Brother sewing machines use a basic winding mechanism located on the top of the machine. Today, most Brother sewing machines use a type of Class 15 bobbin called an SA156. As always, you should only use the bobbin specifically designated in your manual inside the machine!
If your machine came with a plastic bobbin, don’t swap out for a metal bobbin, for example. This will cause tension problems and could even break your machine.
- Adjust the spool pin on the top of the machine so that it stands up in a fully vertical position. Place the spool of thread on the pin.
- Follow the thread guides to loop the thread through the tension disc located on the top left of the machine and then back to the right to the bobbin winder.
- Put the tail of the thread through the hole in the bobbin from the inside to come out of the top of the bobbin.
- Slide the bobbin onto the pin.
- Push the bobbin and the pin all the way to the right until they hit the small plastic stopper to the right. Turn the bobbin clockwise until the notch etched into the top of the bobbin aligns with the notch on top of the plastic stopper.
- Hold the tail of the thread taut in your right hand.
- Turn on the machine and use the foot pedal to run the bobbin winder until it looks full.
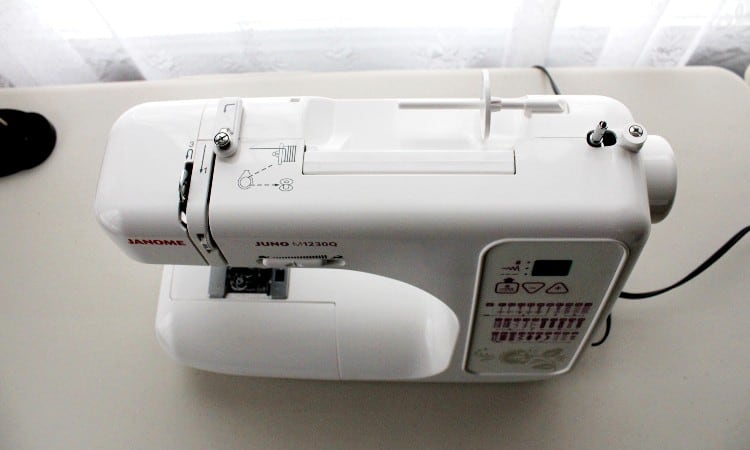
5. On a Janome Machine
Janome machines come in a wide range of complexity, from simple beginner models to very advanced ones, but they all use pretty much the same bobbin winder.
As a fun fact for you, Janome’s founder actually invented the round bobbin that almost every sewing machine uses today. This is where the name Janome, which means “snake eye,” came from!
Many Janome models use a special kind of bobbin made of plastic and rubber because a metal bobbin would mess up Jannome’s special magnetic hooking system. That said, you do want to make sure you check your manual and use only the specific type and size of bobbin that is designed to fit inside your machine.
Most Janome machines use the same basic winding mechanism located on the top of the machine’s casing.
- Load the thread spool into place and unwind about ten inches of thread.
- Slot the thread through the threading path. Many Janome machines have a small diagram printed on top of the machine to help you with this thread path!
- Place the thread tail into the hole in the bobbin and then slow the bobbin onto the winding pin. Shift the bobbin and pin to the right.
- Hold the thread tail while gently using the foot pedal to wind the bobbin. If you go too fast, the thread could stretch out or fill the bobbin unevenly.
6. On an Elna Machine
Elna sewing machines originated in Switzerland, but unlike many European sewing machine companies, they use a basic Class 15 bobbin and a very simple winding mechanism.
You will find the same familiar spool pin, thread guide, and winding pin on the top of most Elna sewing machines. The one additional step with these machines involves the handwheel.
Before you push the bobbin winding pin from left to right, find the handwheel (or the “flywheel” as Elna calls it) located on the right side of your machine as you sit facing it.
Pinch the sides of the wheel between your fingers and pull out. The whole wheel should slide out away from the machine just a bit! This freezes the needle in place and allows the bobbin-winding mechanism to activate.
Then slide the bobbin winding pin to the right and use the foot pedal to wind away!
Antique Sewing Machine Bobbins
Learning how to wind a bobbin on an antique sewing machine such as an old Singer model is pretty easy. Despite the many innovations in sewing machine technology over the years, the basics of bobbin winding have not changed a lot from the mid-1800s till today!
- First, you will want to locate the spool pin. On many antique machines, this is located on top of the machine, usually towards the right.
- Unwind some thread and carry it across the top of the machine to the hook/thread guide located somewhere on the top or front of the left side of the machine. Loop the thread around this guide.
- Now bring the thread all the back to the bobbin winding pin, which you will often find on the right front of the machine or the right top of the machine in front of the spool pin. You will find another hook or thread guide near this pin to hook the thread around. This will make a long, narrow “V” shape out of the thread.
- Slot the bobbin onto the winding pin.
- Wrap the thread around the bobbin and then thread it through the hole in the bobbin. This is a little tricky with the bobbin in place on the pin.
- You should now have a tail of thread in your hand pulling away from the bobbin to the left.
- Press the pedal or run the treadle to fill the bobbin.
Please note that some antique machines do have slight variations in this mechanism. As always, you should reference the manual for details specific to your model.
Also, you really want to make sure you use only the correct size and type of bobbin with an antique machine. Many older machines did not necessarily use a one-size-fits al model the way modern machines do. Plus, older models often have lighter, thinner bobbins that we use today!
How to Thread the Bottom/How to Load the Bobbin
Now that you have a bobbin wound full of thread, you need to know how to load the bobbin back into the machine!
This process will vary depending on whether you have a front-loading or drop-in bobbin. You can always refer to your sewing machine manual to find these areas on your machine. You can also search Youtube for tutorials that demonstrate another sewer inserting a bobbin into the kind of sewing machine that you own.
In general, you can follow these basic steps for any brand of sewing machine:
- Turn off your machine since you have to poke around beneath the needle for this process! You do not want to accidentally sew over your fingers.
- Access the bobbin casing. For front-loading machines, you may need to remove the front extension table and open a flap or hinged door to get to this area. Drop-in bobbins are much easier to find as they almost always go right in front of the needle beneath a sliding cover.
- Put the full bobbin into the casing. You want the thread on the bobbin unwinding in a counterclockwise direction as you do this.
- For a front-loading bobbin casing, pull the thread through the slot in the casing and then reinsert the bobbin casing into its spot with the metal extension that looks like a tiny arm sticking straight up in a twelve o’clock position.
- For drop-in bobbins, you will need to lock the machine in a non-sewing state by raising the presser foot all the way.
- Then use the release lever to slide free the hatch cover on top of the bobbin.
- Place the bobbin into its bobbin-shaped hole with the thread unwinding in a clockwise direction. Then guide the thread tail through the designated gap in the needle plate cover–usually, a small picture of a bobbin will indicate this spot on the cover!
- Cut the thread if your machine has a bobbin-thread cutter. If not, go ahead and slide the cover back over the bobbin hatch.
- For both types of bobbins, pull free about ten inches of thread. Turn the handwheel to raise and lower the needle so that it draws up the lower thread.
Now you’re ready to sew!
Why is My Bobbin Thread Not Catching?
The most common reason your machine does not catch the bobbin thread and pull it up to form stitches is that there is a problem with the upper thread. This may seem illogical, but the upper thread actually gets into much more trouble than the lower thread due to its more complex thread path. To solve this issue, nine times out of ten, all you have to do is rethread the machine and all will be well.
Other common issues include lint or dirt in the shuttle and bobbin casing. Give your machine a good cleaning and then try sewing again.
It’s a good habit to hold onto the loose thread tail coming from the upper and lower threads as your machine makes its first stitches. But if you hold onto these tails too tightly, you create too much tension, which could also mess up the bobbin thread.
Finally, in rare cases, a bent or blunted needle could also cause your bobbin thread not to catch. Try replacing your needle at the start of each new sewing project.
As a pro tip, you will set yourself up for success by filling three or four bobbins in the color of thread you plan to use before you start any sewing project. That way, you don’t have to constantly pause your sewing to rewind the bobbin!
It’s also a great idea to buy a good stock of empty bobbins. Of course, make sure you buy the exact kind of bobbin that fits your machine!
This way, you can leave a full bobbin with leftover spools of thread and have a matched set ready to go every time you want to sew with that thread again. It’s a good idea to use a hair tie or a bobbin spool pin to keep the bobbin and the thread together, rather than jumbling your threaded bobbins into a drawer somewhere!
Conclusion
A bobbin is a small auxiliary spool that supplies half of the thread used to make a stitch as your sewing machine runs. This lower thread hooks onto the upper thread as the needle lowers through the fabric, causing a double thread stitching pattern known as a lock stitch. Winding a bobbin correctly gives is the ability to supply this crucial lower thread as you sew.
Most sewing machines use either a front-loading or drop-in bobbin, but almost all machines have a very similar winding mechanism located on the top of the machine. To wind the bobbin, follow the thread guide laid out on top of the machine to loop the thread from the spool to the bobbin on its winding pin. Use the foot pedal to spin the bobbin and fill it with thread.