At least 90% of the time, any trouble you run into with loose, tight, or wobbly stitches comes from incorrect tension in your sewing machine. Getting the tension mechanism aligned right will help you sew a perfect seam and a smooth curve. Follow this sewing machine tension guide to learn how to make the most of your sewing machine’s tension mechanism!
Sewing machine tension devices place stress on the upper and lower thread to hold them taunt for precise stitching. The upper thread uses a set of discs to hold the thread tense. The lower thread remains tense because of a setting on the bobbin case that prevents the thread from loosening during stitching.
In this article, you will learn how sewing machine tension works. You will find out how to adjust tension settings on your machine. Finally, you will discover helpful tips for how to handle tension problems as you sew.
Quick Navigation
- What is Sewing Machine Tension?
- What Should Tension Be Set to on Sewing Machine?
- How to Set Sewing Machine Tension
- How Do I Know if My Sewing Machine Tension is Too High?
- When Should You Lower the Tension on a Sewing Machine?
- Sewing Machine Tension Guide: 4 Different Fabrics
- Tension Tips for Sewing Machine Brands
- Adjusting Sewing Machine Tension
- Sewing Machine Tension Chart
- Sewing Machine Tension Problems and How to Fix Them
- How Do I Know if My Bobbin Tension is Correct?
- Conclusion
What is Sewing Machine Tension?
Thread tension in a sewing machine means how much thread the machine allows to pass through to form every stitch. Imagine pinching a thread between your fingers and using your other hand to pull down on the thread. If you pinch the thread tightly, only a little will tug through your grip as you pull on it with your second hand, but if you loosen your grip, the thread will easily slide through your hand when you tug on it.
Sewing machine tension works very much like this. If you increase the tension, less thread will get through to form each stitch. If you decrease or loosen the tension, you will have looser stitches because more thread can get through the machine.
This includes both the upper and lower thread, and your sewing machine has separate devices installed to keep tension on the upper thread coming down from the spool and the lower thread coming up from the bobbin.
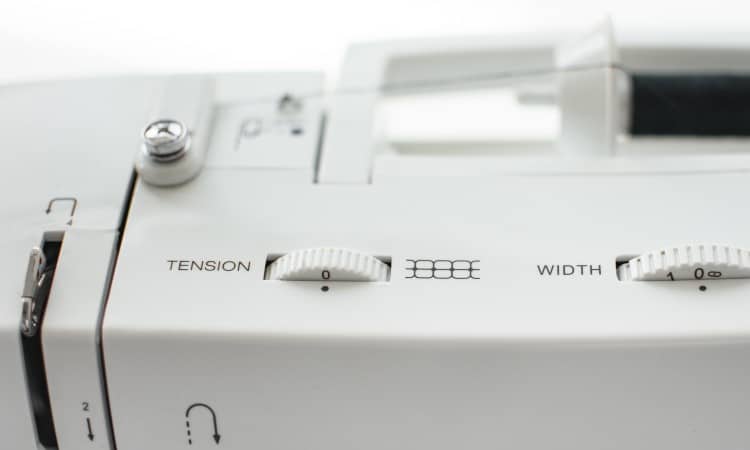
Tension on the upper thread comes from a set of discs set into the arm that reaches out over the needle plate. You may also see this called the “needle tension” or “upper tension.”
You can control the amount of tension the discs exert on the upper thread using a knob, slider, or touchscreen control on your machine. (Reference your sewing machine user’s manual if you do not know how to control your machine’s tension).
Though you can easily learn how to use this control, you should also know one other crucial thing about the upper tension. That is that it all depends on how well you thread your machine. If you do not properly slot the upper thread into the discs while you wind the upper thread along its thread path, the discs will not get a good grip on the thread. In turn, your machine will not provide the right amount of thread for each stitch.
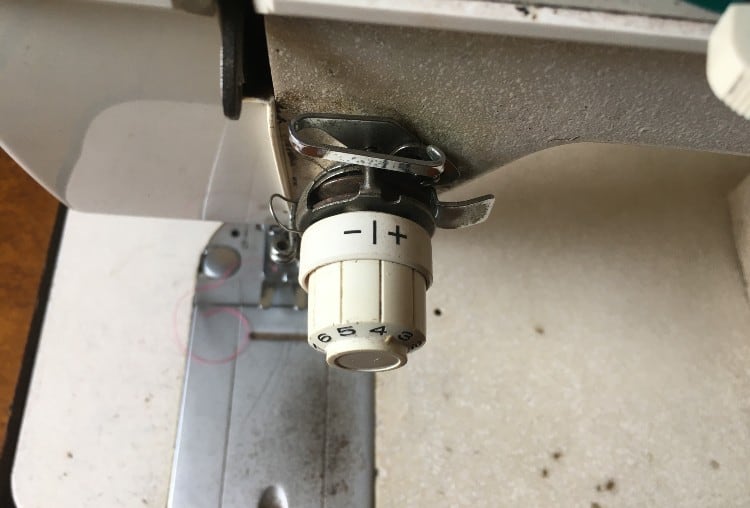
The bobbin case provides a tiny amount of force on the lower thread. In rare cases, you may need to adjust to this by turning a tiny screw you can find in the bobbin case. But the bobbin case comes preset as you do not typically need to alter it for different sewing styles.
You can find out how to adjust bobbin tension later in this article, But first, let’s take a look at how to know when your machine has the right upper tension settings.
What Should Tension Be Set to on Sewing Machine?
Your sewing machine should be set to a tension that balances the upper and lower threads perfectly. The exact settings will change depending on the fabric you plan to sew on and the type of needle you have installed in your machine, among other factors.
There is no one perfect setting for sewing machine tension. Instead, you often need to perform a quick test each time you begin sewing with a new type of fabric. Set up your machine temporarily with differently colored upper and lower threads for the test. Then sew a few inches and examine the stitches.
Perfect tension creates stitches that connect the upper and lower threads exactly in the center of the fabric’s depth. The lower thread does not poke up on top of the fabric, and the upper thread does not loop down through the underside of the fabric in loose tangles.
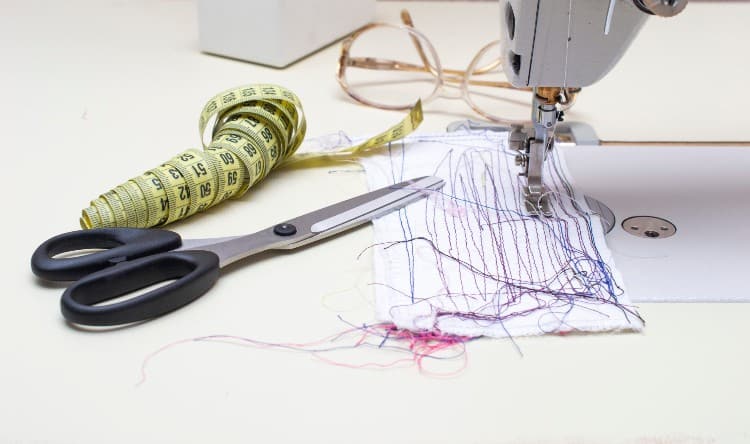
Another way to think of this is in terms of tightness. Too much force pulling on the thread can cause the stitches to cramp up, wrinkling the fabric and creating tiny stitches. Too little force holding the thread back can cause loose, wobbly, crooked, or tangled stitches.
How to Set Sewing Machine Tension
You can set sewing machine tension using controls on your machine to exert a set amount of force onto the upper thread. There is no perfect rule for what setting to use at any given time, as you should always perform a test run of stitches each time you begin sewing. You can then adjust the dial or control accordingly.
The most commonly used tension setting for most sewing machines is a four. This works well for straight stitches on many (though not all) midweight or lightweight fabrics.
If changing the tension settings on your machine seems scary to you, think of it as a simple trial and error process. If you make an adjustment that does not work, simply adjust again, sew another inch or two of test stitches, and find what works!
- Start by rethreading your machine. Pay close attention to the thread guides as you wind the upper thread through its thread path. Make sure you have raised the presser foot before slotting the upper thread through the tension discs.
- Once you have threaded the machine, find the tension control. On many sewing machines, you will find this knob or slider near the tension discs in the part of your machine over the needle. On computerized machines, you may need to use a setting on the digital touchscreen instead.
- To begin, set the tension to a four or the middle of the number range provided by your control.
- Insert a test strip of your fabric and sew two or three inches of stitches.
- Remove the fabric from the machine and look at the stitches. Do the stitches look even on both the top and bottom of the fabric? If so, this tension setting is perfect!
- If the stitches look too loose, use the upper tension controls to increase the number. Try moving the dial or typing in the setting to increase the tension by one number, then sew another test run.
- If the stitches look too tight, move the tension control to a lower number.
How Do I Know if My Sewing Machine Tension is Too High?
Too-high tension in your sewing machine will create tight stitches that show the bobbin thread on the top side of the fabric. You may also find that the fabric puckers or scrunches up as you sew if the upper thread tension is too high.
To solve this problem, try adjusting the tension settings down by one number. Then sew a few stitches and check to see if the upper and lower threads interlock in the middle of the fabric now.
If this did not balance the tension between the upper and lower threads, try lowering the tension by one more number, and repeat the test.
When Should You Lower the Tension on a Sewing Machine?
You should lower the tension on a sewing machine if you find that the bobbin thread peeks up onto the topside of the fabric as you sew. This indicates that the tension on the upper thread is too strong, and the upper thread is yanking the lower thread up too tightly.
In contrast, you will know that you need to raise the tension setting if you see loops of the upper thread on the underside of the fabric. This means that the upper thread flew through the machine with too little resistance and went all the way through the fabric to the underside instead of catching in the center of the fabric to form neat stitches.
Sewing Machine Tension Guide: 4 Different Fabrics
You can follow this basic sewing machine tension guide to learn how to set tension for different kinds of fabric.
Every sewing machine runs a little differently, so you will always want to follow the steps described above to do a quick tension test each time you start sewing on a new fabric. That said, you can follow some general rules about what kind of tension to use for different types of material.
1. Cotton Fabric
You will typically want the most commonly used middle tension setting for cotton material–often a three or four on most sewing machines.
If you have ever wondered what stitch and tension you should use for cotton fabric, look no further! Lightweight and midweight cotton fabrics such as quilting cotton, calico, muslin, or gingham all work well with a basic straight or zigzag stitch.
For the best balance between the upper and lower thread as you sew, make sure you use cotton thread on the spool and in the bobbin.
If you plan to use a heavier cotton fabric such as denim, you will need to adjust the tension for thick fabric, as you will see in the next section.
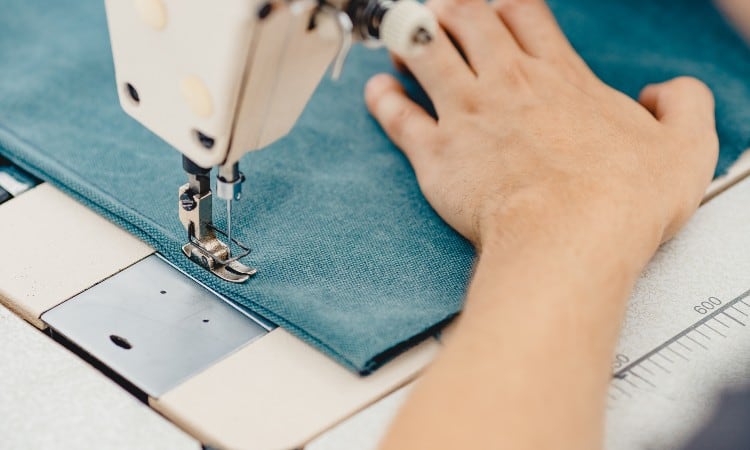
2. Thick Fabric
It may seem counterintuitive, but you need a higher tension setting for thick or heavyweight fabrics. This is because your machine has to work harder to force the fabric through the feed and create each stitch.
To find the right tension setting for your heavyweight cloth:
- Start at the middle setting (usually a 4) and then increase the tension by one number.
- Do a trial run of stitches on a scrap of your heavy fabric, and see if the upper and lower threads look balanced.
- If not, try increasing the tension once more, and repeat the test.
For heavy fabric like denim, you often need to set the sewing machine tension as high as 6.
For many thick fabrics, you will also need to use a specialized needle. You may need a special type of heavyweight thread as well, especially for quilting or sewing through multiple layers of fabric at once time.
3. Stretch Fabric
For stretchy fabric such as knits (t-shirt or maxi dress fabric), you will often need to lower the tension on your sewing machine slightly. You want as little pull on the knit material as possible to avoid stretching it out as you sew.
You should also use a stretch stitch or a narrow-width zigzag if possible. If you sew on a knit fabric with a straight stitch, the material will stretch out and look weird when you finish. You need stitches that can stretch and contract with the shape of the fabric.
4. Silky Fabric
For lightweight or silky fabrics, you want to use as low a tension setting as possible while maintaining balanced stitches. You may even want to turn your tension setting as low as a 2 or 3 and do a quick test to see if the upper and lower threads look even.
You will probably also want to shorten the stitch length setting on your sewing machine. Long stitches will become loose and baggy in a silky material, while small, short stitches can hold it neatly together.
Tension Tips for Sewing Machine Brands
Every sewing machine model will have slight differences in adjusting tension settings, but you can look for certain techniques for some brands like Singer, Brother, and Janome machines.
No matter what make or model of sewing machine you have, you should always read your owner’s manual before adjusting the tension. This handy booklet will tell you where to find the tension controls and how to use them for your specific sewing machine!
Singer
Most Singer sewing machines have a simple dial or knob you turn to set the upper tension. To increase tension, turn clockwise toward the higher number. To lower the tension, turn the dial counterclockwise toward the lower numbers. On many Singer models, you will find this dial located right in front of the tension discs.
On old or antique Singer models, you won’t find a handy dial. Instead, you have to adjust a small screw inside the machine that holds the tension discs in place.
Brother
Most beginner-level Brother sewing machines also use a small numbered dial to control the upper tension. On some more advanced models, you will find a touchscreen or an LED screen with arrows to control the machine settings. The preset tension on Brother sewing machines is a 4, which falls at the middle of the tension spectrum.
Like any other sewing machine brand, you still need to try a test run to see if you should increase or decrease the tension on the upper thread for every type of material you use.
Janome
Your Janome sewing machine will come with an owner’s manual with a chart telling you what tension setting to use for various fabric types. You should always refer to that before starting a new sewing project.
Janome recommends setting your tension to a 2 to a 6, depending on the fabric you use and its thickness.
Adjusting Sewing Machine Tension
The best way to adjust sewing machine tension is to use the control dial or buttons to increase or decrease tension on the upper thread. Most of the time, adjusting the “pull” on the upper thread will help you create smooth stitching on various types of material.
For ideas on how to set the tension specifically, check out the chart in the next section!
Sewing Machine Tension Chart
If you wonder what tension setting to use as you begin a new sewing project, check out this handy reference chart!
| Type of Fabric | Recommended Tension Setting |
| Thick cloth such as denim or upholstery material | 4 and up, as high as 6
The thicker the fabric, the higher the tension should be. |
| Polyester | Depends on the thickness of the cloth. Start with a setting of 4 and test the stitching. |
| Lightweight cotton such as muslin or gingham | Keep the machine at its pre-set tension setting of 4. |
| Flannel | You may need a lower tension setting such as 3. Also, lengthen the stitch length setting on your machine. |
| Satin | Lower the tension to a 3 or 2. Less tension works best on this smooth fabric. |
| Knits and stretchy fabric | Lower the tension setting to 2 or 3 and use either a stretch stitch or a narrow zigzag stitch. |
| Silk | Lower the tension setting to two or three, and use 2 mm stitches in a much shorter length than regular straight stitching for this fine material. |
Sewing Machine Tension Problems and How to Fix Them
Even after you master the basics of setting your sewing machine tension properly, you may encounter a few common sewing machine tension problems. Fortunately, you can usually solve these problems quite easily by following this handy checklist.
- Anytime you notice an issue with stitches, such as unbalanced upper and lower threads, puckering, or tangles, start by rethreading the machine. Test-stitch a couple of inches of straight stitches to see if this solved the issue.
- If the problem persists, examine the needle in your machine. Does it look bent, chipped, or blunted? Try replacing the needle before running another two inches of test stitches.
- Along those lines, take a moment to refer to your sewing machine owner’s manual and ensure you have selected the right needle for the fabric you’re using. Some types of material, like leather, denim, silk, and knits, will work best with specialized needles. Using the wrong needle could mess up the stitching.
- If that still did not fix the stitching problem, take out the bobbin and examine it to see if it has any dents or bent edges. Put in a new bobbin just in case. Once again, try two inches of sample stitches to see if this fixed everything.
- As a next step, clean the inside of your machine. Dust away any accumulated lint from around the bobbin case, and use a thread to scrape loose lint out of the tension discs. Dirt, lint, or grease inside the machine could slow down the thread and impact the tension.
- Make sure you have used the correct type of thread on the spool and in the bobbin. The thread should contain the same material as your fabric. It should also match the material in weight–thick fabric will require heavyweight thread, and so on.
- If you go through the whole checklist and the quality of stitching does not improve, follow the steps in the next section to adjust the tension on your bobbin. This should usually be your last resort, as most sewing machines come with a factory preset bobbin tension that you do not often want to adjust.
How Do I Know if My Bobbin Tension is Correct?
The best way to tell if your bobbin tension is correct is to do a drop test. You can only do this on sewing machines that have a front-loading bobbin with a separate bobbin case.
To try the bobbin case test:
- Hold the bobbin case in one hand, and insert the bobbin with the other.
- Hold onto the tail of the thread as it extends from the bobbin case.
- Let go of the case, so you hold the bobbin and its case just by the thread. The bobbin case should not move much.
- Give a little up-and-down jerk on the thread. This time, the bobbin case should fall slightly.
If the bobbin case falls quickly as it hangs from your hand, it has too little tension. If it does not fall at all after you give it a little yank, it has too much tension.
Another way to test if your bobbin tension is correct is to sew a line of stitches and check to see if the threads look balanced. If the stitches look the same on both the top and bottom of the cloth, you have your upper and bobbin tension correctly balanced.
If the stitches do not look right, you should start by adjusting the upper tension. Most of the time, the upper thread is the issue.
In some cases, adjusting the upper tension may not solve the problem. If your sewing machine has a front-loading bobbin with a removable bobbin case, you can adjust the tension on the lower thread. (If your machine has a top-loading bobbin, there is no easy way to adjust the bobbin tension–you will need to seek professional help).
- Start by removing the bobbin and bobbin case. Set aside the bobbin.
- Find the small screw embedded in the outer shell of the bobbin case.
- Using the tiny screwdriver that came with your machine, very, very gently tighten the screw. Do this in microscopic increments!
- Once you have tightened the screw a tiny fraction, rethread the machine and run a line of test stitches to see if you have corrected the issue. If not, take the bobbin out again and tighten the screw another tiny fraction of a turn.
- Keep up this process until you can run off a line of perfectly balanced stitches.
Conclusion
Sewing machine tension keeps the upper and lower threads moving through the fabric at the right speed to create balanced stitches. Ideally, the needle thread and bobbin thread should lock into a stitch right at the center of the fabric or between the layers of fabric. If this does not happen, your thread may have too much or too little tension.
You also need to adjust the sewing machine tension for every type of cloth you use. Most midweight types of cloth use the factory pre-set tension setting of 4, but silky or lightweight material may need a lower tension. Likewise, a heavy or thick cloth will need a higher tension setting.