Velcro – generically known as hook and loop tape – is a convenient option when it comes to fasteners; there’s no doubt about it. But when it comes to sewing this double-sided closure, you can often be frustrated by broken needles and skipped stitches. So, how should you go about sewing velcro?
Velcro can be sewn by hand or machine with relative ease – as long as attention and care are taken throughout the process. When sewing velcro, one should use a sharp needle and durable polyester thread to sew around the perimeter of the velcro tape. Wax or needle lubricant can make the process go more smoothly.
In this article, we will go over the step-by-step process for sewing velcro both by machine and by hand. We will also provide some helpful tips when working with velcro – including how to attach velcro without sewing.
How to Sew Velcro
Velcro is so easy to use once it’s put into place that the difficulty in attaching it may be overlooked before beginning the project. Overall, sewing velcro comes with relative ease as long as a few simple guidelines are followed and you work with attention and care.
There are many types of velcro on the market that can be found at craft and fabric shops, as well as online – some types work better for sewing than others. For a project in which you intend to sew the velcro to attach it, choose soft, flexible tape. This is the first thing that will make sewing velcro much easier. Ideally – you should avoid stiff, hard types of velcro or velcro that is adhesive-backed. These types can be sewn as well. It’s just that they introduce another level of difficulty.
Velcro is known generically as hook-and-loop tape. There are two sides – one covered in soft, fuzzy loops, the other having small, rigid hooks that grab onto the loops. Though not incredibly difficult to work with – velcro can be somewhat finicky. If you pay attention to what you’re doing and use the right supplies – sewing velcro shouldn’t pose a big problem.
When sewing velcro, you should use a sharp needle and sturdy thread – polyester will be tough and sturdy and much less prone to breaking. You can run the needle through beeswax or use a bit of needle lubricant to help the needle slide through the thick velcro – though it’s not absolutely necessary.
How to Sew Velcro by Machine – Step-by-Step Guide
If you use the correct supplies and work with slow and steady movements – sewing velcro should be a relatively smooth process. Remember to do a test run on a scrap of fabric once your materials and settings are in place.
1. Gather Your Supplies
Select a soft, sewable velcro and a durable thread – preferably polyester for strength – in a matching color. Remember, the thread will show up against the velcro and possibly on the outside of the fabric, so choose your thread color accordingly. A universal needle in size 14 or 16 should work. If you find it difficult to get through the velcro or have snapped needles or skipped stitches – a denim needle designed for extra density can help.
Chalk or another marking tool can be helpful when lining up the velcro. As well as pins – though they are more difficult to work with – or double-sided tape to keep it in place before sewing.
2. Cut the Velcro
Cut the velcro to the appropriate size needed. Cut each corner of the velcro at a 20-degree angle which will reduce sharp corners and help decrease the possibility of snagging on fabric.
3. Position the Velcro
Position the velcro on the fabric where you would like to sew it in place. The “hook” piece should be placed facing out – away from the skin – to avoid scratchy discomfort if the rough side of the velcro touches the surface of the skin. The soft fuzzy side should be placed facing inward.
Using tailor’s chalk, trace the velcro – marking the area where the velcro will lie. Be sure to account for both sides, ensuring that the two pieces align and meet up when pressed closed. Other options are to pin the velcro in place – which can be difficult with small, thick pieces of velcro – or use a piece of double-sided tape.
4. Set Your Machine
A straight stitch is ideal when sewing around velcro. Set the machine to 1.5 – 2.0. Stitches should be small to help ensure that the velcro is securely attached. This will also help keep the edges as flat against the fabric as possible. If you find that you’re getting skipped stitches, a zigzag stitch can be used – just keep in mind that there needs to be enough room around the perimeter of the velcro to do so. As well as considering how the zigzag stitch will look on the opposite side of the fabric which will most likely be facing out. A zigzag stitch will also allow the velcro to be a bit more flexible.
A standard foot should work, but a zipper foot can be helpful to work through the thick backing of the velcro and help decrease bunching. If working with a zipper foot, you will only have the option of straight stitches, as opposed to using a zigzag.
5. Test Your Settings
It’s always a good idea to do a test piece before moving on to the final project – especially if it’s your first time working with velcro. This will give you a feel for the speed that will give you the best result and ensure that all of the settings are properly in place.
6. Sew the Velcro
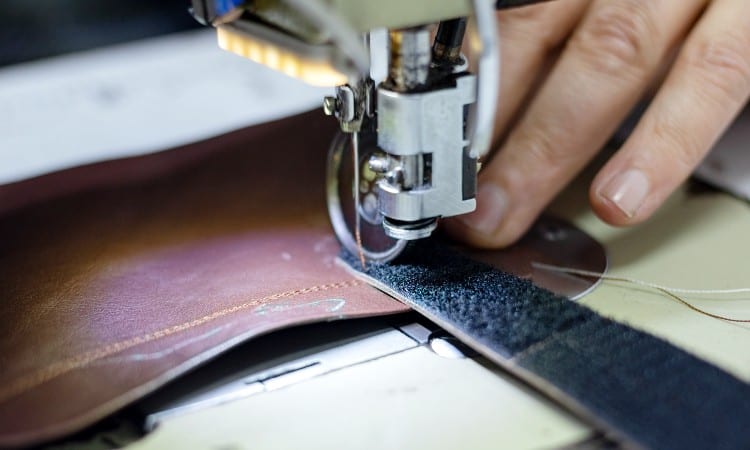
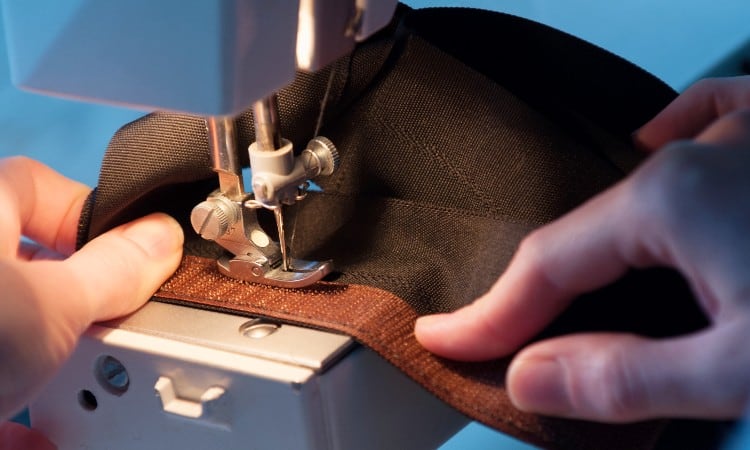
Start slow – making sure that the needle is moving smoothly through the velcro – and sew around the entire perimeter of the velcro. Generally – there is a small border around the velcro hook and/or loop area – this is where you should be sewing. Once you’ve made it all the way around, backstitch a couple of times to ensure that the velcro stays in place.
For added security – since this closure will need to stand up to repeated tension from pulling – sew diagonally across the entire piece of velcro. Do this in both directions creating an X.
7. Repeat with the Other Side
Follow the steps above to sew the opposite side of the velcro into place. Before beginning – double-check that the placing matches and that they will align when pressed together to close.
How to Sew Velcro by Hand – 5 Easy Steps
If you are working with only a small piece of velcro or don’t have access to a machine – sewing by hand is an easy choice. It may take a bit longer – since you’ll be sewing through a thick material – but it is not by any means extremely difficult.
1. Gather Supplies
Choose a flexible, soft velcro – ideally not a sticky back tape – that will be easier to sew than a hard, stiff piece. A durable thread should be used to keep down on breakage and allow for some tension when pulling through the material layers. Polyester is generally one of the sturdiest types and is easily found in stores and online. Choose a thread color that will match the velcro and/or the material you will be sewing the velcro.
You should always work with a sharp needle, especially with velcro. Choose something sturdy and heavy-duty that won’t bend or snap with repeated pushing and pulling through the materials.
2. Cut and Position the Velcro
Measure and cut the velcro to the appropriate size for the project. To cut down on the velcro snagging on other materials – cut each corner of the precut piece at a 20-degree angle.
The hook side of the velcro should be placed on the bottom – facing out and away from the skin. The opposing soft loop side should be on the top, facing inward toward the skin. Ensure that both pieces are correctly aligned so they will meet precisely when pressed together. Pin the velcro pieces in place.
3. Thread and Coat (Optional) the Needle
Thread your needle with an 18” to 20” piece of thread and knot the end. An extremely long piece of thread will tangle more easily – especially when working with the sticky velcro – and become weaker after repeatedly being pulled through the materials. Alternatively – a piece of thread that is too short will need to be changed unnecessarily frequently.
To make the need slide more smoothly through the velcro, you may choose to coat your needle and thread it with beeswax or needle lubricant before proceeding.
4. Sew the Velcro into Place
Start sewing at one corner of the velcro. Using small straight stitches – a backstitch works well here – sew around the border of the velcro. Sew as close to the edge as possible while ensuring that you are adhering the velcro securely to the fabric. Once you have made it around the entirety of the piece of velcro – backstitch a couple of times. This will help make sure that the stitches will not be pulled out over time.
5. Finishing Off
Once the stitches have been secured – knot and tie off the thread, close the thread close to the surface and move to the other side.
Repeat with the Opposite Velcro
Before sewing the other piece of velcro into place – double-check that its position is still accurately aligned with the opposite piece. Once you’re sure, it is lined up, repeat steps four and five to complete the job.
Sticky Back Velcro
Sticky back velcro functions like any other velcro – it has a rigid hook piece that sticks to a soft looped piece to form a closure. The difference is that it comes with an adhesive applied to its back side. Sticky back velcro can simply be pressed into place to attach it to fabric or other materials where you would like velcro to be applied.
Sticky-back velcro is great for projects that need to be finished quickly. As well as for when you’d like to use velcro on hard surfaces or something other than fabric. The problem with sticky back velcro is that the adhesive isn’t necessarily permanent. Especially when you consider the possibility of it being washed multiple times. The edges of sticky back velcro can start pulling away from fabrics and need to be readhered.
Can You Sew Adhesive Back Velcro?
Thankfully – you can sew velcro that was applied with adhesive. Sticky back velcro that is peeling away can be secured back into place with a needle and thread. Alternatively – if you’re midway through a project that requires velcro and a sticky back is the only type you have on hand, it too can be sewn.
How to Sew Sticky Back Velcro
Sewing sticky back velcro can be a bit more tricky than sewing with the types that are designed to be sewn. Continuously working your needle through the sticky adhesive can get cumbersome. Using needle lubricant can make a big difference and help your needle slide much more easily through the sticky velcro. You may need to apply the lubricant intermittently throughout the sewing process to keep the stitches flowing smoothly. Also – after you’ve finished the project, use a bit of acetone to clean off the adhesive built up on the needle.
Sticky back velcro also tends to curl at the edges – much more so than non-sticky back types of tape. This can add to the difficulty of working with it, but it also gives all the more reason that it should be sewn securely. Because of this curling – it is especially important to sew as close as possible to the edges of the velcro – along the border surrounding the hooks/loops. Stitching diagonally across the surface of the piece of velcro once it has been sewn into place is also a good idea for sticky back velcro.
By Hand
The materials needed to sew sticky back velcro by hand are essentially the same as what is needed to sew regular velcro – plus the aforementioned needle lubricant. A sturdy needle – even more important that it be sharp in this case – along with the durable polyester thread in the color of your choice.
Since the back of the velcro is adhesive, there is no need to pin it in place – though it is still important to ensure that both sides will align when closed. The hook part of the velcro should be placed on the bottom – facing out – and the soft loop side facing in.
Thread the needle with an 18” to 20” piece of thread and tie a secure knot in the end. Beginning at one corner of the velcro – proceed around the perimeter sewing with small straight stitches. A back stitch will be somewhat more secure than a basic straight stitch. Once you have made it around the entire piece of velcro – backstitch a few additional times for security and tie off the thread with a knot.
Since the adhesive isn’t necessarily permanent, it can become weak and peel away with time. To make the velcro stay in place best over time – sew diagonally across the face of the velcro in both directions, creating an X.
By Machine
Sewing sticky back velcro by machine can be a bit of a process – anything that is resistant or adds gunk to your needle isn’t making anything easier. But! It’s not impossible. Using needle lubricant is especially crucial when sewing sticky back velcro by machine. It may seem tedious – but the lubricant should be reapplied after every few stitches to get the best results. This will also help to avoid the needle breaking or stitches being skipped – it’s really what is best for the machine.
A zipper foot is helpful to use when sewing sticky back velcro. If you don’t have one, a standard foot can be used – just remember to work slowly and with extra caution. Use a sharp size 14 or 16 universal needle or a denim needle designed specifically to work with thick materials. The heavy-duty polyester thread should be threaded into the machine – in a color that works with the velcro and the material it’s attached to. Apply a drop of needle lubricant to the needle before you begin sewing, as well as every few stitches made thereafter throughout.
The machine should be set with short straight stitches – no more than 1.5 – 2.0. The smaller stitches will help keep the velcro securely in place much better than longer ones. It will also help keep skipped stitches to a minimum – and you’ll want all the help you can get.
Begin sewing – slowly – in the middle of one of the straight sides. Sew as close as you can to the edge of the velcro while not going over the edge. After sewn a few stitches – reapply another drop of needle lube. Continue with this process until you have sewn around the entire perimeter of the velcro. Back stitch before finishing off.
For added security – sew an X diagonally across the surface of the velcro – continuing to apply the needle lubricant every few stitches. Repeat with the opposing piece of velcro.
Tips for Sewing Velcro
Sewing velcro is pretty straightforward overall. But there are a few tips and tricks to make the process go as smoothly as possible. Remember these tips next time a sewing project requires velcro.
- Choose velcro that is intended to be sewn. Sticky back velcro with adhesive applied is not designed to work with needle and thread – even though it can be done. Sticky back velcro is much more difficult to work with and ultimately can damage a sewing machine in the long run.
- Don’t use stiff, hard velcro. The soft, flexible tape will be sewn with much more ease – by hand or on a machine.
- Cut the corners of the velcro before sewing it into place to avoid scratchy, sharp, snagging edges.
- When sewing on a machine, use a sturdy size 14 or 16 universal or denim needle.
- A zipper foot will help sew the velcro more smoothly and cut down on creating or bunching.
- Choose a durable thread less likely to break – polyester is a good choice.
- Choose a thread that will match the color of the velcro and the color of the fabric you are sewing it to.
- Sew the velcro in place as close to the edge of the velcro as possible.
- Use chalk to outline the placement of the velcro on the fabric – as opposed to pins which can distort the velcro’s shape and be difficult to work with.
- Sew across the velcro diagonally in both directions to help keep the tape securely in place.
How to Attach Velcro Without Sewing
If you’re absolutely against sewing velcro into place – sticky back velcro may be your option. Just remember that – over time – the velcro may start peeling away from the fabric. In addition to velcro, which has a peel-away film – iron on velcro is another option for adhesive types. Iron on adhesives can be stronger – as they are heat activated – but will still not be as sturdy and permanent as with sewn velcro.
Alternative closures can also be considered in place of sewing velcro. Buttons, zippers and snaps are all great choices for fasteners for clothing and accessories.
What’s The Best Way to Attach Velcro to Fabric?
When it comes down to it – sewing velcro is the best way to attach it for the long term. Adhesive back velcro can be a quick fix and it has its place in the craft world. But, for a closure that is opened by pulling with force – it’s just not going to be as sturdy as if it were sewn. Luckily – sewing velcro isn’t all that difficult. Whether by hand or machine – if you stick to the guides and tips and tricks above – sewing velcro should almost always be a breeze!