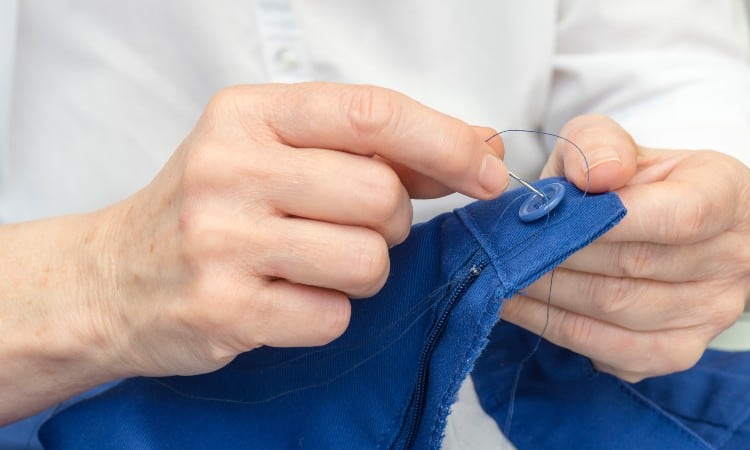
You know that moment when you tug too hard on the waistline of pants while you’re getting dressed, and the button snaps off and ricochets down to the floor? It happens to everyone, but you do not need to throw out the buttonless pants! Instead, you can learn how to sew a button on your pants and keep wearing your favorite trousers for years.
The simplest way to sew a button on pants is to use a needle and strong thread with crossed stitches that form an X on a four-hole button. Other popular methods include creating a thread shank for extra security when sewing by hand or using a sewing machine for extra speed. For a more decorative approach, use embroidery floss to create a design on top of the button.
In this article, you will learn what tools you need to reattach a button to your pants. You will discover eight easy ways to sew a button on pants. Finally, you will find tips for the best beginner or professional methods for sewing on a button.
Quick Navigation
How Do You Put Buttons On Your Pants?
The easiest way to put a button on your pants is to sew it by hand using a sharp needle and sturdy thread. The exact stitching method you should use depends on the kind of button you select. Pants buttons commonly come in several styles, such as a four-hole, two-hole, or shank style.
If possible, hold onto the original button that popped off your pants. This way, you will know that it fits the buttonhole on the trousers. But if you lost it, don’t worry!
This easy method will help you make sure you buy a new button that fits your pants just as well as the old one. Measure the length of the buttonhole horizontally, starting at the inside stitching and ending where the stitching begins on the other side. In other words, you want to measure the length of the empty space.
Subtract ⅛” from that measurement. This measurement tells you the diameter of the button for your pants! This simple trick works because sewing machines usually build in an extra ⅛” in a buttonhole to give the button room to squeeze through with ease.
Many kinds of pants, like khakis, typically use a ⅝” button, but there is no standardized practice, so your best bet is to measure your pants to find the correct size.
You can buy buttons at any craft or sewing store, but you may find it easier to track down exactly the shape and style that works best for your pants if you shop online.
How to Sew a Button on Pants: 8 Methods
You can sew a button on your pants by hand, with a sewing machine, or even with fancy embroidery methods. The technique you choose may vary depending on the type of button that works best for your trousers, though.
1. By Hand
You can sew on a button by hand in just five or ten minutes. The most important part of the process is tying good knots at the beginning and end of your sewing, which will help prevent the button from detaching again!
Check out this guide to learn how to sew on a button step by step:
- Cut a length of thread about 24” long, and thread the needle. If you have a choice in needles, go for one that looks slender and feels sharp when you gently press it to the pad of your finger. A blunt ball-point needle will not work.
- Next, pull the tail of the thread all the way through so that you have an even length of thread hanging down from both sides of the eye of the needle. This lets you use a double thread, which saves time as you stitch!
- Tie an overhand knot at the end of the thread, twining the two strands together to treat them like one thread.
- Now find the spot where the button came off your pants. You will usually see old broken thread here, making it easy to track down.
- If the old thread forms a raised knot, cut it away using scissors.
- Insert the needle from the inside of the pants, poking it out in the spot where the old button used to be. Pull it all the way through so that your knot lodges securely on the inside of the trouser waistband.
- Place the tip of the needle about ⅛” away from your original insertion, and stitch back through the pants to the inside of the waistband. Taking this first stitch before you sew on the button keeps the thread more secure.
- Now place the button in the desired spot on the pants. Use your non-dominant hand to pinch it in place as you bring the needle back through the waistband and a hole in the button.
- Depending on the kind of button you choose, skip down to the directions for a two-hole, four-hole, or shank style to see what kind of stitch to use for each type.
- Finally, you want to securely finish off your stitching by tying another knot on the inside of the waistband. Slip the needle through one of the stitches that show on the inside of the waistband. Pull it almost all the way through, but leave a small loop of thread sticking up.
- Slot the needle through that loop, pull it almost all the way through, and then bring it back through the second loop you created with this action. Pull the knot tight, and you can cut your thread!
2. Shank Button
The best way to sew on a shank button is to use a tiny anchor button on the inside of the garment to help hold it in place.
But first, what is a shank button? Sometimes also called a rounded or no-hole button, this style has a loop protruding from its back that you can use to attach to a garment. Shank buttons often have a fabric covering or a decorative, rounded surface and you see them more often on children’s pants or blouses and coats than on adult-sized pants.
- First, cut a length of thread, thread your needle, and tie a knot at the end of the thread. Start by inserting the needle into the pants from the inside, and take several small stitches to mark the spot where you want to place the button.
- Next, hold a small, clear button at this point on the inside of the waistband. Take a stitch through the holes in this button to attach it to the inside of the pants.
- Now bring the shank button to its spot outside the waistband. While holding the button with one hand, use your other hand to insert the needle back through one of the holes in the clear button, up through the waistband of the pants, and out right beneath the shank of the button.
- Slide the needle through the shank of the button, just like pushing a beading wire through the center of a bead.
- Push the needle back through to the inside of the waistband, making sure it comes out through one of the holes in the small, clear button.
- Repeat this process five times so that you end up with five loops of thread passing through the shank of the button, holding it firmly to the pants.
- Finally, knot off the thread on the inside of the waistband.
3. Two Hole Button
You don’t see a two-hole button on pants as often as a four-hole button, but the key to firmly fixing this kind of button is to use a double thread and make multiple loops through the holes.
- Start by cutting about 24” of thread and fold it in half. Thread the folded end through the eye of your needle, and then knot the two tails together at the other end.
- Insert the needle from the inside of the pants and take two stitches to show where you plan to put the button.
- Hold the button to the spot and bring the needle up through the pants and out one of the two holes in the button.
- Shift the needle over to the second hole in the button and push it all the back through to the inside of the waistband.
- Repeat this step about six or seven times so that you have multiple loops of thread between the two holes of the button, holding it to the pants.
- Finally, tie a secure knot on the inside of the waistband.
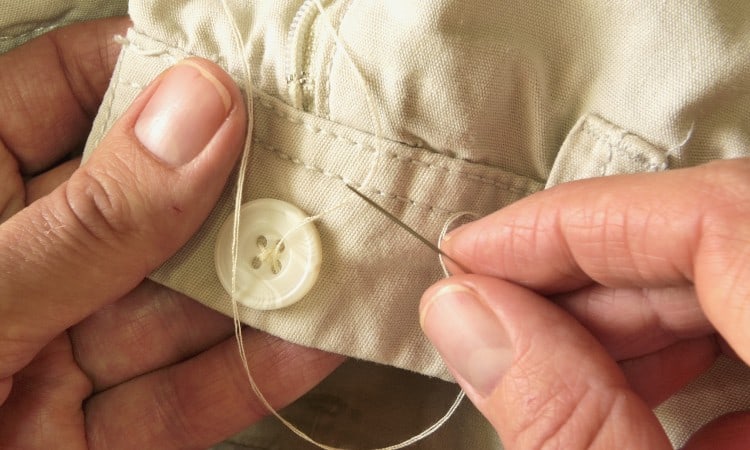
4. Four Hole Button
The best way to sew on a four-hole button is to set it by hand using the thread to create a sturdy shank behind the button. This old-fashioned technique takes a few extra steps but gives you a solidly attached button that will not fly off next time you have to pull on your pants to get them buttoned shut!
- Start by threading your needle and tying a knot at its ends, as described in the section on “how to sew on a button by hand.”
- As usual, you will begin at the inside of the waistband, pushing the needle through to the outside. This lets your knot catch the inside of the pants, where it will not show.
- Make a small stitch where you want the button to go. This marks your spot and also gives the knot a little extra security.
- Here is where you need to set things up a little differently. Pinch the button in place with your thumb. At the same time, lay a small cylinder horizontally between the four holes on top of the button. Another needle, a large sewing pin, or a small rounded toothpick, can work here.
- Now bring the needle up through one of the holes in the button, move the needle and thread overtop of your small cylinder, and then put the needle back down through the hole vertical to the one you began with. You will make a thread loop over the top of the cylinder.
- Repeat this process in the other two holes of the button, forming a loop over the cylinder on that half of the button.
- Go through the button holes and loop process two more times.
- Now, slide the cylinder out and gently tug the button up as far it will move on the loops of thread.
- For the final step, bring the needle up from inside the pants to the outside, but don’t go through a hole in the button. Instead, wrap the length of the thread around the looped threads beneath the button five times. This essentially creates a “shank” out of the thread!
- Draw firmly on the thread so that no slack remains and then insert the needle back into the pants and pull it through to the inside of the waistband one final time.
- Tie off the thread with another small overhand knot on the inside of the waistband.
5. Jeans Button
Jeans and many sturdy work pants use a special kind of button that comes in two halves, and you need either a hammer or a special tool to insert this type of button.
You can find replacement jeans buttons easily online. Just like other styles of buttons, though, they can come in varying sizes, so make sure you measure your jeans first!
- Use the tack-like side of the button to poke a small starter hole where you want to put the button. If the jeans already have a small hole marking the spot where the old button sat, don’t worry about this.
- Push the pointy end of the tack into the hole from the inside of the waistband. Leave it there.
- Align the face half of the button so that the pointy tack slots inside it.
- Place a piece of fabric over the button to avoid damaging it, and use a hammer to tap firmly on the button, forcing the two halves together.
6. With Sewing Machine
If you have a sewing machine with adjustable feed dogs, you can sew on buttons super quickly by using a sewing machine! It also helps to use a button-sewing foot like this one, which can hold the button still while the sewing takes place.
- Start by placing the button on the fabric where you want it to go. Stretch a piece of Scotch tape over the top of the button to lightly hold it in place while you sew. (It will tear away easily after you finish!).
- If your machine has a button-sewing setting, select that option. If not, use the settings to lower the feed dogs yourself.
- Select your button-sewing stitch if the machine gives you that option. You can also use a zigzag stitch with a length set to 0.
- Snap the button sewing foot into place instead of the normal presser foot.
- Slot the garment under the needle so that the point of the needle lines up over one of the holes in the button. Use the handwheel to bring the needle down into that hole.
- Keep turning the handwheel, so the needle comes up. As the needle starts to come back down, make sure you have the correct width on the zigzag stitch so that the needle will fall into another hole on the button. (Though you should not have to do this if you have a button-sewing setting on your machine).
- Now that you know the needle will go up and down exactly into the holes in the button, use the foot pedal to sew 8 stitches between the two holes.
- Cut the two thread tails, leaving about six inches of thread on both sides.
- Use a hand needle to draw the top thread to the inside of the garment, and knot off both threads on the inside of the pants.
7. Without Sewing
If you do not have a boy scout mentality and a handy sewing kit stashed in your backpack or purse, you may need to know how to attach a button without sewing in an emergency! These hacks will rescue you from an embarrassing moment, but you will still want to permanently reattach your errant button at some point in the future.
- If you have a twist tie or bit of wire handy, use that to pin the button in place! Strip away the paper or plastic coating and fold the wire part of the tie in half. Poke one end through two separate holes in the button and then carefully poke the ends of the wire through the pants from the outside, twisting them together on the inside of the waistband.
- Dab a bit of fabric glue onto the pants and hold the button until the glue dries.
- Use clear tape to hold the button in place over the buttonhole.
- If you plan ahead enough, you can also use a special tool designed just for quickly reattaching buttons, like this one.
8. With Embroidery
The most decorative way to sew a button on pants is to use a fun embroidery method, such as using thread to sew a flower on top of the button.
- Start with a 12” length of green embroidery floss. Knot it off and take one stitch to secure the thread to the pants.
- Next, place a four-hole button where you want it to go on the pants, but angle it on a diagonal so that the four holes look like a diamond instead of a square.
- Take one stitch up through one of the top holes in the button and down through one of the bottom holes.
- Bring the needle back up in the hole to the left of that green stitch. Make a diagonal stitch from that hole to the bottom hole you already stitch.
- Come back up through the empty hole to the right of the large green stitch and make another diagonal stitch to that center hole. This should look like a stem with a leaf on either side.
- Repeat these steps to sew over the stem and leaf once more, providing extra strength to the thread.
- On the inside of the pants, tie off the green thread with a tight knot.
- Now thread the needle with another color. Pick any color you like for the flower part of the design! Once again, tie a knot at the end of the thread.
- Bring the needle up through the top hole in the button. To form the “flower,” you will make a French knot with the embroidery thread. To do this, hold the needle with one hand and wrap the thread tightly around the shaft of the needle three times. Then place the tip of the needle back into that same hole in the button, but slightly to the side so that it does not go through the same point in the fabric.
- Pull the needle and thread slowly through so that only the French knot remains on the surface of the button.
- Knot off the flower thread inside the waistband to secure your embroidered flower button!
What Kind of Thread Should You Use to Sew on a Button?
 The best kind of thread to use to sew on a button is a heavy-duty button thread that has a thicker diameter than a normal sewing thread. You can get this thread made out of cotton or polyester and in a huge range of different colors to match your pants.
Heavy-duty button thread like this kind from Coats and Clark does usually cost a bit more than all-purpose sewing thread, but it will secure your button very well!
If you do not have this kind of thread handy, you can use a regular thread. Make sure you double it into a double strand as you sew for extra strength.
You do not want to use the flimsy, fine thread that comes in cheap sewing kits, though. If the thread looks wispy, it will probably snap the first time you tug on the button!
What is the Easiest Way to Sew on a Button?
The easiest way to sew on a button for beginners is to use the two-hole button method. All you have to do for this technique is tie a knot and make loops of thread between the two holes in the button.
That said, the most secure way to sew a button on by hand is to use the four-hole button method and create a thread “shank” between the button and the pants. This method does take a few extra steps, but it gives you a much more securely attached button!
How Do You Sew on a Button Like a Professional?
The quickest way to sew on a button as a professional is to use a sewing machine. Many professional-grade sewing machines have special settings for attaching buttons, making this process fast and easy to repeat when sewing on one button after another.
That said, plenty of tailors and seamstresses also sew on buttons by hand, especially if just one button needs to be attached to a garment. In this case, the professional will probably use either the shank button method or the four-hole button method to create the strongest attachment to the garment.
Conclusion
The most common way to sew a button on your pants is to use a needle and thread and hand-sew the button into place. You can also use your sewing machine if it has the proper settings and the ability to lower the feed dogs. If you want a decorative button, you can even use embroidery floss to create a flower that holds your button to the pants!
The method you use to attach a button to your pants does depend on the style of the button. Shank buttons need a double-button system that places a smaller button behind the main button, while four-hole buttons give one of the strongest attachments to a pair of pants. Some pants like jeans use a two-part button with a tack and a facing that you have to force together with a hammer.