Screen printing is one of the most popular methods of transferring a design onto fabric for t-shirts, bags, and hoodies, but what happens when you need to remove that printed design? Maybe you have a side business screen printing t-shirts to sell on Etsy, or maybe you found a comfy hoodie at a thrift store and you want to erase the ugly, cracked logo printed onto it. Either way, you probably find yourself wondering how to remove screen printing from clothing.
The most popular way to remove screen printing from clothing is to soak a cotton ball in nail polish remover and rub the design. Other easy methods include using an iron and paper bag to melt the print or using a sugar scrub to scrape it away. Some fabrics require special care to remove the design without damaging the material.
In this article, you’ll discover seven easy ways to remove screen printing at home. You’ll also learn techniques for dealing with print residue and how to handle special fabrics like polyester.
What is Screen Printing?
Screen printing uses a thick ink that does not soak through the fabric to create a stenciled design on many popular items, including t-shirts and bags. Many commercial companies that sell t-shirts featuring designs use this technique. You can also screen print at home quite easily with the right tools and inks.
Screen printing is sometimes called silk screening because the process originally used tightly stretched silk mesh with the negative of the design stenciled onto it. The printer then rolls the thick ink onto the screen and places the mesh screen onto the shirt. The stencil prevents the negative space from inking the t-shirt, which creates a design!
Screen printing usually involves only one or two colors of ink because of the simplicity of the process. If you want a t-shirt with a multi-colored design, you probably want to look into heat pressing.
The other really popular way to decorate t-shirts in bulk these days is called heat pressing. This involves sealing a transfer (which is usually vinyl) onto fabric using heat. These designs can incorporate more colors than screen-printed designs. Both methods use heat to set plasticky-feeling designs onto the fabric, though.
Depending on the type of fabric involved, you can often use the same techniques to remove both a screen-printed design and a heat transfer design.
7 Effective Ways of Removing Screen Printing from Clothes
You can remove screen printing designs in several effective ways depending on how large the design is, what kind of fabric it is printed on, and how much time and effort you are willing to put into the process!
You may want to learn these techniques because you do screen printing yourself, and you want to clean up smudges or errors in the designs. Or maybe you enjoy rescuing second-hand clothing and cleaning away old logos or unattractive designs from the items you purchase. There are many reasons you might want to know how to get rid of an unwanted design!
As a piece of general advice, you should always consider safety first while trying any of these techniques. Wear gloves if you plan to work with strong chemicals, open a window, and protect your work surface with a piece of plastic sheeting.
Also, keep in mind that you should avoid exposing the design to hot water or heat. Heat will set the design permanently. (There is one exception to this rule, as you will see in the “iron-and-peel” method later).
Here are seven easy ways to remove screen printing from your clothing.
1. Acetone or Nail Polish Remover
 Nail polish remover contains a chemical called acetone, which can dissolve even old and cracked ink designs. This method is by far the most popular and is often very effective. Plus, many of you probably have a bottle of nail polish remover in the cabinet under your bathroom sink, so it’s a convenient method to try first.
Of course, you can also purchase acetone, though please follow proper safety procedures when working with either of these strong solvents.
First, determine what kind of fabric your design is printed on. If the fabric is more than 50% polyester, skip this method and scroll down to the section on polyester for some special tips for dealing with synthetic fabrics.
If your fabric is mostly cotton or another tough fabric like denim, you can safely try any of these methods.
Second, if your design is newly printed, try washing the item in cold water first, which could loosen the ink.
Next, soak a cotton ball in nail polish remover and dab an unobtrusive area of the design gently. This is a good way to make sure the chemical won’t harm the fabric.
Assuming the nail polish remover didn’t damage the fabric, keep going! Rub the cotton ball over more of the design. Let it sit just a moment, and then try to peel away the design.
Once the design is gone, you will want to wash the t-shirt or fabric item again to get rid of the nail polish remover and any remaining flecks of ink.
2. Spotting Fluid
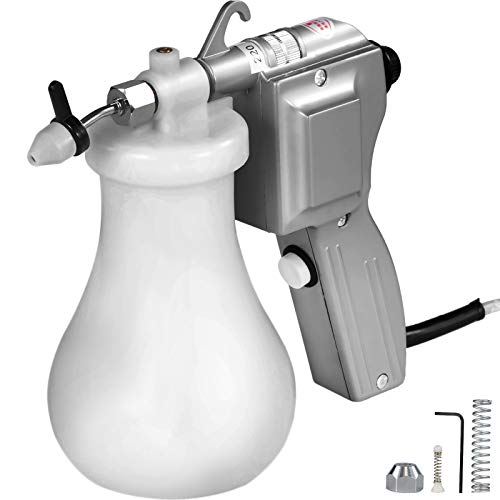 You can buy spot-removal guns at a wide range of prices and effectiveness. Some use air compressors and some work more like the cheap water pistols you might hand out at a kid’s birthday party.
Either way, the general idea is to give you a precise way to remove small spots in your design. You will want to make sure you aim the gun at the inked design because the spot-removing liquid will damage the plain fabric.
These guns use both pressure and a chemical solvent to force the ink to dissolve and soak through the backside of the fabric, so make sure you have an old towel or other scrap material beneath the screen-printed surface to soak up the escaping ink.
That said, this process is maybe the easiest to try. All you have to do is fill the gun with the spot-removing liquid, aim the gun at the error in the design, and fire!
Of course, do wash your fabric item after you’re done to remove the chemical solvent.
The downside of this method is that you have to purchase the gun and the special liquid. It would cost a lot to remove large designs using this method, so you probably want to use it only on small errors.
3. Plastisol Remover
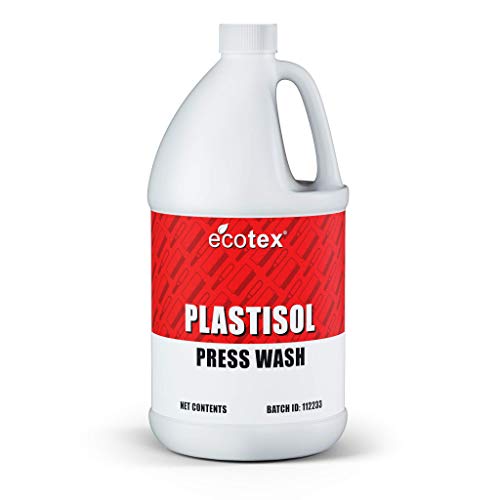 Plastisol is the most popular type of ink used in screen printing, and you can buy special ink removers that work effectively to remove this ink from the fabric.
This stuff is strong, so please work in a well-ventilated area and wear gloves!
To try this method, soak a soft cloth in the remover and lay it over the design. Let this sit for thirty minutes.
Next, use a soft brush to clear away the flaking bits of the design.
Use a soft cloth to wipe away any remaining plastisol remover.
Finally, wash your item in a regular washing machine cycle with detergent. You don’t want to wear the garment while it still smells like strong chemicals!
You might also have luck using rubbing alcohol or mineral spirits, though those techniques work less consistently.
4. Iron and Peel
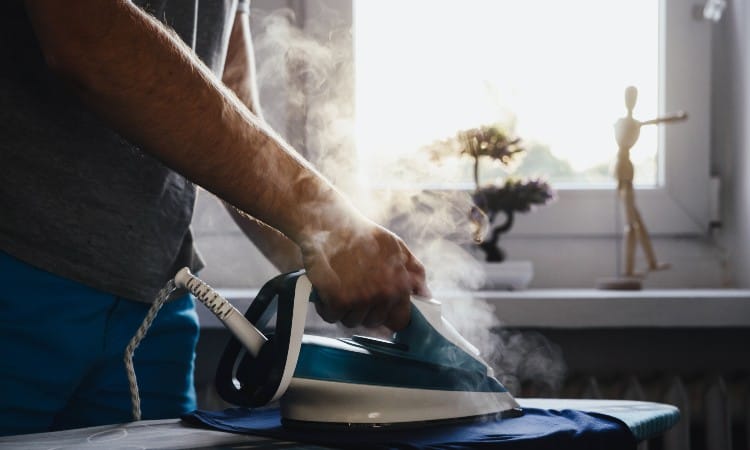
This technique uses iron to melt the design onto a paper bag, making it easy to peel away the remaining ink.
Usually, you will want to avoid applying heat to any design you want to remove, as it can make it harder to get rid of the ink. However, this method is the exception to the rule.
Find a large paper bag, like the kind you can get at grocery stores. Look at the bag and notice that one side is slightly shinier than the other. Lay the shinier side of the bag against the screen print design you want to remove.
Next, set your iron to a low setting without steam. Then run the iron back and forth over the paper bag several times. Hopefully, the heat will encourage the design to stick to the paper bag, peeling it away from the fabric!
If some of the design remains on the cloth, you can use your fingernails or a plastic scraper to scrape away the rest of the ink.
5. Fade with Washing
While this is not a quick fix, it is true that all designs do fade over time, especially after enough washings.
Generally speaking, the average design will remain pristine through about fifty washes, especially if you turn the garment inside out before washing it. Of course, if your goal is to get rid of the design, keep it right side out!
The danger of this method is that it may fade the color of the shirt as well as fading the inked design.
6. Coldwater Rinse While Printing
You can often remove fresh ink with a cold water rinse. This method usually only works on brand-new designs. If you do your own screen printing, this will help you rescue any slightly damaged items as you work!
The minute you notice an error in your design, run the item through a cold rinse in your washing machine. Alternatively, you can try rinsing in cold water by hand.
Either way, don’t use warm water! Heat will set the ink.
If the cold rinse worked, you can then proceed to try a warm rinse and then let the item air dry.
7. Sugar Scrub
![]()
![]()
You can also use sugar as a way to gently abrade screen print designs. This method works best on fresh designs, though you may find it works on small areas of an older design as well.
First, try the cold water rinse and see if that works. If a bit of the design remains, measure a tablespoon of regular sugar onto the design. Then use your hand or a soft cloth to gently rub the design with the sugar.
Of course, you will want to wash the item again to get all the sticky sugar out when you are done!
How to Remove Screen Printing From a Shirt
You can try any of the seven methods described above to remove screen printing from a shirt, but here are a few other tips to consider as well.
First, check the manufacturer’s label inside the shirt to determine what fabric it is made of. Some t-shirts have a pure cotton composition, while many others feature a blend of cotton and polyester. If your shirt contains more than 50% polyester, you probably want to try the dish detergent method described in the section on removing screen printing from polyester later in this article.
As a second t-shirt tip, make sure you have a buffer between the front and back of the shirt. You can use a piece of thick cardboard or an old towel inserted between the layers. This will prevent any ink from soaking through to the back of the shirt.
How to Remove Screen Print from a Jersey
Usually, the nail polish removal method works quite well to remove old lettering from a jersey.
Soak a cotton ball in nail polish remover and gently rub it onto the design. Use a soft brush or cloth to rub away the flaking letters.
You can also try applying the nail polish remover to the inside of the material rather than directly on the design. Allow it to sit for a moment and then gently peel away the old lettering.
This method often works on heat-set vinyl lettering, as well!
How to Remove Print from Denim
One way to remove screen printing from denim is to shock it in a cold wash followed by a hot dryer cycle. After this treatment, try to peel away the old design.
You may also find success with any of the seven methods described earlier.
That said, if your goal is simply to hide the old design, you might find it easier to sew on an embroidered patch over the offending design. You could also try heat-setting a new vinyl design over the old print.
How to Remove Print From a Hoodie

You can usually remove a screen print design from a hoodie using the nail polish remover method described earlier. Here are a few additional suggestions for working with hoodies.
Make sure you insert a buffer inside the hoodie before you begin. A thick piece of cardboard works well. (Otherwise, you will just cause the ink to soak through onto the back of the hoodie).
Next, soak a cotton ball in nail polish remover and rub it gently over the printed design.
Use a soft cloth or brush to peel away the wet design.
Finally, wash the hoodie in a regular wash cycle with detergent to remove the nail polish remover.
Lots of hoodies these days contain synthetic fibers in the fabric. Because of this, nail polish remover might damage the material. It’s a good idea to test the remover on a small, hidden corner of the hoodie before you begin.
How to Remove Screen Printing from Polyester
Speaking of synthetic fabric, your best bet for removing designs from polyester is to apply dish detergent and a stiff brush. You probably know that many common items, like t-shirts, hoodies, and shoulder bags, contain a large amount of polyester these days because this fabric is so affordable.
This synthetic fabric is made out of plastic and requires special treatment when removing printed designs. Polyester probably will not react well to chemical solvents like spot removers. It can also melt under high heat, so don’t try the iron-and-peel method on a polyester shirt!
Your best chance for removing a design from a polyester item is to wash it in warm water and then squirt a dot of dish detergent onto the design while it is still damp. Use a stiff brush to scrub at the design.
If it begins to flake away, the method is working! Keep going until all of the ink is scraped away.
If you try the dish detergent and nothing happens, you may want to try out the acetone or other methods described earlier. However, be aware that these chemicals may damage the polyester fabric.
How to Get Screen Print off Nylon
WD40 or iron can both remove screen printing from nylon. Nylon is another synthetic fabric that requires special treatment to remove printed designs without damaging the material. The good news is, there’s an easy fix that you probably already own!
To remove an unwanted design from an item made of nylon, find yourself a can of WD40. Spray this liberally over the design and let it sit for a moment.
Next, rub the design briskly with an old towel. Ideally, the design will dissolve, and the towel will wipe it away!
WD40 is mostly a solvent and will remove ink from many surfaces, including metal and hard plastic, with good success.
You can also try the iron-and-peel method on nylon fabric, though be very careful not to let the iron rest directly on the nylon fabric. It will melt under high heat.
How to Remove Logos From Clothing
You can remove logos from clothing quite easily by rubbing a cotton ball dipped in nail polish remover over the printed logo. You will then need to peel away the remaining ink using your fingernails or a gentle plastic scraper.
Keep in mind, though, that the clothing might not look pristine after the logo is gone. The fabric where the logo used to be might be brighter and newer-looking than the rest of the shirt. The nail polish remover might also cause the fabric to warp slightly.
How to Clean Screen Printing Residue
If you tried one of the methods described here, but a bit of ink residue remains on the fabric, you may want to try either a cold rinse or a final sugar scrub before giving up.
If you’re working with a new print and have not yet set the design, try a quick cold wash to see if the unwanted ink will peel away.
If that doesn’t remove the residue, or if the design is old, try the sugar scrub mentioned earlier.
Gently rubbing a spoonful or two of sugar over the design will abrade the remaining ink, loosening it from the fibers of the fabric and allowing you to rub it away with a soft cloth or your hand.
You should follow this technique with a regular washing machine cycle to rinse away the sugar.
Other Tips
If all of the methods described above seem like too much work to you, here are a few other thoughts to consider.
One key idea to keep in mind is that small errors are more easily repaired than big mistakes. It will take a lot of spot remover to get rid of a design covering the whole front of a hoodie or t-shirt, for example. Do you really want to buy that much remover or spend that long scraping away at the design?
You may want to reserve your efforts for small splotches that you can dab away with a cotton ball and some nail polish remover.
Secondly, how much time is the t-shirt or hoodie worth? You might want to scrap the ruined item and just start over. Or, if you don’t like the idea of waste, save the garment for cozy wear-around-the-house moments, and make a new one to wear in public! Of course, you could also donate the damaged item or give it to your kids to wear as pajamas!
Alternatively, if removing the design will take too long, you might consider placing a new design over the damaged design. This works well with heat transfers–you may have luck sealing a vinyl design over an old screenprint design.
Finally, if you screen-print professionally, it’s probably cheaper to buy new shirts or hoodies and reprint than remove all the damaged prints from a bulk batch that went wrong. Seriously, think about how long it will take to remove the damaged print from ten, twenty, or even a hundred t-shirts!
Conclusion
You can remove screen printing from clothing using several effective methods. Nail polish remover rubbed onto the design with a cotton ball works well. Abrading the design with a handful of sugar can also successfully remove a printed design.
You can also purchase professional tools like a spot-removal gun to apply pressure and chemicals that will dissolve a design out of the fabric.
Have you tried any of the seven techniques listed here on a screen printed design? Which one did you find most effective? Leave a comment below to let us know!