How many times have you thrown away a perfectly good jacket or pair of pants because the zipper came off or broke? Maybe you even spent several hours trying to wiggle those stubborn teeth back together, only to finally give up. The good news is that you can learn how to put a zipper back on using five simple, easy methods!
The best way to put a zipper back on is to use a pair of pliers or a fork to remove the stopper at the bottom and reinsert the teeth into the pull. Depending on the damage to the zipper, you can also use a sewing machine or glue to reattach the zipper. In some cases, you may simply need to replace the zipper pull to fix the problem.
In this article, you will learn five methods for fixing a broken zipper. You will discover how to put a zipper back on clothing such as a dress, pants, and jeans. Finally, you will get tips for how to fix a zipper that came off one side.
Quick Navigation
Can You Fix a Zipper That Fell Off?
You can almost always fix a zipper that fell off, but this does depend on the type of damage to the garment. If the zipper pull came off one or both sides, or if the fabric has ripped away, you can quite easily fix the damage and repair the zipper. If the teeth bent or broke off, you may need to replace the zipper.
But first, it might help to quickly understand the parts of a zipper. From top to bottom, several key components of this popular fastener keep it functioning smoothly.
At the very top of your zipper, you will notice an extra-large “tooth” often made of metal or plastic that caps off the teeth. This piece is called a top stopper, and it halts the pull when you slide the zipper all the way closed.
Next, you probably already know that the ridged metal or plastic rectangles running down the inside of the zipper are called teeth. These will notch inside each other, creating a smooth, closed line, when you zip the zipper shut. When meshed together, these teeth are technically called a chain.
The fabric portion of the zipper outside the teeth is called the tape. In some cases, the fabric tape may tear off a garment or bag, so you may need to understand how to repair the tape as well as the zipper itself.
At the very bottom of the zipper, the last two “teeth” will once again have a larger size. These plastic or metal shapes are called the bottom stoppers and should prevent the pull from falling off the bottom of the tape!
Finally, you have the pull and the slider. The slider is the portion of the pull that actually rests on top of the teeth. The pull is the small tab you tug on to open or close the zipper.
Once in a while, you might come across a zipper with a double slider with two pulls or a two-way separator. But most zippers have a basic closed-end structure that allows you to pull the slider up to close the teeth and down to open the teeth.
How to Put a Zipper Back On: 5 Methods
You can put a zipper back on in most cases using simple tools like a dinner fork or a pair of pliers. For some kinds of damage, you may need a sewing machine or strong glue instead.
This may seem impossible after learning about all the carefully fitted and moving parts of a basic zipper! You may find yourself wondering, how do you reattach a zipper when something goes wrong with its basic components?
All you need to do is assess the type of damage and then pick one of these five simple, easy repair methods to try!
1. With a Fork
Since pretty much everyone has a fork or two at home, this method is one of the most popular ways of fixing a broken zipper.
You can use the fork method if the pull has come off one or both sides of the zipper. If you have bent or broken teeth or the tape has ripped away from the fabric of your clothing, you will need to try a different method.
To get the pull back on the zipper:
- Find a normal-sized dinner fork.
- Insert the zipper pull on top of the middle prongs of the fork so that those two prongs fit inside the empty space inside the slider.
- Next, carefully align the bottom stopper of the zipper over the left and right-hand prongs of the fork.
- Slowly slide the stopper up the prongs of the fork and onto the zipper teeth.
- You should start to see the teeth meshing together and closing.
- Draw the pull up the zipper, zipping it shut!
2. With Pliers
If you have a few basic tools at home, such as a pair of pliers, you can also use this simple tool to fix many broken zippers.
The basic concept of using pliers to fix a zipper does involve tearing away the bottom stopper, though, so you may have to purchase or make new stoppers if you try this method.
Also, please note that this method works only if the pull and slider have come off one or both sides of the teeth. If you have torn fabric or the fabric tape has torn away, you will need to try a different technique that you can find later in this section.
To fix a zipper with pliers:
- First, use your pliers to remove the bottom stoppers and teeth from the zipper. You will need to pull off enough teeth to reveal the bottom two or three inches of the tape, depending on the size of your pull and slider.
- Ease the zipper pull onto this exposed section of the fabric. If you started with a closed zipper, place the pull on right-side-up, but if you have an open zipper, place the pull on upside down.
- Next, hold the teeth taunt in one hand and slide the pull up onto the teeth from the fabric using your other hand.
- Try pulling the slider up and down the zipper chain several times to make sure the teeth will mesh together properly.
- Finally, you will have to repair the bottom of the zipper by putting on new stoppers and squeezing them closed with your pliers. This will keep the slider and pull from falling off again! You can usually find these components at a crafting store, or you can order them online from places such as Amazon or Etsy.
If you want to get really crafty, you can also add a drop of super glue to the ends of the zipper teeth to replace the removed stopper. But you will want to perform this operation carefully, so you do not accidentally glue the zipper shut for good!
3. With a Sewing Machine
If you have access to a sewing machine, you can easily fix some types of broken zippers in just a few minutes.
When do you need to sew a zipper? If you see dangling threads or a gaping hole between the zipper tape and the fabric of your garment, you will need to sew the tape back into place.
You possibly could perform the necessary sewing by hand with a needle and thread, but you do have to stitch through some thick material. This means you will find the task much easier with a sewing machine.
You can also use a modified form of this technique to replace a broken zipper with a new zipper if your find lots of broken or bent teeth that you can’t easily repair.
To repair a zipper with a sewing machine:
- First, use sewing pins or quilting clips to put the zipper tape back on the garment’s fabric. Try to align the loose potion of the tape in a straight line with the part of the zipper that remains attached to the clothing.
- Set up your sewing machine with thread that matches the garment and a zipper foot. A zipper presser foot has one open side that allows the needle to stitch close to the edge of the metal teeth.
- Carefully insert the garment under the needle to place the presser foot just above the pinned section of the zipper tape.
- Lower the presser foot and use the handwheel to put the needle down.
- Sew a straight line from the remaining stitches in the tape, down the torn-out portion, and connect back up with the remaining stitching in the tape below the gap.
- Neatly clip thread ends.
- Slide the pull up and down to ensure the repaired zipper will work!
You can use a slightly more advanced version of this method if you need to entirely replace a zipper, too. For that technique, you will first need to rip out the damaged zipper using a seam ripper. Then pin a new zipper into place and stitch down it using a zipper foot just as you did in the previous method.
You will need to sew across the bottom of the zipper to finish it off. This acts as a bottom stopper and prevents the pull from sliding off!
4. With Glue
In some cases, you can use glue to put a loose zipper back where it belongs. You may want to consider this method if your zipper has torn away from a material you can’t easily sew, such as a suitcase or a pair of boots.
To glue a torn zipper back into place:
- Figure out where the torn-away portion of the zipper should lie. If a large portion of the tape has ripped free, you may want to draw a chalk line on the boot or bag to indicate where to place the zipper.
- Next, draw a thin line of super glue on the item where you plan to place the loose zipper tape.
- Carefully smooth the tape (the fabric portion of the zipper) onto the glue. Make sure you do not get glue on the teeth, or you may never get it to close properly again!
- Use binder clips or small woodworking clamps to hold the zipper firmly in place as the glue dries. Follow the instructions on the glue bottle to find out how long to let the zipper sit.
- Finally, remove the clips and try zipping and unzipping to see if your fix worked!
5. Replace Zipper Pull
Replacing a zipper pull can also sometimes rescue a piece of clothing. If you examine the broken zipper and discover that all the teeth look good, but the slider and pull have disappeared, all you need to do is buy a new pull and reinsert it on the teeth!
You can buy zipper pulls quite cheaply online or at most sewing and craft stores such as Joann Fabric and Michaels. You can also buy affordable zipper repair kits that will include these components and sometimes come with handy tools such as a pair of pliers as well!
On rare occasions, you might also have a damaged pull in which the slider has gotten smashed and can’t go up and down the teeth. In this case, you will also find it easiest to replace the pull with a new one that works smoothly.
To replace a zipper pull, you can use either the fork or plier method. The trick is that you have to get the new pull past the stop at the top of the zipper. Using the fork method may give you the best result here, as you do not have to pull out any of the teeth for this method!
How Do You Reattach a Zipper That Came Off One Side?
You can fix a zipper that came off one side by using pliers.
For this method, you will want a small pair of pliers, preferably ones with a flat grip like chain-nose pliers.
- To get started, locate the slider beneath the pull. This small metal piece should have U-shaped grips that keep it locked onto the teeth.
- Use the pliers to carefully unbend that U shape on the free side of the slider. Unbend the side of the slider that is still attached to the teeth as well.
- Next, fix the unbent slider by using the pliers to press the U shape back into place on both sides.
- Remove the stops at the top of the zipper. You may need larger pliers for that task.
- Ease the slider onto fabric and then back onto the teeth. You may need to use the fork method if this gets difficult.
- Replace the stops at the top of the zipper.
How to Put a Zipper Back On Clothing
You can almost always use one of the five simple methods described in this article to put a zipper back in clothing. That said, you may sometimes encounter special situations depending on the type of clothing in question.
On a Dress
One of the difficulties of fixing a broken zipper in a dress is that you may have to deal with either a highly visible or even an invisible zipper. Plus, you probably can’t wear the dress until you fix the closure!
The most common problems with dress zippers include the pull tab falling off or the seams ripping.
For a missing pull tab:
- Try looping a paper clip into the slider in place of the pull. This will work in a pinch!
- If this does not work or the slider has also fallen off the zipper, buy a new pull. It will come with instructions, but you can also use the fork method to get it in place.
- If this happens on an invisible zipper with extra-small teeth, you may need to use small jewelry pliers and employ the plier method to get the pull into place.
For a ripped seam:
If the zipper tape has ripped away from the fabric of the dress, you will need to reattach the tape using the sewing machine method described earlier in this article. However, on a dress, you may want to take a couple of additional steps to avoid having an obvious patch job visible on the outside of the garment.
This technique does take a little bit more work, but it is the method used by many couture designers to create beautifully set zippers!
- Use a seam ripper to carefully remove the entire zipper from the dress. Zip up and down several times to make sure everything still works. Remove any loose threads from the tape.
- Next, use a basting stitch on your machine to temporarily sew shut the seam where the zipper goes. This gives a straight line to reattach the zipper onto.
- With the zipper unzipped, use sewing pins to attach one side just to the seam allowance on one side of the seam you just basted together. Make sure you align the open teeth to lie parallel to the basted seam, almost but not quite touching it.
- Use the zipper presser foot to sew the pinned tape onto the seam allowance on one side of the zipper.
- Repeat this method to sew the other side of the zipper tape onto the other side of the seam allowance.
- Gently remove your basting stitches using a seam ripper or small embroidery scissors.
- Use a needle and thread that matches the dress to hand-sew the tape and seam allowance so that it lies flat against the dress. These stitches will go through to the outside of the dress, so make them tiny and invisible! You will also want to set a few stitches across the bottom of the zipper at this point.
- Open and close the zipper to make sure everything closes up properly!
On a Jacket
On a jacket, you often have more flexibility about how or even if you will fix a zipper. For example, if you rarely wear your jacket closed, do you even care if its zipper is broken?
If you need your jacket closed to keep you warm, you may need to try a couple of different methods to get it working again.
- If the zipper has all its parts but won’t move easily, try rubbing a little zipper wax or petroleum jelly over the teeth. You may find that Windex or lip gloss also works for this trick.
- If the pull tab fell off, but you still have the slider in place, try attaching a small keyring in place of the pull! This can look funky as well as fix the problem.
- If the whole slider and pull have disappeared, use the fork or plier method to insert a new pull. These only cost a few dollars at most craft supply stores.
- Another really common issue with a jacket and coat zipper is that they can get caught in the fabric of the garment. In this case, carefully pry away the caught fabric by hand. Make sure no loose hair or grime has adhered to the teeth, and then try re-zipping the jacket.
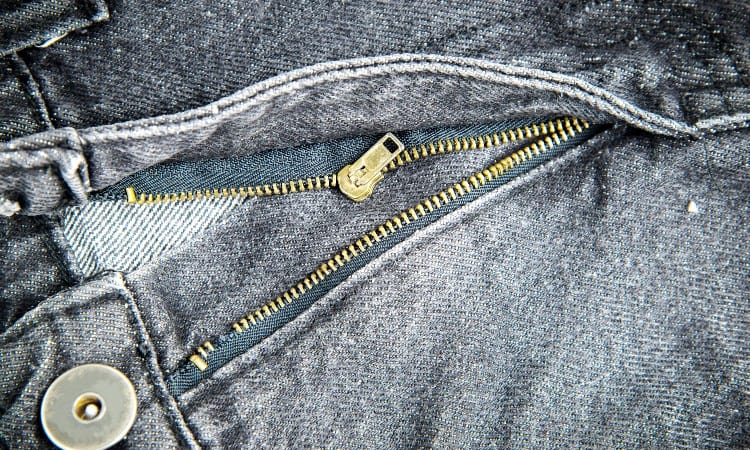
Jeans
One of the most common zipper problems you may find with jeans is that the teeth won’t close even if you pull the tab up and down several times. Since you need the fly on your jeans zipped up, try these tricks to fix the issue!
- Sometimes you see the teeth bowing out from each other, not engaged. This often means that the teeth have worn down and do not mesh together when running the slider over them. To fix this, try rubbing the teeth with a bar of soap.
- Alternatively, you may need to use pliers to take off the slider and re-bend the U-shaped pieces of metal that hold the slider onto the teeth. Bend them back into place over the teeth and try zipping. You may have to repeat this several times to get the right closure on the slider so that it engages the teeth again.
- This does not often happen with jeans, but if the tape does rip and you can see loose stitching, consider taking your jeans to a tailor. Getting a zipper fixed will probably only cost $10-$15. Sewing jeans yourself gets tricky because most sewing machines cannot handle the layers of heavy fabric.
Pants
Depending on the type of damage, you may need to use any of the five methods described in this article to fix a broken zipper in your pants.
- If the pull has come off one or both sides of the zipper, try the fork method to get it realigned.
- If the zipper tape has ripped away from the fabric of the pants, use a sewing machine to fix it.
- If the zipper pull does not stay up because you have an older, much-used zipper, you can try this temporary fix: insert a round key ring into the pull. Then loop the metal ring over the button of your pants. Or you can try the same trick, but use a small rubber band instead for a slightly less obvious solution.
On a Lunchbox or Pencil Case
The easiest way to fix a zipper that has broken off a lunchbox or pencil case is to use the glue method described earlier in this article.
It gets tricky to sew on three-dimensional objects like bags and cases, so fixing the zipper with a sewing machine may not work.
Instead, use either fabric glue or super glue to reattach the zipper tape to the edge it tore away from. You may also want to consider inserting an additional piece of fabric inside the bag on top of the edge of the tape and gluing that in place as well. This will provide extra support for the zipper tape and hopefully prevent it from tearing away again!
Conclusion
Next time your zipper will not zip up, don’t panic because you can usually put a zipper back on when things go wrong. Simple techniques such as the plier, fork, sewing, or gluing methods will often do the trick. Sometimes you may need a replacement part such as a slider or pull, which you can buy cheaply from most craft stores.
In some cases, if you do not want your repair to look obvious, you may need to put in a little more work, such as when you have to stitch a zipper back into a dress using a couture hand-sewing technique. If you find yourself in an emergency situation, you can use a key ring or rubber band to hold your zipper up until you can fix it for real!