Do you remember begging your mom to get your latest badges ironed onto your Girl Scout sash or Boyscout uniform before you went on an important outing? These days, iron-on patches have all kinds of uses beyond the merit badges you probably remember from your childhood! But if you want to use a patch to spruce up your jeans, jacket, or shoes, you will need to know how to iron on patches.
The best way to apply an iron-on patch is to use an iron set to high heat and a pressing cloth to protect the fabric. Most fabrics like cotton and polyester can work well with iron-on patches, but heat-sensitive materials like nylon cannot. Using a measuring tape or sewing pins to secure the patch in the correct spot before ironing will also help give good results.
In this article, you will find out what makes iron-on patches stick. You will discover eight simple methods for attaching an iron-on patch. Finally, you will learn key tips like how long to hold the iron down as you work!
Quick Navigation
Can You Just Iron On Patches?
Yes, you can just iron on patches! Most embroidered badges come with a thin plastic backing coated in a special glue that activates and melts when it gets hot. When you use an iron to activate the glue, you will thoroughly seal the patch onto the fabric of your choice.
A long time ago, hand sewers would stitch embroidered patches such as military rankings or Girl Sout or Boy Scout badges. Today, the invention of computerized embroidery machines means that you can quickly and easily make patches with pretty much any design. If you can digitize the image in a computer graphic program, you can sew it on a fancy embroidery machine!
You can find every kind of image imaginable in an embroidered badge. If you like pizza, you can buy cute pizza emoji patches. If you want to promote your favorite band, you can find or custom-order the band logo and sew it onto your jacket or backpack!
Though a lot of complex computer design makes embroidered badges, the basic steps are quite simple. First, the computer sends the design file to the embroidery machine, which stitches many layers of stitching onto a fabric backing. A thin layer of plastic seals over the back of the fabric to give the stitching more security, and finally, the adhesive layer coats the plastic.
One of the biggest questions you need to settle before you begin is what amount of heat to use. Embroidered patches have a thick layer of thread and that thin layer of plastic resting on top of the adhesive, so you need a serious amount of heat to get through those layers and melt the glue! On the other hand, you do not want to scorch the thread or melt the plastic backing, as this could damage your garment or ruin the patch.
The ideal heat for applying patches is 270℉. Here’s the catch, though: most common household irons do not come with digital temperature settings. To figure this out, you can use a frying pan thermometer to test the temperature of your iron. Or you can read the owner’s manual, which should tell you exactly what temperature the settings on your iron will reach.
For example, the “cotton” setting on most irons reaches a temperature of 275℉.
You can also consider using the type of hair straightener that comes with a digital temperature reading or a heat press if you have one!
Another thing you need to check before beginning is the heat sensitivity of the fabric in your garment. You can usually find this information on the manufacturer’s label inside the garment or item.
In general, a fabric made out of cotton, like denim or jersey knit, can easily handle a 270℉ heat. But some other kinds of fabric like nylon, high-performance athletic materials, or leather will melt or scorch at this temperature!
Finally, how long should you hold the iron onto the patch? Most of the time, you should receive this information when you buy the patch, as the timing will vary depending on the size and thickness of each badge. As a general rule of thumb, you will generally press your iron down for at least 30 seconds to thoroughly secure it.
That said, you can find some helpful general guidance for how to iron a patch in eight different ways in the next section!
How to Iron-On Patches: 9 Methods
You can iron on a patch in just a few simple steps, but the method may vary a little depending on what kind of badge you choose and what object you want to apply it onto, such as a shirt or a pair of shoes.
The key elements remain the same in every process, though. You need to make sure your fabric can handle high heat. You have to carefully align the patch to make sure you do not accidentally put it on crookedly. And you need to get the timing right so that the heat can activate the glue on the back of the badge.
1. On a Shirt
Placing an embroidered patch on a shirt, jacket, or hoodie is super easy because you have lots of nice flat fabric surfaces to choose from!
Of course, you still need to find that manufacturer’s label inside the shirt and make sure it is safe to use an iron on the material. You would not want to try to iron a badge onto a silk shirt, for example. But a cotton t-shirt, denim jacket, or polyester hoodie will work great!
- Set your iron, straightener, or heat press to 270℉. For most home irons, this temperature will be one of the hottest possible settings and is usually described as a “cotton” setting.
- Next, figure out exactly where you want to place the patch. You may find it helpful to use a measuring tape and tailor’s chalk to find just the right spot. For instance, if you want the badge in the center back of your jacket, you need to measure equal distances from the jacket’s side seam, so you do not end up with a slanted patch!
- Once you have marked the spot on the fabric, remove the patch and pre-press the spot where you plan to place it. This will remove any wrinkles, and it will also preheat the fabric.
- Place the patch back in the desired spot. In some cases, you may want to use sewing pins or binder clips to hold it in place, but make sure you take them out before you iron that section of the patch!
- Smooth a pressing cloth over the patch and surrounding fabric. If you do not have a real pressing cloth, you can use a thin tea towel or even a cotton pillowcase.
- Pressing time can vary from one patch to another. In general, though, you will hold a heat press down for 12 seconds and a regular iron down for 30 seconds to secure most patches. You will need to press down firmly on your iron as you do this. Do not sweep the iron from side to side–just press down in one spot for the allotted time.
- Finally, you want to iron the inside of the fabric as well. For most garments, you can do this by turning them inside out, locating the spot that has the patch on it, and pressing this spot for an additional 30 seconds.
2. With Parchment Paper
Some patch manufacturers suggest using silicone-coated parchment paper in place of a pressing cloth to protect your patch as you apply it. Parchment paper is cheap, highly effective, and has an excellent heat resistance, which is why bakers use it to line cookie sheets!
Please note that you should not place the paper between the patch and the fabric. The paper is not meant to stick the patch to your garment or item. Instead, it acts as a protective barrier between the patch and the iron.
Just use a piece of parchment paper instead of a pressing cloth, especially for more sensitive or delicate embroidered patches.
When you buy a patch, it should come with instructions that let you know whether or not you need to use parchment paper.
3. Sticker Patches
Tiny iron-on patches intended for decorating lapels, collars, phone cases, or hats are sometimes called sticker patches. They work the same as their larger counterparts, except that you may have to use a shorter pressing time because of the smaller size. Your sticker patch should come with instructions describing how to apply it.
As a pro tip, you should always read the product description carefully when making a patch purchase. Some sticker patches do not come with an adhesive backing. In this case, you cannot iron on the patch, meaning that you would have to sew it on or use fabric glue to stick it in place.
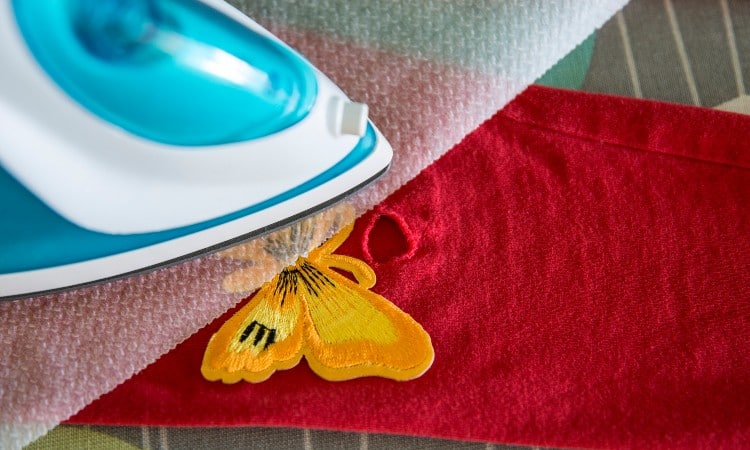
4. For Holes
One of the best ways to extend the lifetime of your clothing is to use iron-on patches to cover holes or damaged areas. You can buy hole-repair iron-on patches online or at most sewing or craft stores.
These patches will not have any embroidered designs. Instead, they are scraps of fabric with adhesive backing, intended to blend in with the original fabric of your garment as closely as possible.
- Start by finding an iron-on patch that matches the fabric of your garment. For instance, if you need to repair a hole in your jeans, try to find a patch that matches the blue, white, or black wash of your denim.
- You will also need a small piece of fabric or denim to go inside the hole on the reverse side of the fabric. Otherwise, when you apply the patch, it will also stick to the other side of the garment through the hole!
- Snip off any dangling threads around the hole in your garment, and iron the fabric around the hole to create a smooth, warm surface to place the patch onto.
- Cut out your repair patch in a circle or square that is at least half an inch bigger on all sides than the size of the hole.
- Lay the patch over the hole in the garment.
- Follow the instructions that came with the patch to set the heat on your iron and to determine pressing time. Generally speaking, you will need to press down on the patch for at least 30 seconds.
- Finally, turn your garment inside out so that you can access the fabric scrap you placed inside the hole. This may peel away easily, especially if the hole was small and not much of the adhesive backing touched this fabric scrap. If not, press on the scrap for another 30 seconds to seal it in place, trim the edges into rounded corners, and leave this in place!
5. For Work Clothes
Depending on the dress code where you work, you may want to keep a few tips in mind if you decide to apply any kind of adhesive patch to your work clothes.
- First, many business-casual garments use types of fabric that may melt or scorch when exposed to high heat. Make sure you read the care label inside your clothing before applying a patch. If the label says “dry clean only” or has a picture of iron with an X over it, you should not try to apply a patch.
- Second, you will want to make sure you won’t get in trouble for wearing patches to work! For example, you may get away with ironing cute matching strawberry emoji sticker patches onto the lapels of your dress shirt, but your boss might look sideways at a large hole-covering patch on the elbow of your suit jacket!
- If you need to fix a hole in your work clothes, make sure you repair as unobtrusive as possible. Use an iron-on patch that exactly matches the color of the garment, and try to cut the patch in as small a shape as possible while still covering the hole.
6. On Jeans
You can easily apply iron-on patches to jeans or denim jackets. Denim contains cotton fibers, which will stick well to the adhesive backing and resist any hot iron damage. This makes jeans an ideal choice for patches!
You can follow all the same basic steps for applying a patch to jeans. Preheat the denim, make sure you align the badge exactly where you want it and use a pressing cloth or parchment paper over the embroidered side to protect it as you iron.
The only difference is that you also need to put something inside the pant leg to protect the reverse side of the pants. You can use a piece of parchment paper, or even just a piece of cardboard stuck up inside the leg. Otherwise, you might end up gluing the pant leg shut!
7. On Leather
Can you iron a patch onto leather? Yes and no. You should never use heat on leather, but you can still use your iron to help you stick an embroidered badge to a leather surface!
- As the first step, you need to make sure you have a clean leather surface. You can use special leather cleaning products or a drop of dish soap in warm water sponged over the surface and then wiped away.
- Next, you have to find a craft or fabric glue intended for use on leather. You can always Google this, but you cal also usually track this down in the leatherworking section of an arts and crafts store.
- Draw a thin line of this glue around the edge of your patch, and then carefully apply it embroidered side up to the leather.
- Do not turn your iron on. Place the cool, flat plate of the iron on top of the patch.
- Leave this to sit for 12 hours.
Alternatively, you can use heat to iron the patch onto a fabric scrap and then sew it onto the leather using leather-working tools. This is a more permanent method for applying patches to leather.
8. On Shoes
Embroidered patches on canvas shoes give you a way to personalize your footwear in a unique way. You can easily adhere patches to many kinds of fabric shoes, but you need a couple of additional steps for these more rounded surfaces.
- Start by selecting where you want to place the patch on your shoes and marking this with chalk.
- Next, wad up handfuls of paper and stuff them firmly inside the shoes. You need to create a solid surface so that your iron can press against something. You can’t simply spread out the shoe on your ironing board like you would with a shirt!
- Put your patch where you want it.
- Place a pressing cloth over it.
- Set your iron to a high-heat setting such as the cotton setting and press it down for about 30 seconds. The patch may come with instructions specifying a different pressing time.
- Remove the pressing cloth and let the patch cool. Carefully tug at the edge of the patch to see if it holds firm.
- You cannot easily iron the patch from the inside of the shoe, so you may need to repeat steps 4-6 if the patch does not seem secure.
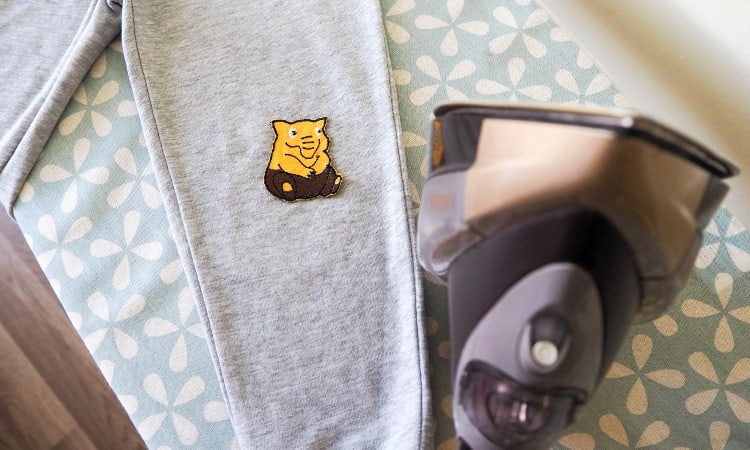
9. Without an Iron/With a Hair Straightener
If you have a flat iron or a hair straightener, you can sometimes use this device as a handy alternative to an iron! Many hair straighteners will tell you a digital temperature reading, which makes them easier to use for patches in some ways.
Plus, the double eating pads allow you to heat the front and back of the fabric at the same time, so you can more quickly complete the adhesion process.
The only downside to using a hair straightener is that it works best on small objects. You can use it to put patches on headbands, hats, or the cuffs or collar of a shirt. But the hinged straightening will not easily reach to the middle of a shirt or the knee of your jeans.
How to Iron on Patches on Polyester
You can iron-on patches on polyester, but you may need to use a slightly lower temperature on your iron and use a slightly longer pressing time to make up for this.
Synthetic fabric like polyester can melt or discolor when exposed to high heat. In fact, you probably have a lower setting on your iron that says “polyester” or “synthetic.”
That said, you can iron or use a heat press on polyester. You just need to use the right temperature. Alternatively, you can continue using the highest heat setting on your iron and place a thick piece of cotton fabric, such as a cotton t-shirt, between the iron and the patch as you work as an extra-thick pressing cloth.
Honestly, you find mixed opinions on whether or not you should apply iron-on patches to polyester. If you want to avoid any risk of damaging your garment, you may want to consider using fabric glue to hold the patch in place or just sewing it as a nice, permanent way of fixing it to the polyester without using any heat.
Do Iron-on Patches Come Off?
Iron-on patches use a fairly strong adhesive that will remain firmly in place if left undisturbed. However, friction, moisture, or constant movement could cause a patch to peel away.
If you wear a denim jacket covered in patches through a rainstorm, the patches may retain some moisture and slowly begin to curl up and peel away. If you put a patch on the knee of your jeans, the constant movement of just wearing the pants, such as walking, sitting down and standing up, could eventually wear away the adhesive.
How Long Do Iron on Patches Last
Iron-on patches will last different amounts of time depending on their placement and the type of material they are on. For example, if you attach a patch to your jacket and frequently slide the strap of a backpack or bag over the patch, it may rub off and eventually come away from the jacket. In some cases, very humid or damp weather could also cause your patches to peel away, especially from shoes or backpacks.
To avoid this, you may want to add a hand-sewn whipstitch around the edge of the patch after you finish ironing it. This will only take a few minutes and hold down the edges of the patch.
Very large or complicated patches also benefit from stitching, at least in a few key areas. Suppose you want to place a 12” patch shaped like a tree in the center back of your jacket. You can iron the tree badge into place, but it may prove tricky to adhere all the leaves and roots to the fabric at exactly the right amount of heat and pressure. You could stitch down any complex bits of the edge of the design just to make sure the edges do not come up later.
Also, iron-on patches can typically withstand occasional hand washing, but you should not put them in your washing machine.
The bottom line is that if you want your patch to stick on permanently, you may need to consider stitching it down as well as ironing it into place.
Do Iron on Patches Work on Denim?
Iron-on patches work very well on denim. Denim is made out of cotton, with nice soft fibers for the adhesive to stick to. Plus, this fabric can handle heat quite well, so you do not need to worry about scorching it as you press down with the iron!
You can use patches on denim as decoration or add extra support in places like the knees of jeans or the elbows of jackets. This will let you keep the garments in good shape for an extra-long time!
Where Can I Buy Iron on Patches?
You can buy iron-on patches almost anywhere, from Walmart to Etsy to custom online stores that will turn a photo of you and your dog into a patch if you pay them enough!
That said, craft stores or craft-focused sites like Etsy may give you the widest range of options. The relative accessibility of digital design programs and computerized embroidery machines means that many small business owners make embroidered patches these days, as well as big companies!
Is It Better to Sew or Iron on a Patch?
Whether or not it is better to sew or iron on a patch depends on many factors, including how roughly you need to use the garment or item. Ironing on a patch gives you quick and semi-secure results, while sewing on a patch takes more time but provides a more permanent hold.
If you want the patch on a backpack that you will use every day, rain or shine, you may want to sew the patch into place. If you plan to put a tiny patch onto a shirt, you will wear to work once or twice a year, and you can save yourself a lot of time and just iron it.
Conclusion
You can iron a patch onto most fabric surfaces by using heat and pressure to activate the adhesive backing on the patch. In most cases, you will want to use a temperature of 270℉ and a pressing time of around 30 seconds, though you should follow any specific instructions that came with the patch. You should always place either a pressing cloth or a piece of parchment paper between the iron and the patch as a protective measure.
Fabrics like cotton, denim, canvas, and polyester can handle this process quite easily. You should not use an iron to put a patch on heat-sensitive material like nylon or silk.