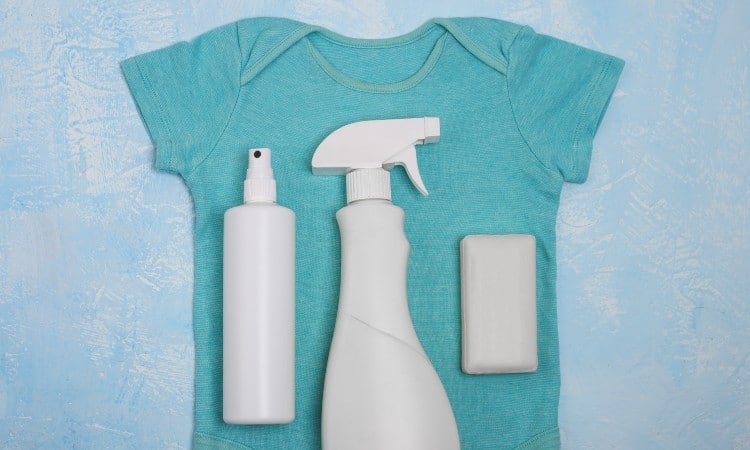
One of the easiest ways to freshen up your summer wardrobe is to upcycle a few of your t-shirts using spray bleach! You can easily create custom designs using nothing but bleach, water, and a stencil or some lace. Ready to learn how to DIY spray bleach a shirt?
One of the best ways to DIY spray bleach a shirt is to apply a mixture of bleach and water over a stencil. This bleaches the negative space around the stencil, creating a design on the shirt. Other popular methods include bleaching a portion of the shirt and then applying a sublimation print or a Cricut design to the bleached area.
In this article, you will learn how to safely apply spray bleach to your shirts. You will discover six simple methods for how to use spray bleach to decorate tees. Finally, you will find tips for how to bleach special kinds of shirts.
Quick Navigation
Can You Use Spray Bleach On Clothes?
You can use spray bleach on clothes safely by taking a few precautions like diluting the bleach in water. Pure chlorine bleach is so strong that it can eat through fabric fibers in some cases, so you do not want to expose your clothes to it!
You also have to keep a sharp eye on how long you leave the bleach on your clothes. In most cases, you do not want to leave spray bleach on clothes for more than five or ten minutes before rinsing it away.
While chlorine and oxygenated bleaches can clean clothes in your laundry when used appropriately, you need chlorine bleach for projects like decorating a t-shirt. Oxygenated bleaches are designed to clean and brighten clothing without removing color, but chlorine bleach will remove color even from black shirts!
Chlorine bleach contains sodium hypochlorite and water. In fact, the bleach you put in your laundry is very similar to the chlorine products used in swimming pools and drinking water, just at very different concentrations! This mixture has incredible disinfecting properties that can kill most types of bacteria.
Without getting into too much science, chlorine bleach also removes color from clothing by oxidizing the dye or breaking the bonds between carbon atoms in dye particles. This makes the molecules unable to absorb light, which in turn, makes them appear colorless! It is important to understand that chlorine bleach will literally remove the color from most surfaces it comes into contact with!
Chlorine bleach has many handy household uses, but you should always approach it with care. You should never mix it with anything except water, as it can create dangerous fumes. Also, make sure you work near a fan or open window, and wear gloves and eye protection, if possible.
How to DIY Spray Bleach Shirt: 6 Methods
One of the most fun ways to use spray bleach is to create custom designs on t-shirts! You can do this in several different ways, such as using a freezer paper stencil or creating a pale background for sublimation printing.
Before beginning any of these methods, make sure you have a freshly washed and ironed t-shirt to work with. Any dirt or wrinkles on the surface of the shirt will mess up your design!
1. Stencil Spray Bleach
One of the most popular ways to use spray bleach on a shirt is to apply it over a freezer-paper stencil. Freezer paper has a polyethylene coating that feels like very thin plastic. This melts when exposed to heat, temporarily sticking the paper to a cloth surface.
Please note that freezer paper and wax paper are not the same things! For this project, you want to use freezer paper.
- First, find a design you like. You may want to start with a fairly simple image for your first project! You can draw the outline of the design by hand on the freezer paper or download an image and print it onto the freezer paper using a laser printer. If you print the design, place the freezer paper shiny-side down so that the ink goes on the papery side.
- Cut out the outer edge of the design. For instance, if you want a triangle, cut along the outside edge of the triangle until you have a solid paper triangle ready to place on your shirt.
- Insert a thick section of cardboard inside the shirt. This will prevent the bleach from soaking through to any unwanted areas on the shirt.
- Set your iron to its lowest temperature and smoothly iron the freezer paper stencil in place. Make sure you place the shiny side down on the fabric.
- Measure one cup of bleach and one cup of water into a spray bottle. Seal the bottle and gently shake to mix the water and bleach.
- Take your shirt outside and set up a clean work area such as a tarp or picnic table. Spread the shirt, with cardboard inside, onto the surface.
- Set the spray bottle to misting, not squirting. This is the turn of the nozzle that shows lots of tiny holes instead of just one.
- Stand over your shirt so that you can aim the spray bottle down.
- Lightly mist around the edge of your stencil. Spritz gently so that you don’t soak the stencil or the shirt.
- Wait ten minutes to see if the bleach has discolored the shirt as you want. If the bleach seems too faint, you can spray again and then wait ten more minutes.
- After this, quickly take the shirt to a hose or faucet to rinse it under cold water. The stencil should peel away during the rinse.
- Let the shirt air dry, then wash it by itself with normal detergent.
2. Bleach Splatter Shirt
If you want more of a splattered look with rounder blobs instead of a fine, cloudy mist of spots on your shirt, try this method! You can use freezer paper for the stencil in this method as well, or you can use adhesive vinyl for a more advanced and intricate design.
- Start by finding or creating a design you like. Send the digital file to your electronic cutting machines such as a silhouette or Cricut. Make sure you use adhesive vinyl.
- Weed the extra portions of the vinyl away from the paper backing, leaving just the part of the design that you want.
- Peel up a corner of the design and align it on your shirt. Gently remove the backing while pressing the sticky side of the vinyl onto the shirt.
- Insert a section of cardboard inside the shirt, behind the vinyl stencil.
- Mix a 50/50 ratio of water and chlorine bleach in a spray bottle.
- Set the spray bottle in squirt mode, with just one, two, or three holes showing.
- Set up outside on a flat surface. Stand directly over your shirt with the spray bottle point down. This time, you can spray on the vinyl stencil as the bleach will not soak through! Use quick, short quirts to drop larger drops onto the shirt around the edge of the stencil.
- Wait ten minutes to see if you like the way the design looks. If not, you can squirt a bit more at this point.
- Rinse the shirt out and then carefully peel away the adhesive vinyl.
- Wash the shirt by itself in the laundry. Otherwise, you could get strong chlorine bleach on other clothing.
3. Cricut Spray Bleach Shirts
Another fun way to use a Cricut or cutting machine for your spray bleach shirts is to use HTV vinyl on top of a bleached area. Heat transfer vinyl will apply to the shirt permanently, unlike the sticky adhesive kind used in the previous method.
One of the great things about using a Cricut or Silhouette is that these products come with access to a digital design space you can use to create or edit the shape you want to cut out. This lets you make more intricate designs or fancy fonts if you want to use lettering.
- First, prep your digital design. For HTV designs, you need to mirror the image before sending the file to the cutting machine. This way, your design will not end up backward on the shirt!
- Next, create negative space around your design by weeding away the HTV that is not part of the image.
- Now you will want to move on to preparing your shirt. Make sure the shirt is clean and ironed to avoid any stains or wrinkles.
- Put a piece of thick cardboard inside the shirt, behind the spot you want to bleach.
- Take the shirt outside and place it on a clean surface like a tarp.
- Mix one cup of water with one cup of bleach in a spray bottle. Make sure you set the twisty nozzle to a multi-hole spray setting.
- Spritz a light sprinkle of bleach water over the section of the shirt you want to decorate. You don’t need to saturate the shirt, as the design looks cooler with tiny droplets of bleached fabric rather than one big splotch.
- Let the droplets sit for ten minutes. If the bleached area looks too faint, repeat this step.
- Rinse the shirt under cold water, and then launder it by itself in your washing machine and dryer.
- To apply the heat transfer vinyl, iron the shirt again to create a smooth surface. Then use either your iron or a heat press to attach the HTV according to the instructions on the vinyl packaging.
4. Spray Bleach for Sublimation
Spray bleach can also make a great background for sublimation prints. Actually, you could use spray bleach to create a high-contrast background for several kinds of printing methods if you wanted to!
Why would you want to spray bleach instead of simply printing straight onto the shirt? Well, most prints show up best against a light-colored or white shirt. If you want to print on a black or dark-colored shirt, you can use bleach to provide a contrast behind the lettering or printed picture.
You will need to use a polyester shirt for this method because sublimation printing uses heat to bond a special kind of dye with polyester fibers. You can also use a shirt with a blend of polyester and cotton in it for a more faded design.
- Prepare your design digitally using the software of your choice. You can download an image, upload a photo, or just use a fun font to create lettering.
- Print the design onto special sublimation transfer paper. If it’s easier, you can also skip this step by having a professional company print out the designs onto transfer paper and mail them to you.
- Next, go outside for the bleaching process.
- Prep your shirt by putting a piece of cardboard or a plastic bag inside it.
- For a polyester shirt, you may want to try using a stronger proportion of bleach, such as one and a half cups of bleach and half a cup of water. Some artists recommend using straight bleach, but try this at your own risk!
- Create a splattered or cloud-like image on the shirt by standing over the shirt and spraying downward at the fabric. Do not drench the shirt; just give the droplets time to soak in and do their work.
- Alternatively, if you want a particular shape, like a rectangle, to go behind a printed photo, you can cut out a frame from cardboard. Then just spray inside this frame to create a neatly outline shape with the bleach!
- As soon as the fabric turns white, take the shirt to your washing machine and run it through a hot cycle. Put it through the dryer as well to get it ready for printing.
- To apply the sublimation print on the transfer paper, you will need to use a heat press. Simply align the transfer paper over the bleached section on the shirt, and use the press to seal the ink into the fabric!
5. Spot Bleach
You can create a galaxy-like design on cotton shirts by using a spot bleach method. For this technique, you do need to use a black cotton shirt. You will also need some plastic bags and white fabric paint or acrylic paint.
- Start by lining the inside of the black shirt with plastic. You can use a small grocery bag for this quite easily.
- Next, mix a strong solution of bleach and water. You want about ¾ bleach to ¼ water in your spray bottle.
- Spray bleach at uneven distances over the whole surface of the shirt. Create some larger splashes of bleach and some lightly misted areas. Leave some black areas to create the illusion of a galaxy spinning against space!
- To make a bigger galaxy image, you can also take a small section of the shirt and twist it up into a spiral. Spray the twisted section a bit more heavily.
- Place the shirt in a nice sunny spot to dry.
- Once it feels dry to the touch, wash and dry the shirt as usual but do not include any other clothing in the washing machine.
- For a final decorative touch, you can add brighter white “stars” by using a paintbrush and some white fabric paint. Simply dip a small paintbrush into the white paint and flick the paint at the shirt. The small flecks of white will mix in with the bleached galaxy and look like stars!
6. Bleach Spray with Lace
You can apply spray bleach over lace as a variation of a stenciling technique to make a pretty design!
For this method, simply use a large piece of lace in place of a freezer paper stencil. You can use a piece of lace across the hem of the shirt to make a pretty border, or you can cut out a lace heart or other shape and use that as a stencil.
Then all you have to do is spray bleach over the lace!
As a pro tip, old lace tablecloths or curtains often work well for this method.
How Long Does it Take to Bleach a Shirt?
Bleaching a shirt can take just a few minutes or several hours, depending on the method you choose. In most cases, you will need to spend a little time creating your stencil design, whether you use freezer paper, vinyl or even just a piece of lace.
You also need to allow time to launder the shirt after applying bleach. This is a key step because if you do not rinse and wash the bleach, it can continue spreading through the shirt and even eat holes in the fabric!
Adding special prints, heat transfer vinyl, or fabric paint after the bleaching process will also add more time to the process.
That said, spraying the bleach onto the shirt only takes about ten minutes in most cases!
How to Spray Bleach a Flannel Shirt
You can spray bleach a flannel shirt using all the same methods you would try on a t-shirt, so long as the flannel is made out of cotton. Cotton fibers can more easily absorb bleach than synthetic fibers like polyester.
You can create a faded, vintage-style flannel shirt by applying a freezer paper stencil and spray-bleaching over the stencil. You can also spray bleach more heavily and then more lightly to create a faded ombre look on a flannel shirt.
You do have to keep in mind that your bleached design will not stand out as obviously from a flannel shirt that already has a plaid design woven into it. The bleach will add a retro faded look but will not stand out in bold contrast as it does on a knit t-shirt.
Where to Find Cool Designs for Bleach Spray Shirts
You can find designs to use as stencils for bleach spray shirts by searching online for free downloads, using a design program such as Adobe Illustrator or Cricut’s Design Space, or even drawing your own with a pencil!
Of course, if you want to use adhesive vinyl or heat transfer vinyl, you will need to work in software that is compatible with your electronic cutting machine. But if you want to make a freezer paper stencil, you can print out any design you want from the internet right onto the freezer paper and then use a pair of scissors to cut out the outline of the shape.
Best Spray Bottle for Bleaching Shirts
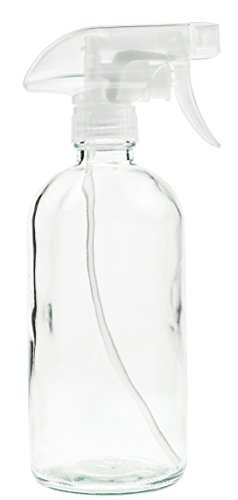 The best spray bottle for bleaching is a glass bottle with an adjustable nozzle. You can use a cheap plastic dollar store bottle if you don’t want to spend a lot of money, but they may squirt unevenly or drip onto your design.
If you plan to make a lot of bleach shirts, a glass bottle like this one offers you the best protection from the dangerous bleach, and a slightly more pricey bottle will also come with an adjustable nozzle that can mist, spritz, or spray, depending on the needs of your project!
The best shirts to use with spray bleach are cotton or cotton blends. You will want to select dark-colored shirts as this will create the strongest contrast with the bleached spots.
How to Bleach Shirts Without Getting Holes
You can bleach shirts without getting holes by using diluted bleach and rinsing the shirt in cold water after creating the design.
In most cases, you only need to let the bleach sit on the shirt for ten minutes to create your design. Then you can move on to rinsing and laundering the shirt, which will deactivate the bleach and set the design in place.
If you forget this step and leave wet bleach sitting in the shirt, it could potentially create small holes in the fabric. Chlorine bleach is quite strong!
Conclusion
You can use spray bleach to DIY unique designs on shirts by using freezer paper or vinyl stencils or spraying bleach over a piece of lace. You can also create a galaxy effect by using spots of bleach out of your spray bottle and then twisting the shirt for a whirling galaxy illusion. You can even use bleach to create a background for heat transfer vinyl or a sublimation print on a shirt!
You will need to use chlorine bleach diluted in water to create a contrasting, lighter design on the shirt. For everything but the sublimation print method, you will want to use a dark-colored or black cotton t-shirt. If you want to use a sublimation transfer, you will need to use a polyester shirt.