I love the look a beautiful handmade quilt can give any bedroom decor. However, the first time I sewed a quilt of my own, I was a bit intimidated by all the steps involved. In particular, finishing the quilt threw me for a bit of a loop and I found myself asking – what is quilt binding? Is it necessary for my quilt?
Quilt binding in quilting refers to two things. The first is when quilters finish or ‘bind off’ the edges of the quilt to give it a nice, clean look. The second refers to the fabric strips that are used to bind off the edges, which can be made at home or can be bought ready-made.
In this article, ‘quilt binding’ refers to the second option, the product used to finish the edges of a quilt. I’ll walk you through the different types of quilt binding available on the market and what you’ll need to know to properly bind off the edges of your quilt.
Quick Navigation
What is Quilt Binding?
Quilt binding refers to the strips of fabric that are used to border the edge of a finished quilt. These strips are usually folded over themselves twice, which allows you to encase the raw edges of the quilted fabric within the fold. The folded strips are then sewn into place, giving a clean look to the outer edges of your quilting project.
Quilt binding can be store-bought and usually comes in an array of solid color designs made of cotton or similar fabric. However, the binding can also be made homemade and is an excellent opportunity for quilters to customize the edges of their quilt. Many people choose to accent the edges of their project with a complimentary or even a contrasting color of fabric and can choose any width for the border that they desire.
Several options exist for what kind of quilt binding you use. These options include variations on how the binding is cut, such as lengthwise grain, cross-grain, and bias binding options. They also include variations on how often the binding has been folded, including single and double-fold options.
Quilt Binding Options
When it comes to quilt binding options, two features can vary from product to product that you will want to be aware of. The first variation to consider is the direction that the grain of the cloth goes in relation to the selvage of the fabric.
‘Selvage’ refers, of course, to the narrow strip or border that runs along the outer edge of the fabric, which often has a different texture or even holes marking the edges. There are three ways the grain can be positioned alongside the selvage – parallel, perpendicular, or diagonal. Each of these represents a different variety of binding.
The second feature that can vary from binding to binding is the number of times it has been folded on itself. Generally, bindings will be folded 1-2 times – making them either a single or double-fold variety.
1. Lengthwise Grain Binding Strips
In lengthwise grain binding strips, the grain of the fabric runs parallel to the selvage edge of the fabric. Because the grain runs in the same direction, there will be little to no stretch to the binding. This type of binding is best used in projects where you don’t want to have a lot of flexibility.
This means that lengthwise grain binding can work well for quilts with straight edges since it will help to reinforce them and won’t warp much, if at all. It is less recommended for quilts with curved edges or on other projects that may need to be able to move freely. For example, you would not want to use this type of binding on the hem of clothing since it will be too rigid.
2. Cross-Grain Binding Strips
Cross-grain binding strips, also known as ‘crosswise grain’ strips, have a grain that runs perpendicular to the selvage of your fabric. In other words, its grain goes in the opposite direction. This type of binding will have a little more stretch than lengthwise grain, but it isn’t the stretchiest option available on the market.
It is still a good option for quilts since it will help to keep the outer edges straight. If you are making your own binding at home, this fabric cutting method may also be preferable because it produces less waste than the other types listed here. You can generally get more strips for your money with cross-grain binding.
3. Bias Binding Strips
Bias binding strips have a grain that goes diagonally to the selvage line of the fabric. The diagonal is usually at a 45-degree angle, which gives this binding a lot more stretch than the others we have discussed. It is great for projects with many curves or need to be able to stretch somewhat as the project moves.
Bias binding strips can be a bit more difficult to make yourself and tend to create much more wasted fabric. If you choose to make bias binding strips, you’ll want to take care to carefully measure out your strips and plan their placement before beginning to cut the fabric. This way, you can ensure you use as much fabric as possible.
4. Single Fold Binding Strips
When it comes to variations in the folding of quilt binding, single-fold binding strips have only one main fold as the name implies. The quilt binding is folded in half at the center, leaving only one layer of fabric on either side of the edge once it has been sewn. Often, the raw edges of single-fold binding strips are rolled slightly so they are not visible outside the binding.
5. Double Fold Binding Strips
With double-fold binding strips, the fabric is folded in half first. Then, the two outer, raw edges are folded inward towards this fold. This gives a clean outer edge to the binding and also creates two layers of fabric on either side of the raw edge once bound.
Having the double layers does give this type of binding some extra strength. Because of this, double-fold binding is generally recommended for projects where the outer borders might see a bit more wear and tear. The extra layer can make the border feel a bit bulkier than single-fold binding will.
How to Make Binding for a Quilt
Making quilt binding yourself is a pretty easy process. You first have to decide how wide you would like your binding strips to be. Generally, the binding needs to be wide enough to go around the fabric’s outer edge while leaving enough room to sew it in place on either side.
Most standard bindings come in a width of about 2 to 2 ½ inches, but you can make this as wide or as narrow as you would like.
Once you have decided on your width, you need to determine what direction you want your grain to be. Lengthwise grain and cross-grain bindings are easiest to cut but have little to no stretch. For these types of binding, you will measure out your strips either parallel or perpendicular to the selvage, depending on which type of binding you are making. Then you will cut the fabric into strips.
For bias bindings trips, you’ll need to measure a 45-degree angle from the selvage line. I find it is easiest to do this by folding one of the corners in half since straight corners will be 90 degrees and divide evenly into two 45-degree halves.
Once you’ve determined where the 45-degree angle is, you can mark it and begin to measure out your strips at that angle. Keep in mind that this method can produce a lot of waste, so plan your cuts carefully to maximize your available fabric.
How to Bind a Quilt: 4 Steps
Binding a quilt can take some time and practice to get perfect. I recommend taking this process slow and steadily and don’t be afraid to try new things if you find a technique that works better for you.
1. Prepare Your Quilt
Before you can attach the binding to your quilt, you’ll need to make sure it is finished and the edges are ready to go. This will require you to finish quilting the top of the project. Otherwise, the binding could pull and shift if you have to go back and finish it later.
You’ll also want to clean up the edges of your quilt as best as possible. Try to trim off any loose threads or hanging pieces of fabric. I recommend using a ruler or a tool with a straight edge to ensure that your borders are perfectly straight and neat.
2. Cut the Binding Fabric
Once you have finished the quilt (other than the binding), you’ll need to cut the fabric strips to use as the border. Decide how much fabric you will need to wrap around the edges of your quilt while still leaving you enough of a seam allowance to sew it in place. You can widen the strip however much you’d like if you prefer a thicker border.
Be sure to keep your cuts consistent and that the grain of the fabric is going in the direction you want. Any inconsistency in the borders of your quilt will be very noticeable. It is worth the effort to take a few extra minutes to ensure you have cut the binding fabric neatly.
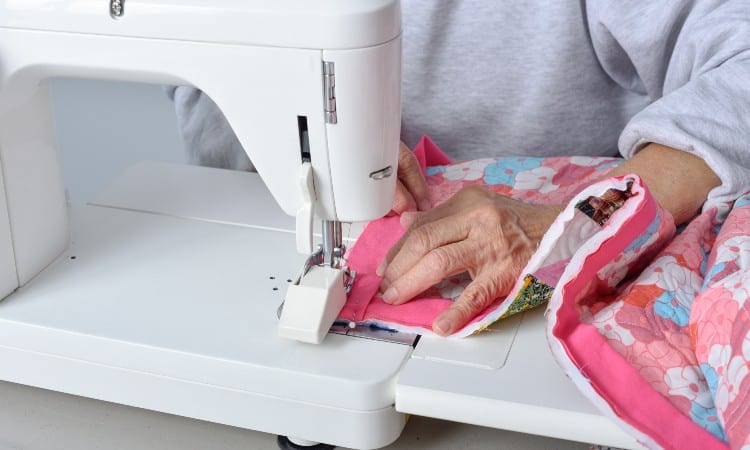
3. Attach Binding to Quilt
Then, you can start attaching the binding to the quilt. You’ll want to begin by placing the raw edge of the binding against the raw edge of the quilt. Be sure to place the first portion of the binding 10-12” away from the nearest corner, to give yourself room to work.
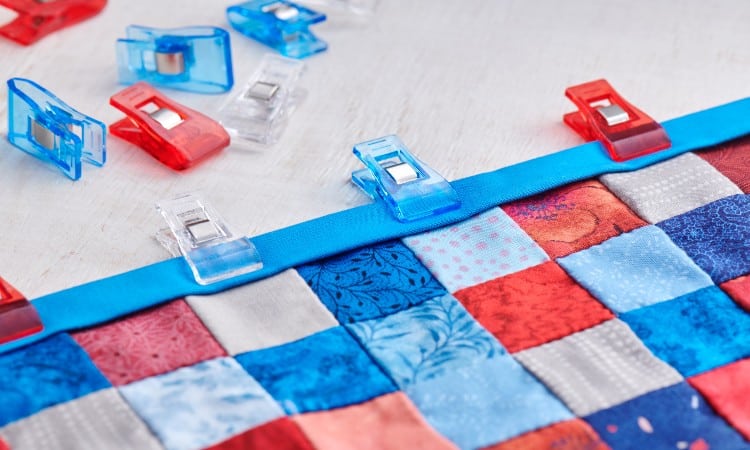
Pin or clamp the binding along this first edge, ensuring that it is even along the quilt’s border. You can’t use too many pins at this stage, since you want the binding to stay put as you work. You’ll just simply have to pull the pins out as you sew.
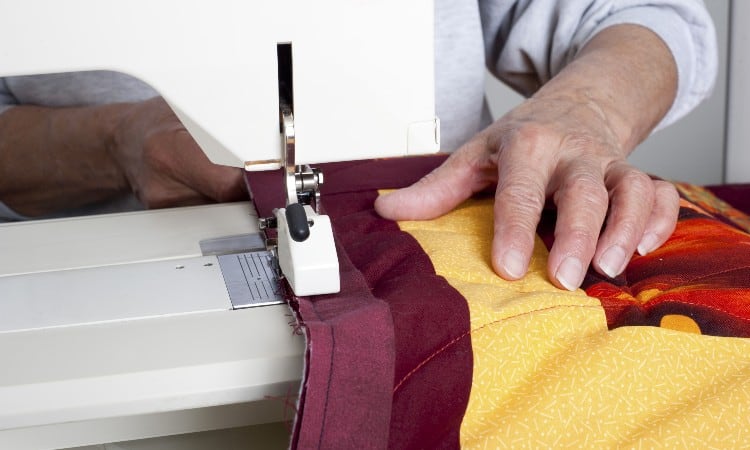
4. Sew the Binding
Begin sewing the binding along the edge of the quilt until you reach ¼” away from the first corner. Don’t go any farther than this or else you won’t be able to form a neat corner on your quilt. To make the corner, fold the quilt binding upwards at a 90-degree angle from the stitches you just made.
In doing this, you should see a 45-degree fold on the binding, from where it has been folded over. Press this fold down firmly, and then fold the binding back down along the new edge of the quilt you will sew next.
This should create an even 90-degree angle at the corner of your quilt. Place your needle ¼” into the new side of the quilt, and then stitch along until you reach ¼” away from the next corner. You will continue this process for all four corners until you meet back up with the first piece of binding you sewed.
Once back at the beginning, overlap the beginning and end of the binding and sew them together. You can insert the ending piece inside the fold of the start piece for a cleaner look overall.
You’re not finished yet, however. The raw edge of the quilt will still be visible on the back of the binding strip at this stage. You’ll need to cover it by folding the folded edge of the binding over to the back of the quilt.
Once you have done so and ensured that both sides were even, the final step is to sew the binding into place once again. This will fully enclose the raw edges of the quilt and give you the clean, finished look you need.
You can also do this final step by gluing the biding into place with heavy-duty fabric glue. Make sure it is a variety that can stand up to washing your quilt.
Do You Bind a Quilt Before Quilting It?
No, you should not bind a quilt before you have quilted the layers together. The binding should be the very last step you do since it is what finishes the pieces and encloses the edges of the quilt.
The process of quilting a quilt can shift the fabric around a bit, causing it to lay differently. If you bind the quilt prematurely, the entire piece might shift and warp as you quilt. This will ruin the overall look of your handmade piece.
How Much Binding Do I Need for a Quilt?
To figure out how much binding you need, you’ll need to measure the perimeter of your quilt. You do this by measuring and adding up the lengths of all sides of your project. In other words, a 60” by 60” quilt would have four sides that each measured this length. Added together, the perimeter would be 240” in length.
Once you have the length of the outer edge of your quilt, you’ll need to add a bit more to give you extra fabric to work with. The extra will be needed to work your way around the corners of the piece. It is also useful for overlapping the finished edges once you are done.
I recommend adding 12” to 24” to the total perimeter of your quilt. This guarantees you will have enough to work with and won’t struggle with too short of a binding.
How Much Quilt Binding Needed for Each Quilt Size
| Quilt Size | Quilt Dimensions | Quilt Binding Length |
| Baby | 30” x 40” | 122 to 134 inches |
| Crib | 36” x 52” | 188 to 200 inches |
| Throw | 50” x 65” | 242 to 254 inches |
| Twin | 70” x 90” | 332 to 344 inches |
| Full/Double | 85” x 108” | 398 to 410 inches |
| Queen | 90” x 108” | 408 to 420 inches |
| King | 110” x 108” | 448 to 460 inches |
How Wide to Cut Quilt Binding
Quilt binding can be cut to any width you like, as long as it is wide enough to wrap around the outer edge of the quilt. It needs to be wide enough that you can sew it into place. Most standard store-bought quilt bindings will come in sizes around 2 to 2 ½ inches in width.
If you like the look of a thick border around your quilt, consider making it one or two times as large as this standard measurement. You can also make it smaller, but remember that you have to be able to sew it in place.
Thicker quilts require wider binding to get around their padded edges. Thinner quilts will not take as wide of a binding to finish.
Can You Make a Quilt Without Binding?
Yes, you can – though binding is the preferred way because it gives the cleanest finish. However, you can finish the edges of your quilt using other techniques.
Some quilters prefer to keep it simple and just stitch around the outer edges of their quilt rather than add fabric. A zigzag or decorative stitch works well for this. You can even hand embroider the edges if you like that look.
Alternatively, some quilters will treat their quilt like they would a pillowcase. They will lay the top and bottom layers of the quilt together, with the right sides facing each other and the batting on the back of one layer.
Then, they’ll sew around the outer edges of the quilt’s interior, being careful to leave a small opening in the center of one of the sides to turn the quilt right-side out. Once turned right-side out, they’ll finish the quilt with a quick stitch around the outer edge.
Your options are fairly limitless when choosing how you finish your quilts. All that matters is that the raw edges have been closed and that your layers are firmly attached.
Conclusion
Quilting is an excellent way to add a spot of color to your bedroom decor. It doesn’t have to be an intimidating process, especially when it comes to things like the quilt binding. Be sure to try these tips, and you’ll see exactly how sharp of a finish a good piece of quilt binding can give your project!