Maybe you want to make a cool TikTok of your style, but you can’t afford to go clothes shopping right now. Or maybe you just don’t want to throw away beloved old tees and need a way to make them wearable again. You can find many reasons to update or upcycle an old t-shirt using t-shirt cutting techniques!
Popular t-shirt cutting techniques include altering the front or back of the neckline and adding sewn elements such as ribbons or lace. Other popular methods include cutting patterned slits in a tee to form a picture like a lacey heart or angel wings. Techniques like tying or braiding cut t-shirts also form unique designs.
In this article, you will learn the characteristics of a cut t-shirt. You will discover 20 fun t-shirt cutting techniques. Finally, you will learn tips for how to make a cut t-shirt look cute!
What is a Cut T-Shirt?
A cut t-shirt is a shirt refashioned using sharp blades to remove fabric, twist, or otherwise transform the shirt into a new style. A cut t-shirt may have a simple modification, such as removing the bottom five inches of the hem to create a crop top or a more elaborate refashion, as in the popular lace-insert style.
Some cut t-shirts mimic ready-wear styles, such as t-shirts cropped short to look like crop tops, tees cut to look like tank tops, and tees cut to look like V-necks. These styles allow you to quickly turn an old tee into a more trendy style in just minutes without spending any money.
But many more cut t-shirt styles originate from sheer creativity and can give you an artistic, fun, or original style all your own! You can add lace or ribbons or go edgier with cage cuts in the sleeves of your shirt.
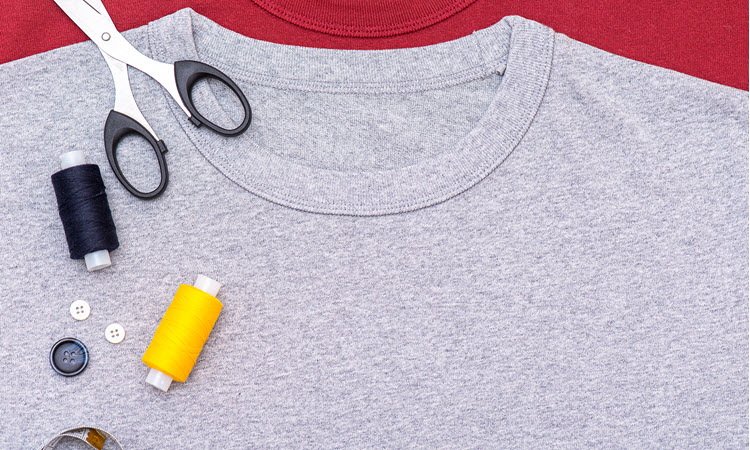
One of the big reasons the cut t-shirt trend remains popular is that t-shirts use a special kind of fabric called jersey knit. Cloth made out of knitted threads uses tons of tiny loops to connect all the threads together instead of weaving the threads over and under each other. This special kind of cloth does not fray and come apart when you cut it, meaning that you do not have to sew along cut edges to keep them nice as you do on many other types of material.
Because of this, you can use nothing but a pair of scissors and your own imagination to completely refashion a t-shirt if you want!
As you look for new cut t-shirt ideas, keep in mind that you can find this style of slits cut into shirts called several different things. Some people do just call these “cut t-shirts,’ but you will also see the term “upcycled t-shirts,” “refashioned t-shirts,” “repurposed tees,” and “recycled fashion” all used to describe this trending way to update your shirts.
20 T-Shirt Cutting Techniques
You can cut a t-shirt in hundreds of different styles using no-sew or sewing methods. You can also use tying, weaving, or even braiding techniques to modify your shirts. Plus, you can focus on different sections of the shirt, like the neck vs the shoulder, for your modifications.
One easy way to get ideas for many different cut t-shirt styles to try is to get on Instagram or Pinterest and do a quick search.
But if you have never tried refashioning a garment before, you may find it more helpful to start with a guide showing you how to cut a shirt step-by-step. This will get you started! Once you learn how to cut a shirt in different styles, you’ll feel more confident exploring new ideas on your own.
No Sew T-Shirt Cutting Ideas
Two of the easiest ways to refashion your t-shirts without sewing are to create a crop top or a tank top out of a tee.
Crop Top
The basic method for turning any t-shirt into a crop top is simply to slice off the lower hem of the tee, but you can also find some fun variations on this style.
- Before cutting a basic crop top, try on the shirt and mark the point you want the raw edge to end. For example, do you want the shirt to end at or just below your navel? Mark this point with a safety pin and then you will know where to slice through the shirt.
- For a cute close-fitting crop top style, cut one inch less than you want to off the front of the shirt. Then cut a one-inch vertical snip right in the center front of the shirt, and use that to cut two horizontal slices toward the side seams, creating two ties. Tie a little bow at the front of your new crop top!
- For a eye-catching crop top, create a fringe around the bottom of the shirt instead of making it shorter. All you have to do is cut evenly-spaced vertical slits all the way around the hem of the shirt!
Tank Top
Another great no-sew method for modifying your t-shirts is to turn them into tank tops.
- Try on your tee inside out and use a piece of chalk or a sewing marker to sketch out the shape of the tank top straps and the neckline.
- Start at one shoulder seam and think about how wide you want the shoulder straps of the tank to reach between your collarbone and shoulder seam. Then mark how deeply you want the neckline of the tank to reach down your chest. Finally, mark a point where you want the armhole to end in the side seam of the shirt.
- Take off the shirt and smooth it flat, with the front of the tee facing up at you.
- Draw smooth curves connecting the lower armhole marking with your shoulder strap marking, and cut along these lines to remove the sleeves on both sides of the shirt.
- Next, draw a smooth curve from your shoulder strap to the point you marked for the depth of the neckline. You can cut a curved neckline or use a ruler to turn this into a V-neck.
- Cut through just the top layer of the shirt to cut out your tank top neckline.
- Try on your new tank top!
With Sewing
If you have a sewing machine, you can update your t-shirts in many ways, including adding a lace insert or attaching a ribbon tie.
Lace Insert
Adding a lace insert can create a large sexy cutout in the back of the shirt or serve as a handy way to remove an old stain from a small section of the shirt, like the side or even in the sleeves!
Check out these steps to see how to insert a lace heart in the back of your shirt:
- Start by folding your shirt in half with a sleeve and side seam in the middle so that the center back forms one of the fold lines.
- Next, use chalk to outline half of the heart along the fold line. You can also trace around a stencil if you have a big cookie cutter or old Valentine’s Day decoration to use as a template.
- Use sharp sewing scissors to cut out the heart along the lines you drew. Set aside this heart-shaped piece of the t-shirt.
- Fold a piece of lace fabric in half and align it over the cutout so that its centerfold matches up with the center back fold of the shirt.
- Cut around the half-heart outline in the lace, but cut about half an inch outside the t-shirt lines, making the lace heart slightly larger.
- Now unfold both the lace and the shirt.
- Turn the shirt inside out and use sewing pins to attach the lace heart to the t-shirt heart from the inside.
- Use a zigzag stitch to sew around the edge of the heart.
- Turn the shirt right side out and admire the lace insert!
As a pro tip, you can expand on this idea of using lace inserts to apply lace at the side seams or center back to make a t-shirt wider.
Ribbon Ties
Another easy way to use sewing to upcycle a tee is to alter the back of the neck and add ribbon ties.
- Start with a generously oversized t-shirt for this technique.
- Turn the shirt inside out and fold it in half so that the center front of the shirt forms one fold line and the center back forms the other fold line.
- Pick a point about halfway between the shoulder and the middle of the collar and draw a chalk dot there. Then use a ruler to draw an angled line connecting that point to the center back fold.
- Cut along this line to remove a deep V-shaped section at the back of the shirt.
- Cut two lengths of one-inch wide ribbon at least two feet long each. You can either turn under the ends of the ribbon and stitch them in place to prevent fraying or dab the cut ends with clear nail polish to keep them nice.
- Use sewing pins to attach one end of each ribbon to the cut edge of the neckline.
- Stitch the ribbon ties in place using your sewing machine.
- Try on the shirt and tie an elegant bow at the back of your neck!
Neck Cutting
One of the best ways to make a basic crewneck tee look trendy is to update the neckline of the shirt.
Check out three cool neck-cutting styles for your tees here:
- Turn a crewneck collar into a V-neck by marking a point in the center front of the shirt and cutting a straight line from the shoulder seam to that point. You can leave the raw edge for a more rugged style. Or you can use a sewing machine to turn under the edge and top stitch it if you want the V-neck to look fancier.
- To make a boatneck opening in your tee, you use the same basic idea but with a much wider angle. Start way over where the shirt meets the sleeve and draw a line from that point to the center front of the shirt. Then cut this wide V and remove the old collar of the shirt.
- For a peekaboo neck cut out, leave the brew neck but cut a small V out of the center front of the shirt right beneath the collar.
Tying
One of the more decorative ways to reimagine an old t-shirt is to use tying techniques like the open back or sides methods.
Open Back
If you have a slightly too-big tee to refashion, you can turn it into an open-backed number with careful cuts and strategic knots.
- Start by turning the shirt inside out and drawing a line right down the center back, from the collar to the hem.
- Now draw two more lines two inches inside the side seams on the back of the shirt.
- For your final set of measurements, make small chalk markings along these sidelines. You want twenty-one marks all evenly spaced up the sidelines.
- Cut up the center fold line.
- Now cut horizontal slits from the open center of the back to the dots you marked along each side. This will give you twenty-one strips of t-shirt fabric along each side of the shirt.
- Gather three strips from each side and knot them together in the center back of the tee.
- Repeat this with every three strips down the back of the shirt.
Side Ties
If you have a baggy tee that you want to turn into a fitted tee, you can cut strips along both sides and knot them together to make the shirt fit you better!
- Turn the shirt inside out and try it on. Pinch the side seams to decide how much smaller you want to make the shirt. Use a safety pin to hold the side seam together at this point and then take the shirt back off.
- Draw a chalk line up on both sides of the shirt at this point to show how far inside the original seam you want to cut.
- Now measure one-inch intervals up both of those chalk lines.
- Cut horizontal snips from the side seam to your chalk lines at these one-inch points, creating a series of tabs along the sides of the shirt.
- Snip through the old stitching at the end of each tab to turn it into two tabs.
- Tie the tabs together with a simple shoelace knot, forming a new, knotted side seam along both sides of the tee!
Off the Shoulder
One of the chicest and most daring ways to upcycle a fitted t-shirt is to turn it into an off-the-shoulder top. You can do this with sharp scissors, with no sewing required!
You can create a basic off-the-shoulder style, a one-sleeve style, or a cut-out style for an off-the-shoulder top.
- For the simplest style of off-the-shoulder top, all you have to do is draw a curved line from one shoulder seam to the other. Cut across this line, slicing through both layers of the shirt. This will remove the whole top of the shirt!
- For a one-shoulder style, you will need a bit more artistic flair. For this, you will draw a scooped curve from just inside one side of the collar down to the armpit on the other side. Then cut along this line to remove one sleeve and the original collar.
- For a fancier off-the-shoulder style, use chalk to trace a curve just inside one side of the collar, but stop when you reach the center front of the shirt and draw a horizontal line connecting that point over the seam connecting the sleeve to the shirt. Stop again here and draw two vertical lines, forming a strap reaching up from this point to the shoulder seam. Cut along your chalk lines to remove the old collar and form a cool shoulder strap on just one side of the tee!
Weaving
Another cool way to make a tee more interesting is to weave a pattern into horizontal slits in the fabric.
- Start by using a ruler to help you draw evenly-spaced horizontal lines across the back of the shirt. You can cut across the back or form a shape with your slits, like a V, a circle, a diamond, etc.
- Cut along your horizontal chalk lines to form a series of slits.
- Now take the second from the top strip of fabric and place it on top of the top strip.
- Pull the second strip over, behind, and then all the way out from under the top strip.
- Pinch the third strip from the top and place it on top of the loop for the second strip, now sticking out from under the original top strip. Pull it through the second strips and then back out under,
- Repeat the pattern until you have looped the final strip.
- Use a few hand-sewn stitches to hold that final loop secure.
Braiding
You can add braided details to your t-shirts in many fun ways, like these five easy braided styles!
- To add a braided pattern around the collar, cut vertical slits one inch long, spaced evenly apart around the outer edge of the collar. Then pull the second loop through the first loop, the third loop through the second loop, and so on, all the way around the neck. Use a few handsewn stitches to keep the final loop in place, and then stretch out the braid a bit if you need to to make it lie flat.
- For an elegant touch around the bottom of the tee, you can repeat this looped braiding method around the shirt by cutting vertical slits about ½” above the hemstitching.
- You can also use the same basic method to put braids in the front or sides of the shirt. You don’t even need to measure for this; just try to cut closely spaced horizontal slits down the shirt in a straight line. Then use the looping method to pull the second loop up and under the top loop, and so on, until it looks like you have a braided line in your shirt!
- For a braided racerback style, cut out deep scoops around each armhole to remove the sleeves. Then cut off the collar and two vertical slits down the center back of the shirt from the collar to about the same point as the armpits, giving your three strips to braid. Braid them together and then stretch the front shoulders over to stitch them to the braid.
- For a more complex open-back shirt, do the same thing on an oversized tee, except cut your three strips on each side of the back of the tee and pull them together to sew to each other in the center back of the shirt.
For Guys
Two of the best ways to cut a t-shirt for guys are to cut a tee into a muscle tank top or a men’s cropped tee.
Muscle Tank Top
Turning a t-shirt into a muscle tank for guys is super easy. All you have to do is cut one line through the shirt to remove the sleeves!
- Fold the shirt in half longways, with both sleeves to the left.
- Use a piece of chalk to draw a smooth curved line from about five inches below the armpit in the side seam to the shoulder of the tee.
- Cut along this line to create giant armholes in the tank top.
Men’s Cropped T-Shirt
Another quick way to restyle a t-shirt for men is to turn a big tee into a cropped shirt.
- Try on the shirt and decide how much you want to cut off the bottom.
- Smooth the shirt on a flat surface and measure that distance from the hem of the shirt. Mark that point with chalk.
- Repeat the measurement four times across the bottom of the shirt, and then use a ruler to connect your chalk markings.
- Cut across the line to remove the bottom edge of the shirt.
How To Cut a Shirt to Show Cleavage
The best way to cut a shirt to show cleavage is to alter the neckline of the tee using a method like the V-neck technique described earlier in this article.
You can change the neckline of a t-shirt in many ways, with or without sewing.
- Cut a deep V for a plunging neckline in a fitted t-shirt. You can decide where you want the tip of the V to end by trying on the shirt and placing a safety pin in the shirt at that point while looking in a mirror. Then take off the shirt and cut your V-shape out, starting at that spot.
- You can also easily create a peek-a-boo neckline by leaving the crewneck collar of the shirt but snipping out a shape from the fabric right below it. This makes an opening just above your chest, and you can use shapes like a teardrop or diamond to provide a deeper point, if you prefer.
- You can also use a grommet crimper to put eyelets into the sides of a deep t-shirt neckline and then put laces through the eyelets to make a deep, eye-catching neckline.
How Do You Cut a Shirt So it Looks Ripped?
You can make a shirt look ripped or distressed in several different ways, such as using a razor or making cage cuts.
- To distress a shirt and make it look edgier, use a disposable razor scraped over the fabric to scuff up the graphics on the tee and even wear holes in the fabric.
- To make slices in the fabric that looks like someone ripped the shirt, use a box cutter or craft knife. Place a cutting board inside the shirt and then just tear the blade through the shirt!
- For a more stylized ripped look, you can make a caged-cut style by making a series of horizontal slits down a sleeve or the side of the shirt. These slits will look like bars across your arm!
Cute Ways to Cut a Shirt
Some of the cutest ways to cut a shirt include adding a lace insert and creating an off-the-shoulder style. But you can make any cut t-shirt design work and look cute! The main thing with t-shirt upcycling is to pick a style that you feel comfortable wearing.
For example, you can easily turn any t-shirt into a crop top, which can look trendy and cute on many people! But not everyone feels comfortable in this youthful style, so you may want to pick a different cute look, such as a daring V-neck or a fun braided hem around the bottom of your tee.
No matter what style you pick, you will get a cool, updated shirt to wear without spending any money!
Conclusion
Popular t-shirt cutting techniques include transforming the neckline of a shirt and making the tee either sleeveless, tighter, or shorter. You can cut a t-shirt using a pair of scissors or cut the shirt and then sew it for styles such as adding lace inserts or ribbons. You can also use techniques like tying or braiding strips of the t-shirt for more decorative finishes.
For a rough, ripped tee style, you can use tools like a razor or a boxcutter to add distressed details to the shirt. For a more sexy look, you can deepen V-shaped or peek-a-boo necklines in a tee. For a cute style, you can add frills like lace or go trendy with a crop top.