Screen printing uses an ancient technique of pushing ink through a stenciled screen to create high-quality fabric designs. It remains one of the most durable and popular ways to print on t-shirts today. If you love making custom clothes or want to start your own printing business, you may want to learn how to screenprint at home!
Screen printing at home starts with creating a design and turning it into a stencil, often using Cricut and vinyl cutouts. Next, the stencil layers on top of a mesh screen, and a squeegee spreads the ink over both stencil and screen. This forces the ink through the desired shape onto a T-shirt or other fabric.
In this article, you will find out what equipment and materials you need to screen print at home. You will learn the basic steps of how to screen print as a beginner or in a more professional way from your home. Finally, you will find tips on how to start screen printing frugally.
Quick Navigation
- Can Screen Printing Be Done At Home?
- Screen Printing Setup
- How to Screen Print Shirts at Home
- How Long Does Screen Printing Last?
- Best Fabric for Screen Printing
- How to Do DIY Screen Printing at Home for Cheap
- How to Make Screen Printing Stencils
- How Much Does a Home Screen Printer Cost?
- DIY T-Shirt Screen Printing Kit
- Conclusion
Can Screen Printing Be Done At Home?
You can screen print at home quite easily in just a few simple steps. Screenprinting is a rare art form that works with just a few basic art supplies or with lots of fancy professional equipment. It all depends on how much time and money you want to spend.
At its core, screen printing simply means making a design by pushing ink through a stenciled screen. You can try this at your kitchen table with nothing but a handmade screen and some fabric paints to keep things simple! Keep in mind that with a screen print, you must apply each color in the design one layer at a time.
If you have a bit more space and a budget for pricier craft supplies, you can also learn how to make professional-grade light emulsion stencils at home. Or you can do what many custom t-shirt business owners do, and make your stencils using an inexpensive Cricut machine.
Of course, to some extent, you do get what you pay for. The reason people love screen-printed shirts so much because these designs feature a special type of thick dye called plastisol ink, which creates a raised, plasticky design on top of the fabric. For the best results, you will want to invest in this ink and learn how to use it properly to create those durable and high-quality designs.
Screen Printing Setup
 For the best-quality screen prints, you will need some equipment as part of the screen print setup, including a screen, the right ink, and a heat press. You may also need a dark room and a heat press, depending on how advanced you plan to get with your process!
If you want to keep your start-up cost as low as possible, check out the section on “how to do screenprinting for cheap” later in this article for some great frugal tips!
So, what do you need to screen print?
- Unless you want to go old-school and hand-draw your designs, you need a space to create digital designs that you will use to make your screen print stencils. You can do this using Word or Google Docs, or purchase real graphic design software if you want to get serious. If you have a Cricut, you can also use DesignSpace online for this process.
- Next, you need a screen, which you can order online or buy from some craft stores. While you can make your own, for best results, you will want to consider buying a couple of screens with a nice aluminum frame and 110 polyester mesh for the screen. You will not have to spend a lot of time taping off the edges to avoid dye leakage with these store-bought frames.
- If you want to launch a home business and make hundreds of shirts instead of just one or two, you may want to consider an actual screen print rotary carousel press with arms to hold many screens at once. Or you can get a manual press like this for home use.
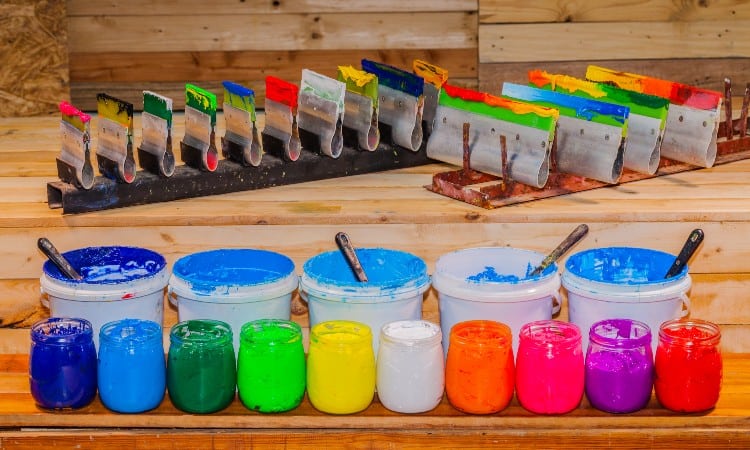
- Another key factor is the quality of the ink you use. For nice-looking shirts, you should use plastisol ink that you can order online like this one. You can also buy individual colors from many arts and crafts stores or order more cheaply in bulk if you want to go into business!
- A good squeegee will help keep your ink in a smooth, perfect layer.
- Of course, you also need shirts to print onto! Ideally, you should find 100% cotton tees, though the cut and type of shirt are totally up to you. You can buy shirts from any clothing retailer or order them in bulk online if you want to make many shirts at once–the price will vary from as little as $1 per shirt to $15 per shirt depending on who you buy them from.
- For best results, you will need a heat press to cure the ink after printing. Most professionals use a clamshell-style heat press to seal over the shirt briefly, curing the ink. You can also use a budget-friendly version like Cricut’s small EasyPress for the same results.
Does that seem like a lot? Well, there’s one more additional component you have to consider: how to make the stencil. Screen printing is all about the stencil, which dictates the shape of the ink on the fabric!
Most home artists make their stencils in two ways.
The first method is to use a Cricut machine, or an electronic cutting machine made by another brand, to cut out a vinyl stencil. This method does require buying a Cricut machine. It is the easiest way to make your stencils at home!
The second method of stencil-making works very much like developing a photo negative in an old-fashioned darkroom. This is the stencil-making method used by professionals, but you can do it at home with very few additional supplies!
To make your own light emulsion stencils, you would need a completely dark space in your home. You will also need a very bright light, a fan, and a photo emulsion product like this one. Lots of arts and craft stores will sell this equipment, or you can even buy a kit that has everything you need, like this one!
How to Screen Print Shirts at Home
You can learn how to screen print at home using the same techniques as a professional printer by following a few simple steps. You can also use a slightly simpler technique by referring to the “screen printing for beginners” section below.
- The first stage in screenprinting is to create your design digitally. Professional printers use graphic design software that can separate the colors in the design into separate layers, ready to print one screen at a time. You can use many different programs like Adobe Illustrator, Cricut’s Design Space, or even just Paint or Google Docs if you want a free option!
- Alternatively, you can download free designs, but you will want to use caution here. You can learn more about this process in the section on “how to screenprint for cheap” later in this article!
- Once you have a design, you need to separate it into individual colors if the design contains more than one color. You also need to mirror the image if the direction of the lettering or pictures matters. These options work most easily in professional design software, so you may want to stick to one-color, simple designs if you do not have access to this kind of software.
- The next step is to use this image to create a stencil. The two most popular ways to do this are to cut out the design onto vinyl using an electronic cutting machine or create a light emulsion using special chemicals. You can find more details about these two options in the following sections!
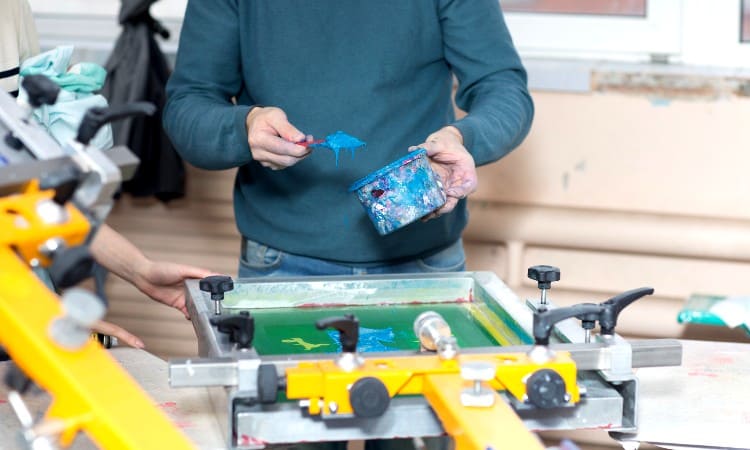
- At this point, you can prepare the screen and the shirt by placing them in the press. Make sure you put cardboard or paper inside the shirt to prevent any bleedthrough. You can apply the screen by hand, but most home printers get at least a simple manually operated press to help align the shirt and the screens.
- Follow the directions on the press to lower the screen down onto the shirt.
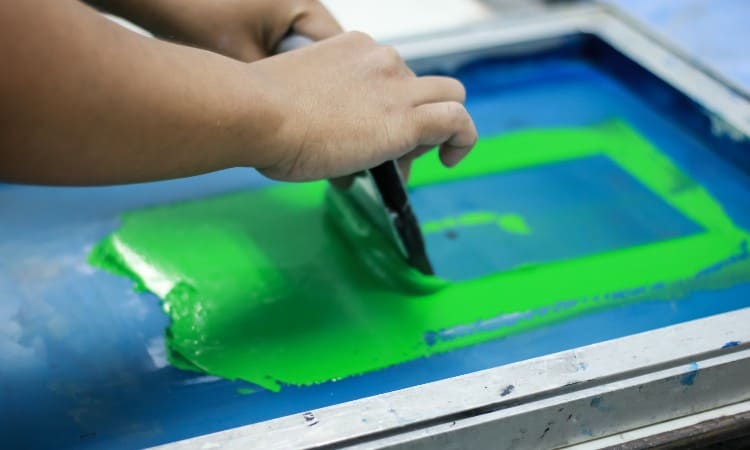
- Apply plastisol ink to the back of the screen over the stencil. Use a squeegee to pull a thin, even layer of the ink down the screen.
- If you want to make multiple copies of the same design, you can raise the screen, insert a new shirt, and keep using the same stenciled screen multiple times by applying new ink each time.
- Finally, the printed shirt must go through a curing process. Big companies often have fancy drying machines that can do this, but most home printers use a heat press.
When you break it down into details like that, it may seem overwhelming. But keep in mind that really, all you need to do is put a stencil on a screen and spread ink over it!
Screen Printing for Beginners
As a beginner screen printer, you may find these modifications to the process a little easier to grasp.
First, it’s good to start with single-color designs, such as lettering or fun graphics in just one shade. This way, you do not have to learn how to digitally separate color layers, and you also do not have to apply multiple screens to each shirt.
Second, you should probably start by making your stencils on an electronic cutting machine such as a Cricut or a Silhouette. These machines turn a digital image into a cut-out pattern. Using vinyl cut-outs is much easier than creating a light emulsion stencil!
How do you do this?
- First, either create or select a digital design in the software or cloud-based program that comes with your cutting machine. For Cricut, this online space is called Design Space.
- Make sure to mirror the design using the tool provided in the program if you have words or letters in your design.
- Set up the vinyl on a sticky cutting mat and insert it into the machine per the instructions for that model of cutting machine.
- Select the cutting settings that fit the material (such as vinyl rather than paper) in the digital design space on your computer.
- Start the cut!
- When the machine finishes cutting out the desired shapes, use weeding tools to remove extraneous vinyl and then peel away the stencil.
Now you can use the vinyl stencil on your mesh screen!
Professional Screen Printing at Home
If you want to create professional screen printing at home, you will probably want to master the method of making stencils using a light emulsion. This technique takes more time and skill than creating a stencil using vinyl, allowing you to make more detailed designs. It’s also the best way to make stencils for multi-colored designs.
Big screen printing companies do have equipment that simplifies this process. But lots of home printers also use light emulsion stencils. The only tricky part is that you need to find somewhere in your home that can serve as a dark room, with no light inside it!
To make a light emulsion stencil for screen printing:
- First, create your design or lettering in a design program. If you use a design involving more than one color, use a color separating feature in the program to break the design into separate images for each color. You will need to prepare a stencil for each color in this case.
- Print out the image onto transparency paper and then cut it out. Alternatively, you can use an electronic cutting machine to cut the design out of transparency paper. Transparency paper will prevent light from reaching the emulsion chemicals, creating the image of the stencil on the screen.
- Next, prepare the emulsion. This usually comes as two separate components in two bottles and instructions on how to mix them. The bottles should last you for many uses!
- Take your screen and your mixed emulsion into your darkroom. A basement with no windows or a closet with the crack under the door blocked up will work well.
- Pour a bead (a thin line) of emulsion across the top of the screen, and then use your squeegee to pull the emulsion evenly across the whole length of the screen.
- Repeat this process on the other side of the screen.
- Lay the screen flat to dry in the darkroom, with a fan blowing onto it. This will take about half an hour to an hour.
- Next, return to the darkroom and set up an area with a bright light, but don’t turn it on yet! Any lamp with a directed beam and a 150-watt bulb will work for this. You also need a large piece of bristol board to act as a backing for your screen.
- Place the screen on the black bristol board and arrange your cut-out shapes on the screen. If these do not lie flat, you can place a sheet of glass (like a piece taken out of a photo frame) on top of the images to hold them flat.
- Turn on the light! The emulsion chemicals will come with instructions that tell you how long to expose the screen. Usually, this will take about 5, 10, 0r 15 minutes, depending on the light and a few other factors. You can tell it is working when the green emulsion turns greyish.
- Wash the screen in a sink under cool water.
- You should see only the negative space remaining, outlined by the emulsion chemicals! You have created a detailed stencil.
At this point, you can move the screen to the press, apply ink, and start printing your shirts!
How Long Does Screen Printing Last?
Screen printing lasts a very long time because of the thick plastisol inks used. Some printers maintain that this kind of print will last for the whole lifetime of a shirt, while others make the more moderate claim that a screen print should remain vibrant for 40 to 50 washes.
For comparison, shirts made with heat-transfer vinyl usually do not hold up as well as screen prints, as the vinyl can tend to crack and peel over time. DTG shirts, with designs printed directly onto the fabric, last even less time and usually fade much more quickly than screen-printed designs.
As a fun fact, the mesh screens created by using light emulsion stencils can last up to twenty years in some cases, allowing printers to reuse them over and over!
Best Fabric for Screen Printing
The best fabric for screen printing is 100% cotton, though cotton blends and other natural fabrics can work well too. Cotton is super absorbent, which allows the plastisol ink used in screen printing to soak into its top surface and create a sturdy layer bound into the fibers of the fabric.
You can screen print on synthetics like polyester, but this process requires some careful work. You have to use a different kind of ink and some special additives. In general, screen printers prefer to work on cotton as it simplifies the process.
How to Do DIY Screen Printing at Home for Cheap
You can learn how to do DIY screen printing at home for cheap by making a lot of the supplies yourself. With screen printing, you can go big and buy lots of professional equipment to make the process as fast and homogeneous as possible, or you can embrace a little bit of artistic mess and pretty much DIY the whole process!
Check out these frugal tips to help you start screen printing without breaking the bank!
- Instead of buying screens that cost about $20 each, you can make your own on the cheap by nailing together slim wooden strips and using a staple gun to stretch the mesh over the rectangular frame. Do make sure you buy good-quality 110 polyester mesh, though!
- If you don’t want to spend any money, you can even make a screen print frame out of sheer curtains and old picture frames!
- You can also save money by using plastic wrap painted with white-out in place of transparency paper for a really simple light emulsion screen.
- Alternatively, you could draw your designs and cut them out of vinyl by hand to save money.
- Finally, you can often find screen printing kits or inks on sale at craft stores or online. While you don’t want to work with low-quality inks, you can certainly find cheaper inks to help make the process affordable! Plus, one batch of ink will last you for many shirts.
How to Make Screen Printing Stencils
You can make screen printing stencils by hand, using vinyl, or by creating a light emulsion.
For the best-quality, professional-looking stencils, you will want to try making a light emulsion. This works very much like developing a photograph in the days before digital cameras! You will need to prepare and dry a screen coated in emulsion chemicals, place your image on the screen, and then expose it to bright light.
You can much more quickly make stencils out of vinyl using an electronic cutting machine linked to a digital graphic design program on a computer. The machine will cut out the stencil for you, and you just apply it to the mesh screen.
Finally, you can cut out stencils by hand. This process often looks more rough-and-ready, but you may want to start here for your first few screen prints!
How Much Does a Home Screen Printer Cost?
You can buy manual home screen printing machines for as little as $100, though they often cost around $200. The giant automatic machines used by professional printers cost upwards of $20,000! If you want to start a t-shirt business, you will have to seriously consider how many shirts you plan to print and what level of equipment you want to invest in.
Brands like VEVOR, SHZOND, and YUDO make small screen printing machines perfect for your home. While these may not have the capacity or the functionality of a $20,000 professional printer, they will speed up your home printing process considerably! A good home screen printing machine will also help you create accurate, consistent prints.
DIY T-Shirt Screen Printing Kit
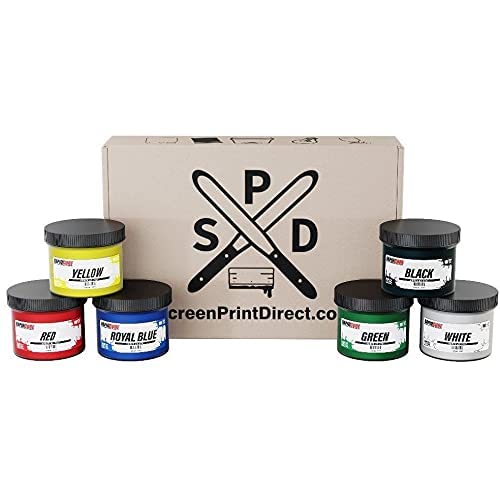
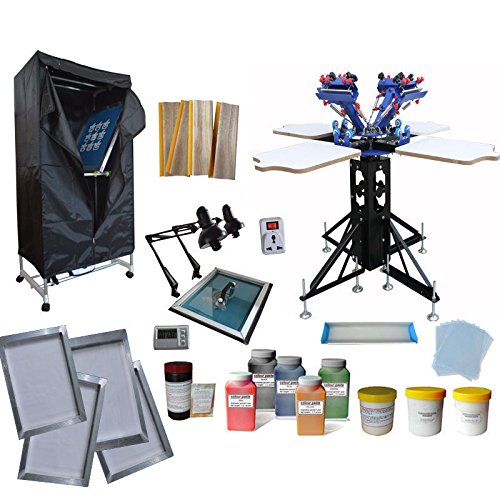 If you want to try screen printing in the easiest way possible, you can buy a DIY t-shirt screen printing kit that comes with all the supplies you need in one convenient package!
For example, this kit on Amazon comes with pretty much everything you would need for your first batch of shirts. You get multiple screens, a complete set of primary ink colors, squeegees, and even the equipment to make a light emulsion stencil!
If you want to launch a small business screen printing tees, you might consider this even more comprehensive kit. This kit gives you everything you could need as a new screen printer, including a TechTongda 4 Color screen print station.
Conclusion
You can screen print from home using a few simple supplies or a manual screen print station with multiple arms to print more than one color at a time. Depending on how much time and money you want to invest, you can easily design and print custom t-shirts for yourself or run a small business from home.
To make stencils to use on your screens, you will find it easiest to cut out vinyl shapes using a Cricut. If you want professional or multi-colored prints, you may prefer the light emulsion method that uses chemicals to create a stencil on the mesh screen.
Have you ever tried your hand at screen printing? What kind of design did you make? Leave a comment below to let us know!