Embroidery is a great way to individualize many sewable items. You can add a little flair with a decorative floral or use a monogram to personalize items for the whole family. Embroidering is a skill you can use to make things more beautiful or unique – but what about those blaring brand logos that you don’t want front and center on your clothing? Have you ever wondered how to remove embroidery from a shirt?
Embroidery can be removed from a shirt with several methods involving cutting and removing the many threads that make up the stitched-on design. Though not an extremely difficult task, removing embroidery from a shirt requires patience and attention to detail.
In this article, we will cover how to remove both hand and machine embroidery using a seam ripper, embroidery scissors or a special tool specific to removing embroidery. We’ll also go over how to get rid of marks after the embroidery is removed.
Quick Navigation
- Can You Remove Embroidery?
- Will Removing Embroidery Leave Holes?
- How to Remove Embroidery From a Shirt
- How to Remove Hand Embroidery
- How to Remove Embroidery From a Jacket, Hat or Backpack
- How to Get Rid of Stitch Marks After Removing Embroidery
- How to Remove Embroidery From Polyester
- Can You Embroider Over an Existing Embroidery?
- How to Remove an Embroidered Patch
- How to Remove Printed Logos
- What Is the Best Way to Undo Embroidery?
Can You Remove Embroidery?
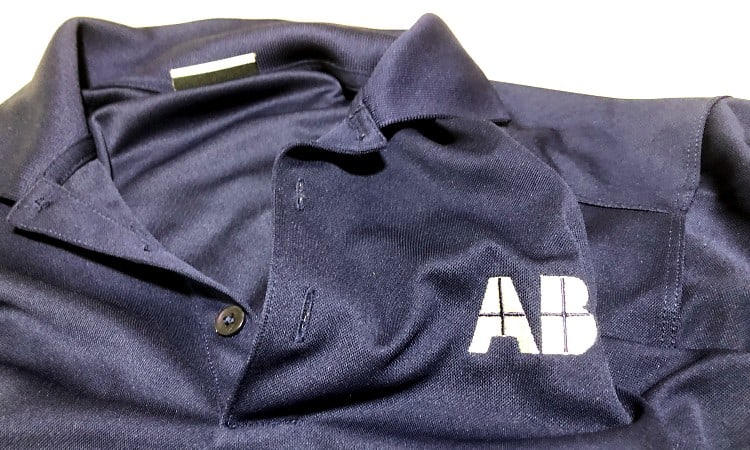
Embroidery can be found on all sorts of items. Many companies use embroidery to place their logo on every item they produce to make their brand easily identifiable. But what if you don’t want that logo on your shirt, or you find an amazing item at a consignment store with someone else’s initials sewn on? Don’t worry! You don’t have to pass on a previously monogrammed item or be a walking advertisement – most embroidery can be removed.
Removing embroidery isn’t a particularly difficult task, but work must be done carefully to avoid damaging the item. It only takes a few tools but will also take time and patience – how much exactly depends on how much embroidery is removed.
Will Removing Embroidery Leave Holes?
With hundreds of stitches being made to create an embroidered design, you can imagine how many holes are in the fabric underneath. Removing the embroidery from an item will undeniably leave those holes exposed. These stitch marks will be more apparent on some fabrics than others, but – in most cases – this doesn’t mean the item isn’t salvageable! In a few simple steps, you can remove – or at least dramatically reduce – stitch marks left behind from embroidery. Also, with time, they can continue to become less visible.
How to Remove Embroidery From a Shirt
Embroidery is hundreds – sometimes thousands! of stitches used to make up a pattern or design. To remove embroidery, essentially, these threads must all be cut. Both machine and hand embroidery can be removed using embroidery scissors or a seam ripper. These tools will give you the precision to cut only the desired threads, ensuring the item being worked on stays intact. While precise, these tools are not designed for speed.
Another option is a stitch and embroidery removal tool – made specifically for getting rid of embroidery. A stitch removal tool is similar to a pair of electric hair clippers. It has short, criss-crossing blades that hopefully shave down the threads from the embroidery without cutting the cloth below. This is a great tool if you have a large area of embroidery to remove or if you plan on removing embroidery often.
Combined with the tools listed above, it will also help to have a pair of tweezers – to pluck out the threads once they’ve been cut. Removing all of those threads is going to leave a lot of fuzzy bits behind – a lint roller is another valuable tool you can use to help clean up all that debris. If you don’t have a lint roller, masking or scotch tape make great substitutes.
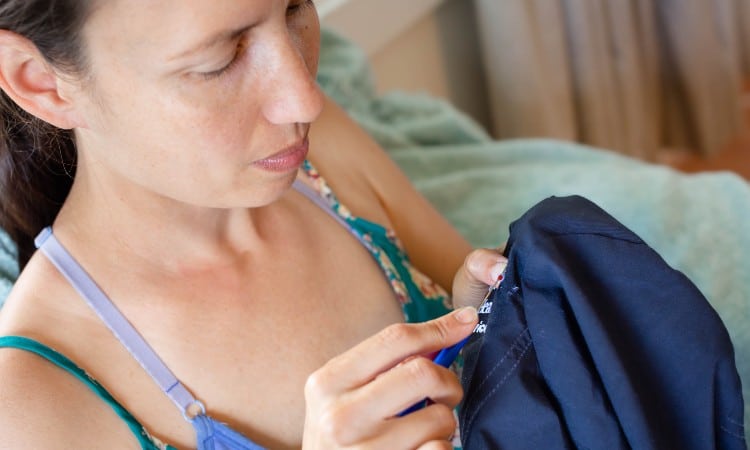
So, you found a great shirt at a thrift shop, but the previous owner left their monogram behind? Look no further – below are four easy methods for removing unwanted embroidery. Pro-tip: slightly dampening threads can weaken them – making them easier to cut. This tip can be used with any of the methods below – just make sure you aren’t overly soaking the item.
1. Seam Ripper
A seam ripper is any seamstress’s best friend. This tiny tool’s job is to cut and remove stitches using a sharp blade inside its hooked portion. It is small and precise – exactly what you need when looking to undo embroidery. Adding a darning needle and a pair of tweezers can help, as well as a lint roller if you want an easier clean-up.
- Turn the shirt inside-out. When removing embroidery, you should always start out working on the back. Here, you will cut the stitches and don’t want to accidentally knick the fabric – leaving a visible mark.
- Remove Stabilizer. If there is backing or stabilizer on the back of the embroidery, cut away and remove as much as possible before attempting to cut the threads.
- Cut the stitches. Slide the seam ripper under a few bobbin stitches and cut by lifting up and at a slight angle. Depending on the embroidery and fabric you are working with, you’ll need to decide how many stitches to cut at a time. Continue cutting just a few at a time if the shirt is a thinner material. If it is thick and sturdy – canvas, for example – you can get away with cutting more stitches at once.
- Turn the shirt right-side out. After cutting away a section of the embroidery, turn the shirt right-side-out and check that threads have become loose and are beginning to fray.
- Pull the stitches out of the front side of the fabric. Slide the darning needle under the stitches on the front and gently pull them out. Using your fingers or the tweezers, carefully pull to remove all the stitches that have been cut from behind. If at any point you are met with resistance – turn the shirt inside-out again and check to make sure all of the threads you are pulling have been cut.
- Repeat. Working in sections, continue cutting the threads on the back, flipping the shirt right-side out and pulling to remove the stitches. Repeat these steps until all areas of the embroidery have been removed.
- Get rid of all that fuzz. Once you’ve swept away most of the cut threads, you can use the lint roller – or tape if you don’t have one handy – to clean up the fuzzy area left behind.
2. Razor
It may not be obvious at first, but a razor can act as a very effective tool for removing embroidery! Any sort of disposable – or reusable – razor should work. A sharp razor will be the easiest to use.
- Turn the shirt inside-out. This gives the easiest access to removing the stitches, as well as protecting the front side of the shirt.
- Remove backing. If there is backing covering the stitches behind the design, carefully cut and peel away as much as possible.
- Shave away the stitches. Begin by rubbing the razor over the bobbin stitches on the backside of the fabric. Working in sections, continue running the razor across the stitches until they are all cut away.
- Turn the shirt right-side out. The stitches are all cut from the back and should come out with ease.
- Pull out the stitches. You can now pull or brush away the threads using your fingers or a pair of tweezers – the stitches should come away easily. If there is any resistance when pulling, turn the garment back inside-out and cut any threads that may have been missed.
- Lint-roll away loose threads. After all the stitches have been removed, you will be left with a good amount of fuzz and thread. Use a lint roller to roll over the area you were working on to clean up the surface.
3. Stitch and Embroidery Removal Tool
A stitch or embroidery removal tool – also called a stitch eraser – looks just like a pair of electric hair clippers but is a tool designed specifically for removing stitches. It helps speed up the job and is the ideal tool for removing logos or another thick machine embroidery. A stitch eraser can be purchased online or at many fabric stores. This is a pricier method, but if you plan on removing a lot of embroidery, it may be a worthy investment.
Note: a stitch removal tool should not be used on the front side of a garment, as it can damage the fabric. If used correctly – on the back side – the stitch eraser shouldn’t cause any harm. This method is also best used on professional embroidery rather than designs done by hand.
- Turn the shirt inside-out. As with any embroidery removal, cutting the bobbin threads from the back is necessary to remove the design cleanly while keeping the garment’s integrity.
- Remove backing and keep the embroidery taut. The stitch eraser will have a much easier time cutting through the threads if the design is held tight in place. The item can be stretched in a hoop or held taut with your free hand. Remove backing before you begin.
- Cut the threads with the stitch removal tool. Turn the stitch eraser on and place the blades against the bobbin threads. Slowly push the tool back and forth across the stitches, making sure you’re using just enough pressure to cut through the threads. The design of the teeth should ensure that only the threads sticking up over the surface of the fabric are cut – not the fabric itself.
- Repeat. Working in small sections, move your way across the entire backside of the embroidery design until the threads from all areas have been cut.
- Turn the shirt right-side out. Returning to the front of the garment, you should be able to easily remove all of the freshly cut threads.
- Pull out the stitches. Using one of the following methods, pull the threads from the front of the shirt: scratching with your fingernail, sliding a darning needle under the threads and pulling them up, pinching with your fingertips, or pulling them out with tweezers. If you come across stubborn threads that don’t come out easily, turn the shirt back inside-out and check which stitches may need to be re-cut. You can run the stitch eraser over these areas again or – if it’s only a few threads – use a seam ripper or scissors to cut the stitches free.
- Clean up leftover debris. After all of the stitches have been removed, roll a lint brush over the area to pick up any threads or small bits of fuzz left behind.
4. Embroidery Scissors
Embroidery scissors are just like standard scissors in their design, but they are smaller in size and have sharp, fine tips – making them ideal for cutting small stitched areas precisely. Where a regular pair of scissors will be clunky – easily cutting your fabric unintentionally, embroidery scissors allow you to get into small areas and cut only the wanted threads.
- Turn the shirt inside-out. It is always best to start working on the back side of the fabric, cutting here whenever possible.
- Cut the threads. Slide the sharp pointed end of the scissor blade under a section of threads and snip – being careful that you are not cutting the fabric along with the stitches.
- Turn the shirt right-side out to pluck stitches out. Using your fingertips or a pair of tweezers, you can pull the loosened threads out. Alternatively, you can use a darning needle to remove the stitches – slide the needle under a section of threads and remove them by pulling upward. Any resistance may mean that there are threads that still need to be cut. Check both sides and cut with the scissors where necessary.
- Repeat back to front. Working in sections – snipping, then pulling out the threads – work through the entire embroidery design until all stitches have been removed. Because the scissors are such a precision tool if there are threads that need to be cut on the front side – carefully! You can do so.
- Remove all loose threads. Now, using a lint roller or tape – you can clean up the finished product by removing any loose threads or dusty bits left behind.
How to Remove Hand Embroidery
Hand embroidery can add a beautiful, artistic touch to any piece, but for any number of reasons, you may still want to remove it. Generally, hand embroidery employs much fewer stitches overall – when compared to machine embroidery. With that in mind, the techniques used to remove this type of stitching will differ slightly. A stitch eraser should not be used to remove hand embroidered designs, whereas a seam ripper or embroidery scissors will do a great job.
When removing hand embroidery, you should start by removing satin stitches from the back side of the work. You can do this by cutting with a seam ripper or embroidery scissors. If the fabric you’re working with is delicate, scissors are the preferable choice – as they cut right through the thread. A seam ripper will put some pressure on the fabric as you pull to cut. Once the stitches have been cut, the threads can be pulled out from the front using your fingers, tweezers, or a darning needle. After removing the satin stitches, use the same method to snip and pull out running stitches.
Removing embroidery can be a tedious job, but in most cases isn’t difficult. However, there are certain fabrics that can be very unforgiving when it comes to stitching. While you can embroider on just about any material, thin materials will not take well to the aggressive pulling of stitches and can be easily torn with attempted removal. Removing stitches from silk, satin and other delicate fabrics should be reconsidered. Leather is another material that is not a great candidate for embroidery removal. Thick and sturdy, there will always be noticeable holes left behind.
How to Remove Embroidery From a Jacket, Hat or Backpack
Embroidery found on jackets, hats and backpacks is often done by machine. These thick designs can be removed in the same ways as listed above. The best – and quickest – choice is a stitch eraser. Another reason that a stitch eraser is a great tool for these items because they’re usually made from thicker materials. It may be a bit more difficult to maneuver a hat or inside of a backpack, but by following the step-by-step guide above, you can remove an embroidered design successfully.
How to Get Rid of Stitch Marks After Removing Embroidery
Washing an item is one simple way to shrink the holes left after embroidery removal. Check the item’s care label and follow the instructions for washing. Once clean and dry, the stitch marks should be much less noticeable. Pressing with a hot iron is another quick and easy method to reduce these marks – make sure the fabric you are working with can handle the heat before you begin. If the iron doesn’t do a satisfactory job on its own, you can put a little more manual effort into getting rid of these holes.
If you are left with stubborn stitch marks even after ironing, simply use your fingernail – or the edge of a spoon – to rub the fibers back into place. Make sure to use an appropriate pressure for the fabric, and scratch both horizontally and vertically to help move all fibers back into place. Press with the iron once finished – then flip and repeat on the backside. It may take a couple of rounds, but this technique will take care of the most noticeable stitch marks – leaving the fabric as good as new.
How to Remove Embroidery From Polyester
In most cases, embroidery takes best to natural fibers – polyester being an exception. But as a synthetic – and often tightly woven – fabric, when it comes to removal, the process can be damaging. If you must remove an embroidered design from a polyester item, choose a method that employs embroidery scissors or a seam ripper. Also, take extra care with each step – especially when pulling out those threads. Remember, with polyester, there is a greater chance that the item may be damaged. Another option if trying to get rid of old embroidery is to cover it with a new embroidered patch.
Can You Embroider Over an Existing Embroidery?
Embroidering over an existing embroidered design is not the best idea. The area will be raised above the rest of the material, making it difficult to cover and stitch through. Removing the embroidery first would be a much better option. This would leave a clean area that could then easily be re-embroidered. Alternatively – if you don’t want to go through the removal process – using an embroidered patch to cover an existing design would be a better choice.
How to Remove an Embroidered Patch
An embroidery patch is an alternative to stitching directly onto an item. Patches often include intricate designs with thousands of stitches that would be nearly impossible to remove individually. Generally, these patches are either sewn onto garments or applied with an adhesive – in some cases, both.
The first step in removing an embroidered patch is to cut the threads holding it in place. This should be done on the back of the garment, where the stitches will be more distinguishable. Next, pull the stitches out from the front. If the patch does not come loose after the stitches are removed, there was likely an adhesive applied as well. Two methods that can be used to continue loosening the patch are a hot iron and a fabric-safe liquid adhesive remover. Follow care labels for ironing, and if attempting an adhesive remover – test an inconspicuous area on the item before applying it to your garment.
How to Remove Printed Logos
It may come as a surprise – but removing printed-on logos is easier than you think. The most common method is to use a solvent, such as a nail polish remover. First, test a small area of the garment to make sure that the solvent won’t damage the fabric. If everything looks good after the test, soak the logo with the solvent from the back. Once the solvent has thoroughly soaked through, turn to the right side of the garment and peel the design right off! You may have to re-soak and peel to remove the entire design. And be sure to wash the garment before wearing it!
What Is the Best Way to Undo Embroidery?
The best method for removing embroidery depends on the style of embroidery you are handling. For professional machine embroidery, the stitch eraser will be the most efficient tool – quick and safe on most materials. For hand embroidery, though, you should opt for a seam ripper. This method might take a bit more time, but this precise tool will help ensure you remove that old design without damaging the item itself. Now that you know every technique necessary for removing old embroidery, why not hunt for new-to-you garments at your local thrift shop?!