I love the look and feel of vintage shirts. They are so soft and flexible. Vintage clothing can be expensive and hard to find, though. Can I get the look for a lower price? How can I make a shirt look vintage?
There are a couple of ways to make a shirt look vintage. For the distressed look, use table salt, pumice, or bleach to make the color fade. This will also make ink used in motifs or designs crack and peel. Using a sharp razor, cut rips and tears into the garment to mimic a well-worn look.
Making a modern shirt look vintage is simple and effective. Read on to find out how to make your shirt look vintage. Using these tried and tested methods, your shirt will be rocking the vintage style in no time.
What Makes a Shirt Look Vintage?
Shirts look vintage because they are old or because they have the appearance of being well-worn and faded. A true vintage shirt tends to be soft to the touch and comfortable to wear. Any color vibrancy will have been washed out years ago and any inked motifs are chipped, cracked, or missing in places.
There are two ways to achieve the look and feel of vintage. Your first choice is genuine vintage garments from a previous decade. The second option is to buy new apparel and alter it to make it look vintage.
Which choice you go for depends on why you want your shirt to look vintage. If you are into history bounding and want the real deal, the genuine article is hard to beat. Already well-washed and slightly faded, vintage shirts from previous decades will already be styled in the popular fashion of that era.
Known for having extra wide collars, a 1970s shirt will stand out against today’s smaller, streamlined shirt collars. Combined with a wide kipper tie and even wider flared jeans, your whole ensemble will scream vintage simply because the clothing style is dated.
Making your new shirt look vintage works a treat when you’re not looking to mimic a specific decade. You just want the comfy and well-worn look or a steam-punk aesthetic.
One of the easiest ways to make your shirt look vintage is to cut holes or tears in it. Another is to treat the shirt with bleach, vinegar, or even table salt to make the colors fade.
Why Make Your Shirt Look Vintage?
The distressed look is on-trend at the moment. So much so, it’s had a knock-on effect on the availability of vintage clothing.
Genuine vintage shirts are hard to find. Increased demand has caused prices to soar. Even new clothing designed to look vintage can be problematic. Buying new clothes like ripped jeans or distressed shirts can cost as much as the original vintage attire. Looking vintage can be a pricey exercise.
Faking the vintage look on a shirt you already own is a great way to make a fashion statement. Not only will the result be unique to you, but you can decide how vintage you want to go with it.
Do you want faded colors and motifs? Or do you want to go for the rips, holes, and tears too? It’s totally up to you. Better still, you can achieve the look for a fraction of the price an original garment would cost.
The treatment process to make your shirt look vintage will also improve the feel of the fabric. Instead of being a new shirt that is stiff and scratchy, the fabric will become soft, flexible, and super comfortable to wear.
How to Make Your Shirt Look Vintage: 8 Easy Ways
With commercially produced distressed clothing being expensive to buy, and genuine vintage clothing hard to come by, it can leave you feeling as though the vintage aesthetic is out of reach. Fear not, the vintage look is just a few steps away.
You can create your own vintage shirt at home using simple DIY techniques. All you need is a little bit of patience and some handy household products. Here’s a step-by-step guide to the more dependable methods you can use to send your shirt back through time.
1. Cutting, Tearing, and Clipping
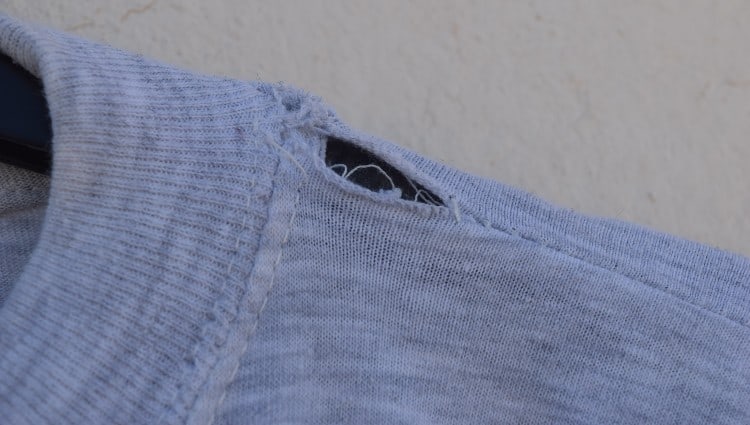
When it comes to looking vintage, nothing ages a garment better than some rips and tears. Especially if the clothing is made of denim. There’s just something about torn denim that oozes well-loved style.
These three techniques will add a touch of vintage panache to any casual shirt. You can use one of them or all three on the same garment. From cutting off sleeves to ripping out necklines. You can even tear into hems to create a frayed look.
Don’t overdo it, though. Too many holes, tears, or rips and you’ll end up with a shabby dishcloth rather than a chic vintage shirt. Remember the old adage, less is more.
You will need:
- A sharp razor blade
- A pair of fabric scissors
Step 1
Pinch a small piece of your shirt between your finger and thumb. You should end up with a loop of fabric. Using your scissors, snip the end off the loop. This will give you a small hole in your shirt. Do this a couple of times in different parts of the shirt until you are happy with the overall effect.
Step 2
To add extra emphasis, tear the hems. With a razor blade or your scissors, put a small nick into the bottom hem area of your shirt. Make sure you follow the line of the hem. Then, holding the hem and body of the shirt, pull the two sections away from each other. This will create a frayed edge. Keep pulling until the hem has separated and you are happy with the result.
This option is particularly effective on denim and can be used to create cut-off shorts from an old pair of jeans.
Step 3
If you want to distress the hems on your cuffs or collar edges, grab your razor blade and clip into the edge. This time, you want to go upwards into the hem edge. Only slightly, though, just the barest of touches will do the job.
Do this in random places around the cuff or collar. You only need a couple. Too many clips and your shirt will end up looking like you’ve added a fringe trim.
A couple of random nicks will create the look of cuffs and collars with a well-worn look. The type of fraying that occurs after numerous wears and washes.
Step 4
Whether you use cutting, tearing, or clipping on your shirt, always make sure to wash the garment after you’ve finished with the scissors. Use your usual wash setting and detergent.
Washing helps soften the tears and nicks. It will also start the fraying process and make the damage appear more natural.
You can wash in hotter water than normal if you want. This will help colors fade quicker, adding to the overall vintage appeal. Make sure the garment can stand a hot wash though, or it could end up shrinking.
2. Sandpaper or Dremel
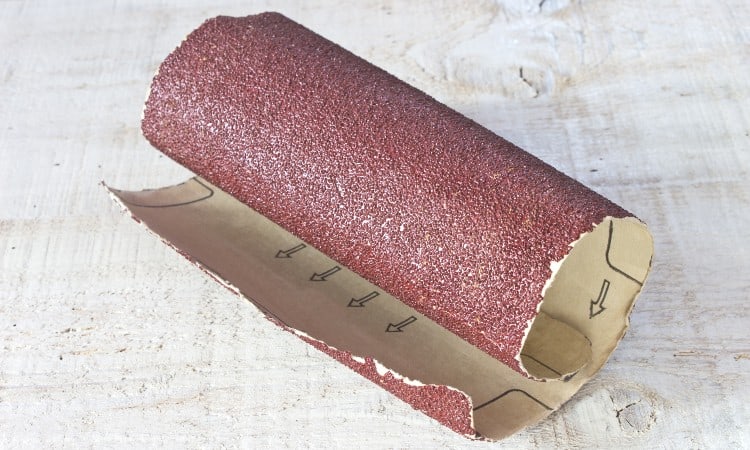
Depending on the thickness of your shirt fabric, sandpaper or a Dremel can work wonders to create a distressed look. Simple and effective, your shirt will be looking vintage in no time.
You do have to be careful with using abrasive items on fabric. Rub too hard, you could end up going straight through the garment to the other side. The worry here, you may damage the surface you are working on.
You will need:
- Sandpaper for light to midweight fabrics
- Dremel for heavier fabrics
- Cardboard to protect your work surface
Step 1
Put a piece of cardboard inside your shirt before you start working on it. This will keep the other side of the shirt and your table protected from damage.
Step 2
Sanding works best in areas that see the most wear. Hems, cuffs, knees, or elbows. Choose one of those areas and begin to rub it with either sandpaper or a Dremel. Try to match the grade of sandpaper to your fabric, so use a fine grade for lightweight material and a coarser grade for mediumweight. Dremels come in handy for denim or other heavyweight materials.
Rub until you have a fuzzy effect on your fabric or until you have a hole. The amount of sanding you do is up to you and the look you want to achieve.
Step 3
Wash your shirt using your normal wash cycle and detergent. This will remove any leftover debris from the sandpaper. It will also help to age the rubbing and make it look natural.
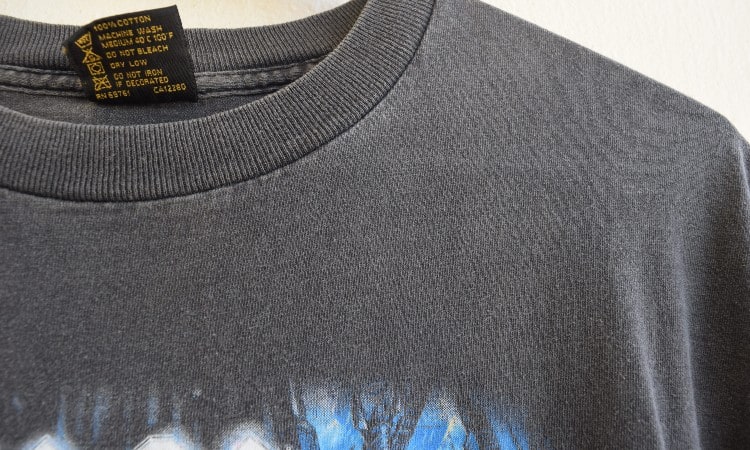
3. Bleaching and Fading

Bleach is a known color fading solution. This option will work on most fabrics but, you do need to be extra careful. Some fabrics won’t survive a bleach wash. Try to stick to cotton for this method.
You will need:
- 1/2 cup of bleach
- Bucket, sink, or basin
- Lukewarm water
- Hot water
- Wooden tongs
- Rubber gloves
- Washing machine
Step 1
Fill your bucket, sink, or basin with lukewarm water, enough to cover the garment completely. Add the bleach and using the wooden tongs, stir it.
Step 2
Put on your rubber gloves and dunk the shirt into the water and bleach mix. Swish it about in the solution for 1-2 minutes. Allow it to soak for 10 minutes.
Step 3
Rinse the shirt in hot water. Then, wash the garment as you would normally using your usual wash cycle and detergent.
Rather than using a bucket or sink, you can also use your washing machine. The steps are similar, although a little quicker.
Allow your washing machine to fill with hot water and add the bleach. Put your shirt in and wash on a short cycle. Stop the machine before the rinse cycle and allow the shirt to soak for 1 hour. Then rinse. Wash the shirt as you would normally.
4. Acetone
 This option works well on t-shirts with graphics or printed designs on them. However, you do have to be cautious. Sometimes, particularly if you have a white shirt, the colors from the graphic may run rather than fade.
This method takes a little longer than the other methods we’ve looked at so far. Aim for between 12-48 hours, depending on the amount of fading you want.
You will need:
- Bucket
- 3 gallons of water
- 2 cups of acetone
- Sponge
- Rubber gloves
- Wooden tongs
Step 1
Mix the acetone into the water. Wearing your rubber gloves, add the shirt and completely submerge it. Using the wooden tongs, swish it about in the water for 1-2 minutes.
If you are concerned about colors running, only treat the area with the printed design. Apply the water and acetone mix with a sponge.
Step 2
Leave to soak for 12-48 hours. Check on it occasionally and stir it now and then. Make sure to use wooden tongs when you do this. If you used the sponge method, you would need to place a rolled-up towel inside the shirt to prevent the acetone solution from soaking through to the back of the shirt.
Step 3
Rinse and wash as normal. You may need to repeat the process to get the level of fading you are looking for.
5. Vinegar and Lemon Juice
 Vinegar is acidic and is effective at removing color for a lived-in faded look. Like acetone, it does take time and patience. You’re looking at 2-3 days for this option. One drawback with this method is that if your shirt has graphics, you will need to use one of the abrasive methods to wear down the ink.
You will need:
- Bucket
- Vinegar
- Lemon juice
- Water
Step 1
Fill your bucket with enough water to completely cover your shirt. Add 1/2 cup of lemon juice. Put your shirt in the solution and leave for 3-12 hours. Keep checking on your shirt. If it’s not aging, add a little more lemon juice. Allow your shirt to dry naturally. If you have graphics, it’s at this point you will need to work on them separately with an abrasive, like sandpaper.
Step 2
Refill your bucket with water, and only this time add 1/2 cup of vinegar. Add your shirt and allow to soak for 4-12 hours. Dry naturally.
Step 3
Once the shirt is dry, wash as you would normally. Use your usual washing detergent.
6. Pumice Wash
Pumice is abrasive and works in the same way as sandpaper. The only difference, you don’t have to do any rubbing. Available from your local hardware or DIY store, pumice is also known as pumice rock, or you can also use rock salt.
You will need:
- Bucket
- Warm water
- 2 cups of pumice rock
- Or 1 cup of rock salt
Step 1
Fill your bucket with enough warm water to submerge your shirt. Add your shirt to the water and start to stir in the pumice. Keep stirring until all the pumice has been added to the bucket.
Step 2
Allow the shirt to soak for 3 days. When the 3 days are up, rinse in cold water and then wash as you would normally.
7. Water and Table Salt
You probably already have the ingredients for this option in your kitchen. Simple and effective, the water and table salt method can be started at the drop of a hat. You don’t need much preparation for this one.
However, as with the vinegar option, this one only fades color and softens fabric. For graphics or printed designs, you will need to combine the salt bath with an abrasive like a Dremel or sandpaper.
You will need:
- Bucket
- Table salt
- Water
Step 1
Add salt to a bucket of water to create a salt bath. Drop your shirt into the solution and swish it around for 30 seconds. Make sure the water covers the shirt completely.
Step 2
Leave the shirt to soak for 3 days. Once the 3 days are up, wash your newly-aged vintage shirt as you would normally.
8. Tea and Coffee Wash
One of the ways we used to make paper look vintage for school projects was to dye it in cold tea or coffee. Guess what? The same process works on fabric too! This is a quick and easy way of making your shirt look vintage.
You will need:
- Bucket
- Cold tea
- Or cold coffee
Step 1
Make a brew of tea or coffee and allow it to cool. The strength of the brew is up to you. A stronger mix will give you a darker vintage effect. Lighter colors can be achieved with a weak solution. You’ll need enough to fill a bucket and cover your shirt.
Step 2
Soak your shirt in the bucket of tea or coffee. Leave for 1-2 days, depending on the depth of vintage color you are looking for.
Step 3
Allow it to dry, so the tea or coffee has a chance to attach to the fibers in your shirt. Once it is completely dry, wash as you would normally.
How to Look Vintage Without Altering Your Shirt
As you’ve probably noticed, some of the methods in this article are a little time-consuming. What happens if you’re short on time? Can you make your shirt look vintage without waiting for 3 days? Or rubbing holes in it with a Dremel?
Yes, you can! There are ways to look vintage without changing the look of your shirt. A bonus, if you don’t cut, bleach, or stain your shirt, you can use it for other occasions. Not altering your shirt gives you a more adaptable wardrobe, particularly if you’re on a budget.
One of the easiest ways to make your shirt look vintage is to wear it with accessories from the era you are emulating. From the style of your hair and makeup to things like beads, brooches, and hats. Anything associated with a bygone age will help disguise a modern shirt and give it a vintage aesthetic.
Staying with the style theme, you can also create a vintage effect by using color. For instance, if you think about the 1970s, it was a decade known for bold, bright, and sometimes clashes of color. To give your shirt the vintage 70s touch, wear it with a bright green jacket and purple pants.
Keeping your shirt unaltered and achieving a vintage look takes imagination. But, the results can be amazing, individual, and on-trend.
Can You Make Any Shirt Look Vintage?
Any shirt can be made to look vintage. Although, you do have to consider the material the shirt is made from. You will find some fabrics will work better than others.
Natural fibers like cotton and linen will be easier to work with than synthetics. There are two problems with synthetics. The first is modern synthetics are designed not to fade. Getting them to fade can damage them.
In fact, that’s the second issue. Many of the methods for making a shirt look vintage can damage synthetic fibers. Bleach, for instance, is not a friend to most artificial materials.
Another thing to consider before you make your shirt look vintage is the style of the shirt. Casual shirts like t-shirts will suit the distressed look best. A dress shirt may end up looking used and abused rather than vintage.
This brings us neatly to the next thing to watch out for. What the shirt was designed for is another factor in whether you should make it look vintage. If it’s a shirt normally worn to the office, having holes, rips, and tears might detract from your professional image. The grunge look is best kept to items worn in your free time rather than for business or corporate attire.
Conclusion
Making your shirt look vintage is easy. All you need is time, patience, and a few household products like table salt and a pair of scissors.
I hope you liked the article. Has it helped you take the plunge into making your shirt look vintage? What method will you use? Let me know in the comments.