Maybe every time you buy jeans, you find the legs too long, or you want a pair of trendy jeans with more holes than denim. Either way, you can easily achieve that casual, mod look of frayed jeans at home with just a few simple tools! You can learn how to fray jeans using a simple pair of scissors or even a cheese grater!
Popular ways to fray jeans at home include using scissors and ripping holes in the denim or using scissors and placing the jeans in the washing machine for a softly frayed look. More abrasive methods include applying a cheesegrater, razor, or sandpaper to the denim to create a frayed appearance. For a controlled fray, plucking out threads with tweezers also works.
In this article, you will learn nine simple methods for fraying jeans. You will discover how to fray special jeans like stretch jeans. Finally, you will find tips on how to make frayed jeans fashionable!
Quick Navigation
What Are Frayed Jeans?
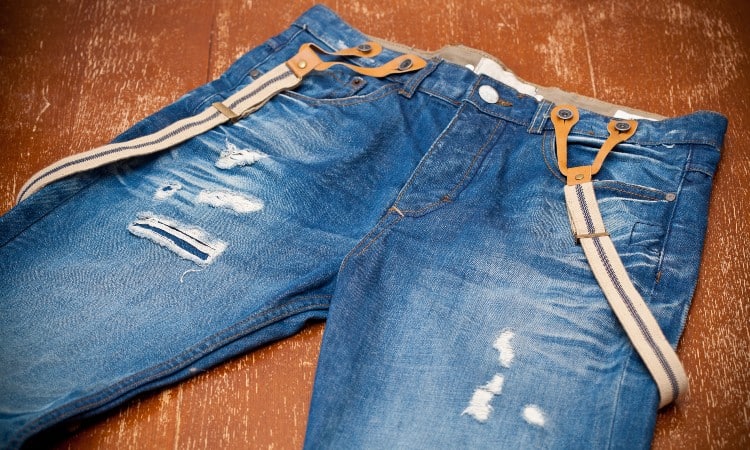
Frayed jeans feature unraveled or rubbed-raw denim threads at various places in the garment. A frayed hem with loose threads hanging down remains a popular style. Distressed knees and ragged slashes through the legs present a trendy look.
If you like your jeans because they offer a sturdy shield of denim between you and the great outdoors, you may find yourself rolling your eyes at this unusual fashion trend. But it’s quite true that since way back in the 1970s, frayed jeans have continued to find a spot in the latest fashion crazes!
Originally, the look had its roots in the 1970s punk rock music movement, which launched the first popular ripped jean style. The 1990s grunge movement carried the look even farther, using ripped jeans as an anti-establishment statement piece. But as so often happens, the rebellious statement of this fashion trend quickly caught on with teens and celebrities worldwide and slid into popular fashion by the early 2000s.
Over the past decades, a variety of frayed jean styles have emerged. The frayed hem remains super popular, as does the ripped-and-slashed knee. More mildly distressed versions offer faded-looking patches on the thighs and at the knees in jeans. And then there is the series of slashes all the way up the upper leg style, which leaves almost more air than denim in the jeans!
Today, you can buy frayed jeans from many recognizable jean brands and every clothing store, from Target to Belk. If you want a more customized fraying style or don’t want to spend extra money to pay for holes in your jeans, you can also easily learn how to fray your jeans yourself!
How to Fray Jeans: 10 Methods
You can fray jeans yourself using ten easy methods such as tearing, grating with a cheese grater or lemon zester, and distressing with sandpaper.
You may want to practice your fraying on a pair of cheap jeans from your local Goodwill before attacking your favorite pair of designer jeans with a cheese grater. None of these methods require special skills, but everything gets better with practice!
Plus, you need to pay attention to the kind of denim in your jeans for the best results. Classic blue and white denim look nice because you can pull out the white threads for a distinctive ragged edge. Stretch denim does not respond well to many methods here because the elastic fibers in the threads will curl up and create poofy edges at the rips, slashes, or tears in the jeans.
Before choosing a method to use, you should also decide what kind of frayed or distressed look you want. For example, do you want to shorten the hem of your jeans a little by adding a ragged edge around the ankle? Or do you want slashes all the way up the legs of the pants to make a real statement out of slim-fit or skinny jeans?
Once you know the style you want, you can easily match it to one of the simple methods listed here!
1. By Hand
Perhaps the most basic method for fraying jeans, ripping holes in the knees, can give you that classic gaping knee look. You see this wider kind of hole most often at the knee in jeans, but you could also use this technique on other areas if you want larger holes elsewhere in the legs of your jeans.
Also, you see this style most often used in straight-legged or loose-fitting jeans like boyfriend jeans, though you can try it in skinny or slim jeans if you want!
- First, try on your jeans and bend your legs to find the spot where the denim folds at your knee. Use chalk or a pen to mark this line across the front of the knee. Make sure you don’t mark the line too high up on your knee, or your kneecap could catch on it and snag every time you try to sit down while wearing these pants!
- Take off the jeans and use a pair of sharp crafting scissors to snip a starting hole at one end of your chalk line.
- Then use your fingers to rip the hole open down the rest of the line. The ripping or tearing method will create a ragged, large hole at the knee.
- If you want a much neater slash at the knee rather than a big hole, check out the “at the knee” section further down!
- For a nice frayed edge around the hole, use your fingers to carefully remove some of the vertical threads and tease out the ragged white ends of the remaining vertical threads, so they make a sort of fringe around the edge of the hole.
- If you don’t want the hole to expand as you wear the jeans, you can sew a ring of tiny hand-stitches just inside the frayed edge to strengthen the unfrayed denim and keep it from unraveling further.
2. With a Cheese Grater
Believe it or not, a simple cheese grater borrowed from your kitchen drawer can easily fray jeans with a little elbow grease!
Using a cheese grater to distress or fray jeans is one of the most popular DIY methods because it works so quickly. You should practice this on a pair of throw-away jeans first because it’s very easy to take the grating motion too far and end up with bigger holes than you wanted!
- As always, you should start by marking the areas you want to fray. Popular placement for distressed/frayed patches or holes include the front of the thigh, the back pockets, the knee, or the middle of the shin. Use chalk or a washable fabric marker on these spots.
- Next, slide a protective barrier inside the jeans behind the spot you marked. You can use a folded magazine or a piece of cardboard for this.
- Borrow your cheese grater from the kitchen and rub it up and down vertically over the spot you marked.
- Pause every couple of up-and-down motions to check on the level of fraying. You should start to see some of the top threads in the weave coming apart quite quickly.
- If you want a rubbed look, stop before you create a hole all the way through the denim.
- If you want a hole with horizontal threads stretched across it, you will want to grate quite a lot of the denim away.
- Once you have grated to the level you like, you can finish the hole in a couple of ways. You can use your fingers or tweezers to gently remove the remaining vertical threads, leaving horizontal threads stretched across the hole. Or you can use sandpaper on the edges of the hole to make a fuzzy frayed white edge.
3. With a Razor
A disposable razor can also easily abrade the fibers in your denim jeans to create a frayed appearance. This method takes a little more time and patience than a cheese grater or sandpaper, but it also offers more control and precision.
- As always, you need to pick a spot to fray before you begin. This method works well on small areas like the zipper or the tops of pockets if you want to create an authentically frayed, faded look in small spots.
- You should also put protective padding behind the spot you want to fray. You can use anything that will fit inside your jeans, such as a folded newspaper or a squashed cereal box.
- Get a cheap, disposable shaving razor and scrape it over the surface of the fabric. Scrape lightly at first to see how much effect the razorblade has on the denim. Continue this motion until you create the frayed appearance you want.
- To create a frayed hole, you will want to scrape lightly and then push down harder as you reached the center of the spot you want the hole to go. Or just use small, delicate scraping motions in the center of the hole until you scrape right through the denim.
As a pro tip, using razor blades or sandpaper lightly over the surface of the denim will make the fabric softer and more supple as well!
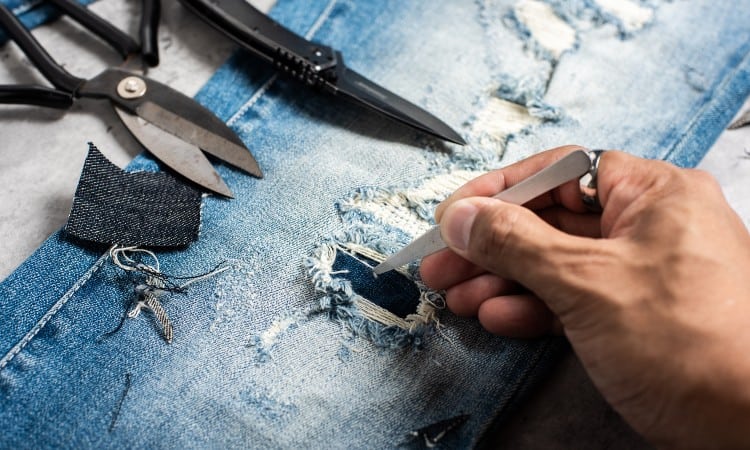
4. With Tweezers
Using tweezers to pluck out threads along a cut edge can create a carefully styled frayed appearance in your jeans. You can use this method for precise fraying at the hem of your jeans, or you can create frayed holes anywhere on the jeans–popular styles these days sometimes have frayed slices all the way up the pant legs, from the ankle to the front pockets!
- Once you have chosen the spot you want to work on, use a pair of sharp scissors to create a neat slice through the denim. You can make a tiny snip if you want a small frayed hole or a clean slice horizontally across the leg if you want repeated frayed slices up the leg. Make sure you do not cut through the side seam of the jeans, though!
- Use your tweezers to tease out loose ends of threads along the edge of the slice or snipped sections. This will create a soft, white edge around the hole or slice.
- To make a bigger frayed hole with artful horizontal threads remaining, carefully pull out just the vertical threads from a section of the jeans using your tweezers. You may want a pair of tiny embroidery scissors on hand to snip the vertical threads lose as you work.
- If you want a frayed patch that has threads poking out all over in a soft fuzzy mat, pluck threads lose all over the patch instead of just focusing on the vertical threads.
5. With Sandpaper
Whether you want a mildly distressed white spot on your jeans or a full-fledged hole frayed through the denim, you can get the look you want with a few pieces of sandpaper! For light distressing, use fine-grit sandpaper. For bigger holes, use sandpaper with a coarser grit, or buy a sanding block from a local hardware store for an easy-to-grip sanding method.
- Before you begin sanding, you need to select the parts of the jeans you want to fray. Popular spots for this include the top edge of pockets, the knees, and the front of the thighs.
- As a safety precaution, put a piece of cardboard or cardstock inside the jean leg behind the spot you want to fray. This will avoid any damage to the back of the leg as you work.
- Rub the sandpaper briskly up and down in the areas you selected. Sandpaper works super quickly on fabric, so keep an eye on how much the threads wear away as you work.
- If you want a natural-looking distressed look, sand just a tiny bit until you see white peeking through the blue of the denim. If you leave this light distressing, the denim will fade and fray naturally over time as you wear and wash the jeans.
- If you want actual holes in the denim, keep sanding until you can see the main vertical and horizontal threads. You can snip some of the vertical threads and pull them out if you want or sand straight through to create a larger hole!
6. In Wash
You can use your washing machine to create a frayed look in your jeans in several different ways.
- Washing your jeans will naturally fade and soften them just a fraction every time they go through the laundry cycle. The constant agitation in the washing machine creates friction on the cotton fibers in the denim. For this reason, you can easily create a very natural frayed hole or edge on your jeans by starting with just a small hole and then washing the jeans to let the water do the rest of the work for you.
- Another popular way to use your washing machine to fray your jeans is to apply bleach to the edge of a hole or hem, creating a whiter edge that will more starkly contrast against the fabric of the jeans. After applying the bleach, immediately wash the jeans to stop the bleaching process before it eats into the denim too much.
- Finally, you can create natural-looking frayed edges at the hem of your jeans or the pockets by using a seam ripper to slice through just a few stitches at the seams. Then wash the jeans, and the friction in the machine will abrade the picked-out seam, creating a frayed spot!
7. At the Ankle
Probably the most popular place to fray your jeans is at the ankle! You can use other methods such as the sandpaper technique to accomplish this, but for the quickest and most precise method, you will want several tools, including scissors, a seam ripper, and tweezers.
- To start with, you need to measure how much shorter you want to make the legs of your jeans.
- Mark this line around the edge of the hem using a measuring tape and a piece of chalk.
- If you want a high-low hem, carefully measure the back of the jean leg a little lower than the front. For example, you can measure one inch up from the hem across the back of the leg and then 1.5 inches up from the hem for the front.
- Cut along the lines, you measured using sharp scissors.
- Next, use a seam ripper to carefully pick out the stitching at both side seams. Take out the stitches about half an inch up from the newly cut hem. If you want a deeper frayed edge, you can pick out an inch or more instead.
- Next, slice a small horizontal gash in the center of the pant leg, either half an inch or one inch from the new hem, depending on how deep you want your frayed edge to be.
- Use tweezers to gently tug at the loose thread along this slit, removing some vertical threads if you want a raggedy edge or just plucking and pulling to create a distressed hem.
- Running your jeans through the washing machine after you finish with the tweezers will make the frayed edge softer and fluffier.
8. The Edges
Jeans naturally wear at certain points over time, such as the belt loops, the pockets, the inseams, and the knees. To get that natural look at the edges of the jeans, you can use many of the methods provided in this article.
- To fray belt loops, zippers, and the corners of pockets, try using the razor blade method. This allows you to carefully abrade these small sections for a naturally distressed look.
- If you want to fray the edge of the hem, try using a seam ripper! You can find step-by-step instructions for this in the section titled “how to fray the bottom of jeans” later in this article.
- To fray the side seams or the edges of the pant legs, the easiest technique is to use sandpaper. You do not want to slice through the side seams, as this could mess up the overall shape of the jeans.
9. At the Knee
Another classic at-the-knee fraying technique requires a sharp Exacto or craft knife to slice many fine lines across the denim.
- Start by finding the knee on your jeans. To do this, try them on and squat down to see where the denim folds at the bend in your knee.
- Mark this with chalk. If you want many lines across the jeans, take them off and use a ruler to draw multiple lines above and below your original chalk marking to locate the knee. You will want to draw these lines horizontally across the knee, not vertically.
- Next, place a piece of thick cardboard inside the jean leg behind your chalk markings. You will need this protective buffer to prevent you from cutting straight through to the back of the jean leg or even through the jeans and into your work table!
- Slice across your chalk lines with a very sharp knife. This should create clean slashes in the denim.
- If you want a ragged edge on your slashes, you can rub the open cuts with sandpaper or simply tease the loose threads free with your fingers.
10. How to Fray Stretch Jeans
You can fray stretch jeans or jeans with spandex or Lycra by following a few careful steps. In general, it is much easier to get good frayed edges on non-stretch jeans.
But if you really want holes in your jeggings or skinny jeans, give this method a try!
- Try on your stretchy jeans and use chalk to mark the spot you want to rip or fray.
- Take off the jeans and use sharp scissors to cut a small slice horizontally at this point. If you want a hole at your knee or across the width of the leg, cut the slice longer. If you want a small frayed patch elsewhere in the jeans, keep the slice as small as one inch.
- Next, use a nail file to gently abrade the cut edges. You will start to see loose threads coming out of the cut edge.
- Use your fingers to pick these threads apart by using a tugging and rubbing motion between your thumb and forefinger. This takes a long time! Keep going until you have a “thready” looking edge around the hole.
- Finally, run the jeans through the wash one or two times to get a softer, fuzzier look on the frayed edge.
How to Fray the Bottom of Jeans
 One of the best ways to fray the bottom of jeans is to use a sewing machine and a seam ripper.
- Start by measuring the new point where you would the hem of the jeans to end. Mark this with chalk.
- Sew a line of stitches in a thread that matches the jeans around this line, all the way around the circle of the leg opening. If you do not have a sewing machine, use a fine line of fabric glue on the inside of the pant leg at this point instead.
- Next, cut off the hemmed edge of the jeans. Make sure you just slice off right above the stitching.
- Use a seam ripper to start below the stitching line and carefully work down through the threads. This should cut through and pull out the horizontal threads, leaving the vertical threads hanging straight down from the pant leg.
- Keep slowly working around the circle with your seam ripper until you have removed the horizontal threads and gently fluffed all the vertical threads in a frayed hem!
What Tools Do You Use to Fray Jeans?
You can use several tools to fray jeans, including sandpaper and scissors.
- For a distressed, softened surface on the denim, try using sandpaper. Fine-grit paper will abrade the fabric fibers less, creating a softer surface. Coarse-grit paper will remove surface threads, allowing you to easily create holes or frayed edges.
- Scissors help create holes and slashes in jeans or make the starting point of a hole that you can widen using your fingers, tweezers, or a nail file.
- A seam ripper allows you to remove stitching in jeans and create frayed edges as the hem.
- A cheese grater will roughly abrade denim, creating quick frayed holes or worn-out-looking patches on the jeans.
- A razor blade does this as well, but more slowly and delicately, making it a good tool for small areas such as belt loops or the corners of pockets.
How to Fringe Jeans Fast
The best ways to fray jeans fast are to use a cheese grater or sandpaper. Other methods, such as using the washing machine, will work and may look more natural but require more time.
Keep in mind that if you want to fray stretch jeans, you will have to work more slowly. This method does require using your fingers to painstakingly rub the edges of a hole into a frayed state.
Are Frayed Jeans Still in Style?
Frayed jeans are still in style, as you can see by opening any fashion magazine, scrolling through Pinterest, or visiting the teen section of most clothing stores!
You can make frayed jeans look classy by pairing them with heels or ankle boots. For guys, pairing ripped jeans with a leather jacket and nice boots can create a casual but-hardcore vibe for a night out.
For a laid-back look, ripped jeans go great with t-shirts and tennis shoes for both men and women!
Conclusion
You can fray jeans yourself using just a pair of scissors and your hands, or you can spend hours carefully plucking out threads and teasing them one at a time with a pair of tweezers. You can abrade the denim of your jeans coarsely with a cheese grater or sandpaper, or you can work gently with a nail file. You can even use a sewing machine and a seam ripper to create a perfect frayed hem at the bottom of your jeans!
In most cases, working with blue-and-white non-stretch denim will give you the best results. This kind of cotton fabric can easily create a soft, fluffy white edge when frayed. If you want to fray stretch denim, you will have to work slowly to avoid messing up the elastic strands in the fibers.