Few things in life can embarrass you as badly as a broken zipper, especially if you look down and realize that your fly won’t close properly! Separated zippers can inconvenience you in many ways, from spilled bags to unzipped flies or jackets that won’t keep you warm on a chilly day. Fortunately, you can quickly learn how to fix a zipper that separates.
The best way to fix a zipper that separates is to adjust the tension of the slider and cause it to grip the zipper teeth more tightly. Other solutions include taking apart the zipper, removing the slider, and realigning the teeth so they mesh together. Quick hacks to help a zipper work properly include using a safety pin or paperclip to hold the teeth shut.
In this article, you will find out how a zipper works and how it can break down. You will discover twelve simple methods for fixing a zipper that separates. Finally, you will find tips on how to fix a separated zipper on a tent, backpack, or other items.

Quick Navigation
How Does a Zipper Work?
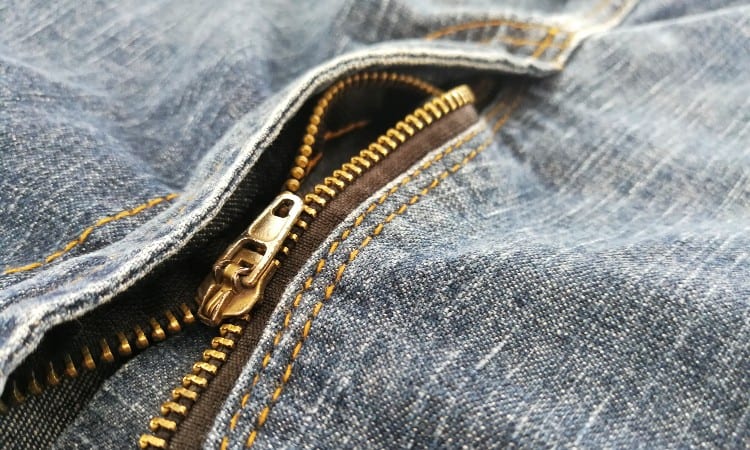
A zipper works by using a wedge-shaped slider to force two rows of angled teeth to mesh together. This forms a very strong seal that will not easily separate until the wedge slider comes back down, angling the teeth back away from each other.
Zippers contain several key parts that will help you understand how they work.
- The tape is the fabric or plastic strip on the outside of the teeth on both sides. This provides a way to attach the zipper to the garment or item, usually by sewing. Most modern zippers use teeth molded directly onto this tape for extra security.
- The teeth have a unique shape featuring a hooked top and a hollow lower portion, also known as a concave-convex structure. When engaged together, each tooth will snick into the hollow of the teeth on the other side of the tape. This perfect fit with all the hooks and hollows aligning is what allows a tight seal.
- Teeth come in different types. You may often see plastic teeth molded onto the tape, but you can also find teeth made out of coiled nylon and sewn onto the tape. Metal zippers often have metal teeth sewn onto the tape as well.
- The top and bottom edge of each row of teeth will feature a small metal or plastic rectangle called a stop. This helps prevent the slider from sliding right off the teeth.
- The slide is the latching mechanism. The inside of a slide looks like a Y, with a wider portion narrowing down to a skinny section. This lets the slide ease over the teeth and force them together. The downward-pointing portion of the slide forms an external-facing wedge angled just right to plow through the teeth and push the hooks away from each other to unzip.
- The pull attaches to the top of the slide to make it easy for you to move the slide up and down through the teeth.
Can You Fix a Zipper That Keeps Separating?
You can often fix a zipper that keeps separating with a few simple techniques and a couple of tools. This does depend on the type of problem, though.
If you check the zipper and it has separated because the teeth or coil pulled away from the tape, you probably need to replace it. This holds true for missing teeth as well. You can’t easily replace teeth because they need to match each other perfectly to snick together in that meshed chain.
If you try to zip up and the teeth simply don’t align properly, you can take apart the zipper and reconstruct it to fix the alignment in many cases. You can learn a couple of different methods for making this repair in the next section!
Another common problem is that the slider may have become too loose, and you can use a few household tools to tighten it up and get it back at the correct angle for wedging through the teeth.
If you lose the pull of the zipper, you can very easily replace it. But if you lose the slider or some teeth, the zip is a goner and you should just replace it.
How to Fix a Zipper That Separates: 12 Methods

You can fix a zipper that separates using common household tools like pliers, a screwdriver, or tweezers. If you still have all the pieces of the zipper and it just won’t stay shut, you probably need to fix the slider or align the teeth to get things working again. If you have lost some of the parts of the zipper, you can use a quick hack like employing a safety pin or just get out your sewing machine and replace the zipper.
1. Fix the Slider
At least half of all zipper problems come from a worn-out or too-loose slider. Fortunately, you can often fix the slider quite easily!
When you look closely at the slider, you will see that it consists of a top plate that attaches to the pull, a wedged interior, and a bottom plate that lies below the teeth.
The easiest way to fix a slider is to use a pair of pliers to tighten it.
- Put the slider back onto the teeth if necessary. See the screwdriver method for tips on how to accomplish this!
- Next, examine the slider and notice that it has a top plate connected to the pull and a bottom plate beneath its wedge shape. You want to pinch those two plates a little closer together to tighten up the slider.
- Find a pair of flat-nosed pliers. Neele-nosed pliers won’t grip as well, as the rounded edges will slide off the flat top and bottom plate.
- Hold the slide in your left hand and use your right hand to set the pliers around the top and bottom plate. Squeeze gently.
- Try the pull again and see if it meshes shut. If not, repeat the plier squeezing, keeping your pressure light.
In some cases, you can actually replace a missing slider. But this gets tricky because you need exactly the right shape and size of the slider to match the teeth.
2. Check Pressure/Align Teeth
One of the most common separating zipper problems on clothes and bags is that the teeth have skewed and no longer align properly.
Before trying this method, check the pressure on the slider with pliers to see if that solves the issue. If not, go on to taking apart the zipper and fixing the alignment:
- Carefully remove the bottom stops on the teeth using pliers.
- Use the pliers to carefully pry out four teeth on each side of the tape where you just removed the bottom stoppers. To do this, close the plier tips over one tooth. Squeeze the handles of the pliers and pull back at the same time.
- Put the slider back on. You should find this quite easy without the stoppers in the way, but you can use tweezers to help insert the teeth into the wedge portion of the slider if necessary.
- Use a needle and thread to sew shut the area you took teeth out of. Basically, you will shorten the zipper by sealing off this bottom portion. Make sure you knot off your thread to prevent unraveling later.
3. Pliers
Another handy way to use pliers to fix a zipper that keeps separating is to bend uneven teeth back into place.
One of the reasons the teeth can refuse to mesh properly is that they have bent out of place and will no longer align with each other.
- Look at the teeth running down each side of the tape. Do any of them seem bent backward or slightly crooked?
- If so, get a pair of pliers and carefully lever each tooth back into the row. Small jeweler’s pliers may work best for this, as you want to straighten one tooth at a time.
- If the slider has fallen off the unruly teeth, use your pliers, a screwdriver, or tweezers to reinsert the teeth and pull upward on the slider to close the teeth together.
- If you hit a snag at the previously bent teeth, don’t try to force the slider. Instead, unzip everything and examine the teeth again to see if they need further straightening.
4. Screwdriver
If one side of the slider has come off the teeth, you can use a screwdriver to fix the separation. You can also try this if the slider and pull have entirely come off both sides of the teeth.
- Start by finding a small flathead screwdriver.
- Next, locate the bottom end of the zipper. On a garment, this is easy because the bottom is the end closest to your feet, but on a bag or other item, the “bottom” is usually the farthest right side of the teeth as you face the zipper.
- Insert the wider end of the pull onto the bottom stoppers. You do need to make sure you place the pull in the correct direction, or it will not slide over the teeth.
- The teeth will not easily slide into the pull most of the time, but you can use your small flathead screwdriver to provide leverage and help ease the teeth back into the slider on each side.
5. Tweezers
Another handy tool for fixing a separated zipper is a basic pair of tweezers. You can use tweezers for a repair in several ways:
- If the slider has come off the teeth, use tweezers to help force the teeth back into the wide end of the slider, and then draw the pull upward to return the slider to the zipper. This method gives you more control than using a screwdriver and may work even better!
- If the pull jams up on the teeth, use tweezers to pry out the thread or other particles that may have logged up the slider.
- Tweezers don’t exert as much force as pliers, but in a pinch, you can also use them to squeeze a loose slide top and bottom plate closer together. This will help force the teeth to mesh together properly if you have a constantly separating zipper.
6. Dish Soap/Petroleum Jelly
Sometimes all a stubbornly separating zipper needs is a quick fix to help the teeth and slider glide together more smoothly. In this case, you can try two different options to grease the teeth and slider.
Try dipping a cotton ball in a tiny amount of dish soap. Then wipe the soapy cotton ball up and down the unzipped teeth to smooth the way for the slider. Use this method carefully, as you don’t want to get soap all over your garment!
You can also try a tiny amount of petroleum jelly on a cotton ball rubbed into the teeth. This usually works wonders on a zipper, but the jelly can stain some types of fabric, so make sure you do not smear it onto the fabric of the clothing!
7. Graphite Pencil
Another way to fix a separated zipper is to use the lead from a regular graphite pencil. You may especially want to try this if you notice a broken zipper when you’re at work!
- Sharpen an ordinary pencil and then “color” all over the hooks and hollows of the teeth.
- Stick the pencil inside the slider as far as possible to rub graphite inside the wedged portion of the slider.
- Sometimes this small amount of power from a pencil lead will ease the slider and teeth and help the hooks of the teeth snick together properly.
8. Nail Polish
It doesn’t happen as often, but it’s possible that your zipper keeps separating because the teeth have worn down after lots of use. In this case, you can try building up the teeth using nail polish.
- Find a shade of nail polish that matches your zipper.
- Unzip the zipper and spread the teeth on top of a plastic bag or piece of cardboard.
- Carefully coat the teeth with nail polish. You want a light coat–if you glop it on, you may end up with clumps that prevent the slider from securing the teeth.
- Let this coat dry, and then apply another careful coat.
- Finally, try the zipper again and see if it seals shut!
9. Paper Clip
If you’re in a hurry, you may want to use a quick paperclip hack instead of truly fixing a separated zipper.
Sometimes zippers keep coming undone because the slider has gotten loose and keeps dropping down to the bottom. To truly fix this problem, you need a pair of pliers and a bit of time to play with the amount of pressure necessary to get the slider closing tightly onto the teeth.
If you do not have pliers or time or are away from home when you notice the issue, you can try using a paperclip to secure the slider at the top of the zipper.
- Loop the wide end of the paperclip around the button on our pants or skirt.
- Weave the other end of the paperclip through the pull or through the loop in the top slider plate, trying not to unbend the paperclip too much.
- Straighten the paperclip so that it forms a bridge between the pull and the button on your pants.
- This should temporarily keep the slider at the top of the teeth and prevent your zip from coming undone!
10. Safety Pin
Another quick hack for a zipper that keeps separating is to use a safety pin at the top of the zip.
All you have to do is slot the pin through the opening in the pull and then secure the pin to the fabric of your garment so that the slider will not fall back down the zipper.
This method does not work if the teeth have an issue, but it will provide a temporary solution for a broken slider!
11. Commercial Products
 If you want to get serious about repairing your separated zippers, you can buy commercial products like a Fix N’ Zip to do most of the work. Alternatively, you can find many affordable zipper repair kits you can keep on hand for future use as well!
A Fix N’ Zip replaces the old slider and helps realign the teeth that have separated. This handy little tool can work on bags, clothes, or tents!
The only catch with this or most other repair products is that you need to check the size of the zipper to make sure you buy the appropriate repair piece. You can often find the size stamped into the back of the slider.
12. Replace Zipper

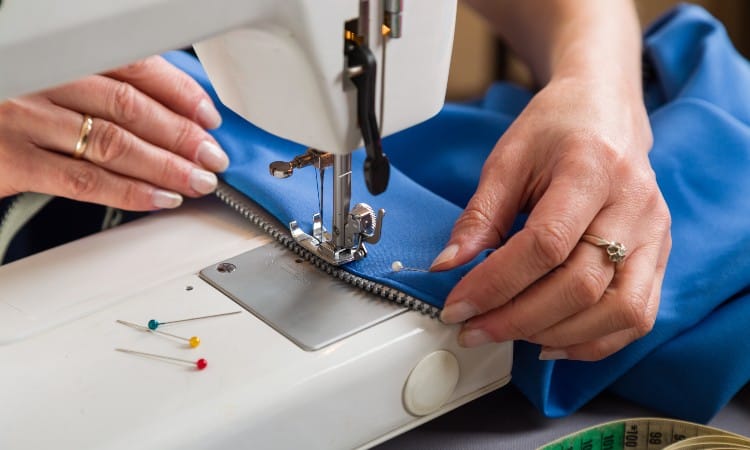
If you have a sewing machine, you can rip out a separated zipper and replace it with a new one in a few simple steps. This process takes more time and work than any other method described in this article.
If you do not especially care about the garment with the broken zipper, you may want to consider just buying a new piece of clothing instead of taking the drastic measure of replacing the zipper.
- Start by finding a new zipper of the same length and size as the one in your garment. You can buy zippers for one or two dollars at most sewing stores or order one to your exact specifications online through Amazon or another online venue.
- Next, use a seam ripper to carefully pick out the stitching that holds the zipper to the garment. This will take some time. Try to find good lighting to see the tiny stitches as you work!
- Set aside the old zipper.
- Use your sewing machine to baste the zipper seam shut. Press it open so that the seam allowance lies flat to either side of the seam inside the garment.
- Pin one side of the zipper tape to the seam allowance. Make sure the teeth line up exactly with the stitching in the middle of the seam.
- Use a zipper foot to sew one side of the tape to the seam allowance, sewing close to the teeth.
- Pin the other side of the tape to the other side of the seam allowance, and sew this in place.
- Remove all the pins.
- Using small hand stitches, sew the zipper tape and seam allowance down to the garment, making sure your small stitches do not show too much on the outside of the garment.
- Finally, use a whip stitch to hold the bottom of the zipper in place onto the seam allowance.
Can a Tailor Replace a Zipper?
Most tailors can replace a broken zipper in garments like slacks, dresses, or jackets. Leather jackets or bags may fall outside of a tailor’s regular skillset.
Professional zipper replacement fees can range from as little as $8 to as much as $75. This mostly depends on the complexity of the garment and the type of zipper used, as some zippers can cost a lot more than others.
If a tailor can easily fix the zipper or simply needs to replace the pull, they may charge you less than $5. It all depends on the type of work required.
As with most professional alterations, you get what you pay for. If you want the assurance that the zipper in your favorite dress will not break again, go to a professional!
Ripping out and replacing a zipper yourself is not too hard if you have some basic sewing skills. But if you do not have much experience with a sewing machine, you should leave this task to the experts.
How to Fix a Separating Zipper On:

Now that you know the basic zipper repair methods check out these tips for using the right method on a backpack, bag, or even a tent!
Backpack
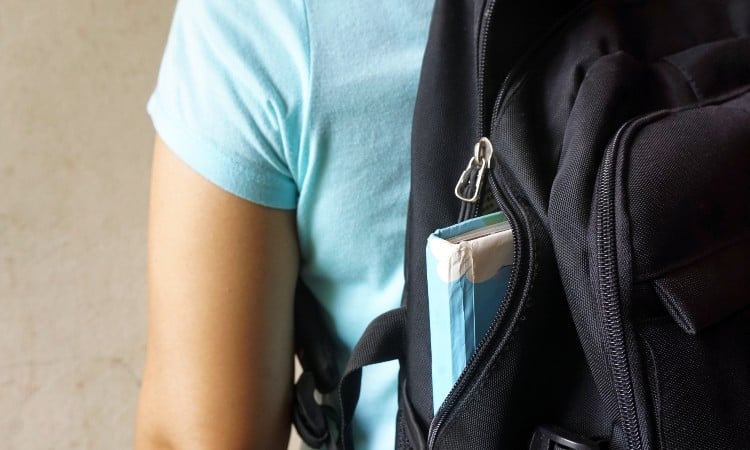
The best way to fix a separating zipper on a backpack is to use the checking pressure and realigning technique. This process usually takes about twenty minutes and requires hand sewing skills, but it will permanently repair your backpack.
For a loose slider that keeps causing the zipper to separate, you can use a safety pin to secure the pull to the fabric of the bag. This does not look as nice, but it works!
Bag
Most of the time, the best way to fix a separating zipper on a bag is to use pliers on the slider. Zippers on bags often endure a lot of stress as bags get overfilled or just used a lot.
This can cause the slider’s top and bottom plates to start easing farther apart, which in turn means that the slider will not force the teeth of the zipper together as tightly as it should.
Use the plier techniques described earlier in this article to tighten that loose slider!
Jacket
One of the easiest ways to rescue a separating zipper on a jacket or coat is to use the dish soap method. This work well if one side of the teeth has poofed out below the separation and you have uneven lengths of teeth to cover on each side.
Simply coat the longer side of the teeth in a cotton ball soaked in a little dish soap, and gently work the slider to the bottom of the zipper. After that, zipping upward should realign everything!
Tent
 The best way to fix a separating zipper on a tent is to use a repair kit. You can find these quite cheaply on Amazon. If you do a lot of camping, you should always keep this kit with your gear!
If you can’t fix a zipper on a pair of old jeans, you can just throw them away and buy new jeans. But tents are pricey and provide you with crucial protection from the elements. A broken zipper could mean snakes or spiders crawling in with you at night! Go the extra mile and buy a repair kit for this fix.
Conclusion
Next time you discover a separated zipper on your jeans, jacket, or backpack, don’t panic! You can easily fix the separated teeth using pliers, tweezers, or a screwdriver. You can also use petroleum jelly, dish soap, or pencil lead to smooth the slider over the teeth and help them align properly. Another common issue with separating zippers is that the slider has gotten loose and needs pressure to force it back onto the teeth.
If you find bent teeth on your zipper, use jeweler’s pliers to ease them back into place. But if you find missing teeth, consider replacing the zipper with a new one using a sewing machine. Of course, in a real emergency, you can often use a simple paperclip or safety pin to hold your zipper shut until you get home!