The older a T-Shirt is, the better it looks. It’s no wonder distressed T-shirts are so popular. Not only are they comfortable and soft to wear, but they also have a lived-in charm. As they can be expensive to buy, I need a cheaper option. Can I make my own? Can I learn how to distress a t-shirt?
Distressing a T-shirt is the art of making it look old or vintage. The look can be achieved by cutting, ripping, or tearing the fabric on purpose. Household items like cheese graters, razors, and sandpaper can be used to make holes in a t-shirt. Color can be faded through the use of bleach.
Let’s take an in-depth look at distressing a t-shirt. This article will cover the methods you can use to create your own unique and individual design.
What Is a Distressed T-Shirt?
A distressed t-shirt is one that has been designed to look old and well-worn. There are two ways to acquire a t-shirt with a distressed look. You can either buy one off the peg, or you can turn one of your existing t-shirts into a distressed shirt.
The distressed look is created by purposefully slashing, tearing, or ripping holes in t-shirts. When you buy a distressed t-shirt ready-to-wear, this process is done before the garment is sewn together. For the homemade version, the cutting is done after you’ve bought the shirt.
In either case, the result is the same. Distressed t-shirts have a rough, worn, lived-in appeal. They look bold, youthful, rebellious, and edgy. Better still, no two distressed t-shirts are the same. Echoing your individuality, they can help you stand out from a crowd.
Done correctly, ripped t-shirts can enhance your personal style. They are giving you exuberant street-wise credibility free from any structure or conformity. There is a fine balance, though. Less is more is definitely something to watch with distressed t-shirts. Overdoing the cuts, tears, and small holes will make you look unkempt.
The art of purposefully making clothes look worn out has been a trend since the 1960s. Eager to distance themselves from the stilted fashion of their parents, the youth of that decade broke away from traditional expectations. Their drastically cut clothing held together with safety pins became the identifying factor of the punk movement.
These days distressed clothing is a bit more reserved. Tears, rips, and slashes are more refined and tend to be coupled with bleached colors for an overall worn-out aesthetic.
But even with less need for safety pins to hold the look together, distressing your garments is still a sign of youthful vitality. A distressed t-shirt in your closet screams individuality and a fun-loving rebellious streak.
How to Distress a T-shirt: 5 Ways
Buying a commercially made distressed t-shirt can be expensive. There are ways to create the look using a t-shirt you already own, though. Each method is easy to do and effective.
Not only that, you can use everyday household items. Creating your own distressed t-shirt can give you a unique and individual garment and you’ll have fun in the process!
Before You Start Distressing Your T-Shirt
The first thing you’ll need to do is choose the t-shirt you want to distress. You can use any t-shirt you already own or buy a used one from a thrift store. Pay attention to the fiber content as some fabrics will be harder to work with than others.
For instance, heavy cotton, like denim, will take longer to distress if you use one of the abrasion methods we’ll be looking at in a moment. Instead, cotton blended with polyester will take less effort and fray quicker.
Next, think about the effect you are aiming for and the best way to achieve the look of your dreams. Do you want uniformity to the design? If you do, you’ll want to mark cutting lines on your t-shirt.
Or do you want to throw caution to the wind and really let rip? In which case, just go with the flow and start snipping.
Before we get into the different tools and step-by-step guides for each option, there is one more thing to remember. Distressing a t-shirt is your chance to be creative and express your own personal style.
There is no right or wrong way to do it, nor is there a good or bad design. How your t-shirt ends up is totally down to you, so don’t worry about messing up. You can’t mess up when the only rules you are following are your own!
1. Scissors and Sandpaper
This quick and easy method works well on areas that normally look frayed over time. Think collars, cuffs, and hems.
Sandpaper on fabric will work the same way as wood. It takes the surface layer off. You can use the abrasive properties of the sandpaper on its own for a roughed-up effect. Or combine with scissors for a rough-cut look.
You will need:
- Sandpaper
- Scissors
- Cardboard
Step 1
Choose your sandpaper. As it comes in different grades, you’ll notice harsher sandpapers will rip at the fabric of your t-shirt, causing it to fray faster. Smoother sandpapers will give a softer effect. Using a sanding block to wrap the sandpaper around is optional. You can use the sandpaper on its own. However, the block will save your fingers.
Step 2
If you are using the sandpaper by itself, simply start rubbing your shirt in the areas you want to look roughed up. Put a piece of cardboard inside the shirt, so you don’t accidentally rub straight through to the back of the t-shirt. A hole in the same place on the front and back isn’t going to look natural.
Keep rubbing the sandpaper in the same spot until you achieve your desired effect. Move along the collar, cuff, or hemline to new places and repeat the rubbing. Don’t rub in too many areas, as overdoing this technique will look fake.
Step 3
If you want a rough-cut look, grab your scissors. Nip a slight hole in the fabric of your t-shirt. This needs to be as close to the collar line, cuff line, or hemline as possible. Don’t make a big slash or cut; it only needs to be small.
Then, with the sandpaper, start to rub at the area you cut. You’ll find the sandpaper will rough up the fabric and increase the size of the cut. As the edges of the cut will be frayed, this method gives an effective and natural lived-in appeal.
2. Scissors and Pumice Stone
Similar to sandpaper, a pumice stone is abrasive. However, as the pumice stone is technically a rock, it’s easier to hold. Even sandpaper on a block will slip and slide, making the abrasive damage less manageable.
As you can control it easier, the pumice stone will give a better roughed-up effect in larger areas. Use this option for the main body of the t-shirt for dramatic shirt-wide slashes.
You will need:
- Pumice Stone
- Scissors
- Cardboard
Step 1
With your scissors, cut lines across your t-shirt. You can go diagonally or vertically, although cuts on the diagonal will look more realistic. The size of the cut is up to you. From seam to seam will look great, just don’t cut through the seam line or your shirt will fall apart.
Step 2
Go over the edges of the cuts with the pumice stone. Rubbing along the edges of the cut will take away the straightness of the line, giving a more natural uneven look. Keep rubbing until you’re happy with the result.
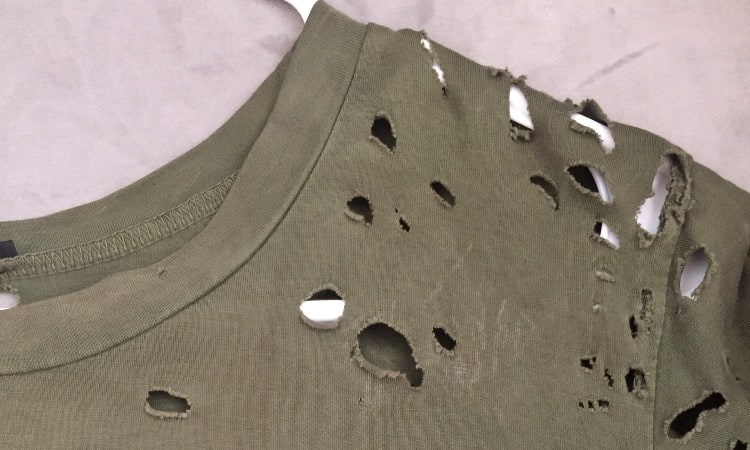
3. Cheese Grater
A cheese grater is probably not the first thing you think about when you want to rip holes in your t-shirt. But, it can create some interesting effects on even heavy fabrics like denim. The results will look more like your newly distressed t-shirt has become snagged on something, like a nail.
Because of that, this option will look more realistic when used on the main body of your t-shirt. With jagged edges and a randomly scattered appearance, the cheese grater will make your garment look edgy.
You will need:
- Cheese Grater
Step 1
Scrunch up a small section of your shirt in your hand. Holding the cheese grater in your other hand, rub the shirt up and down the grater. You need to use the same technique you would if you were grating cheese. Don’t apply too much pressure. You want to gently grate the fabric, not dessicate it.
Step 2
The material will snag on the grater, but that’s what creates the randomness of the tears. You’ll find the holes on the shirt will already be frayed. Repeat step 1 as many times as you like in different parts of the t-shirt until you are happy with the design.
4. Razor
Slightly easier to control than the cheese grater, a razor will create random tears in the same way. It will also be more effective at distressing vinyl decals or printed areas of the t-shirt.
This method can be used in the main section of your t-shirt or at the hem, neckline, and sleeves.
You will need:
- A razor
- Cardboard
Step 1
Put the cardboard inside your t-shirt in the area you want to work on. You don’t want to accidentally rub straight through the fabric to the back of the shirt. That would look too symmetrical and unnatural.
Stretch the fabric across the cardboard until you have a flat surface. Rub the razor back and forth to create a scratchy holed effect. This technique works incredibly well on decals as it gives vinyl a look reminiscent of animal claw scratches.
Step 2
For a more jagged effect, fold the cardboard into a triangle before putting it inside the t-shirt. Then, run the razor down the edge of the cardboard. This will create smaller, rougher holes but they will be in a line as though you have snagged your t-shirt on something.
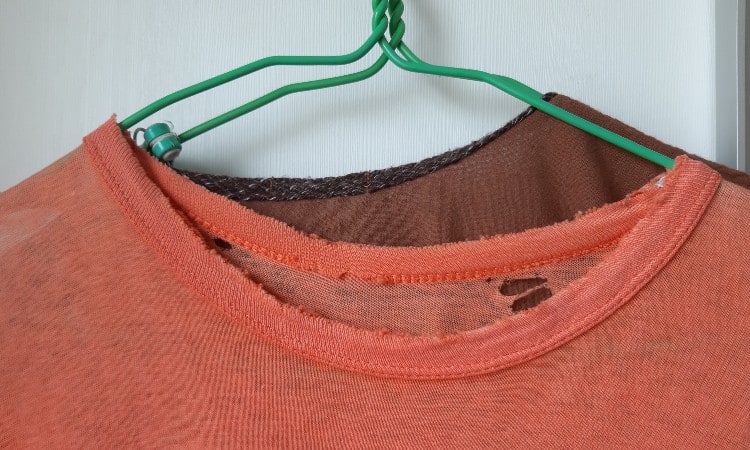
5. Bleach
Once you’ve cut, torn, or ripped your t-shirt, it’s time to move on to the next step in the distressing process. Fading the color of your shirt or making it look like the color has been washed out in places.
The best product for fading color is bleach. Depending on how you apply it to the garment, it can even give the impression of paint splashes. However, watch your fabric content!
Not all fabrics can survive a bleach treatment. Synthetics, in particular, do not fair well and you could end up destroying your t-shirt rather than distressing it. Test a small area first before you go all-in with the bleach.
You will need:
- Bleach
- Spray bottle
- Well-ventilated area
- Newspaper
- Apron
Step 1
When you’re spraying bleach, you’ll need to take a few precautions. Wear an apron to protect the clothes you are wearing unless you want them bleached too! Always spray in a well-ventilated area and put newspaper down to protect work surfaces and other areas you don’t want stained.
Step 2
Fill a spray bottle with bleach. You can use it neat for more drastic effects or water it down for a subtle change.
Set your spray bottle on a fine mist for an all-over spotted effect. Or leave it on full spray and stand further back for a more edgy, paint-splattered effect.
Step 3
Once you are happy, allow the bleach to dry. Then, wash the garment as normal to remove any bleach residue.
Why Distress Your T-Shirt
Buying distressed clothing from your local retail store can be expensive. Especially if the garment is an on-trend t-shirt. As a popular wardrobe staple, distressed t-shirts, in particular, can be pricey.
A great way to reduce the costs of distressed t-shirts is to make your own. Not only will this save you money, but you’ll also get results unique to you. By using your own shirt and choosing how to cut or bleach it, you can be guaranteed no one else in the world will have the same design.
One of the biggest drawbacks of commercially designed apparel is a lack of individuality. Off the peg clothing is mass-produced. Even though distressed clothing can be cut or slashed differently, manufacturers will create collections using the same colors or printed patterns.
Besides, taking a pair of scissors or a razor to a t-shirt you no longer like, can be fun. Embrace your creativity and bring a smile to your face at the same time! It can also breathe fresh life into your t-shirt, making you want to wear it again.
Why Is Distressed Clothing So Popular?
Have you ever had a pair of jeans that became more comfortable the longer you owned them? Did you ever wonder why that’s the case? It’s because the fabric wears in over time, getting softer and easier to wear.
In the same way, an old t-shirt you’ve had for years will feel like a second skin. Worn and frequently washed, the older the t-shirt is, the softer and more flexible it will be.
Distressed clothing is also a fashion statement. Wearing cutoff jeans or ripped t-shirts says something about you as a person. You’re fun-loving, free-thinking, and highly creative.
As a trend associated with youth and vitality, distressed t-shirts can also help you identify with popular movements. Both punk and grunge music styles embrace the aesthetics of the lived-in look. Wearing distressed t-shirts can help you feel closer to your favorite band yet still be able to express your individuality.
Can You Distress Denim T-Shirts?
Yes, denim is a great fit for distressing t-shirts and shirts. Denim is probably the most famous fabric for distressed apparel. You’ve got cutoff denim jackets, cutoff jeans, and denim shirts with cutoff sleeves. Even bleach and denim are a winning combination.
The thing you do have to watch with denim shirts is the amount of tailoring or structure to them. Unlike a t-shirt made out of a soft cotton jersey, denim tends to be more rigid. Although denim is a casual fabric, it’s not as laid back as t-shirt fabric.
Because of this, the less distressing you do to a denim t-shirt, the better it will look. You can slash the front or rip the sleeves off. Simple fraying on hems or collars will work too! But don’t do all of it. Keep as much of the structure of the garment as you can.
Conclusion
Distressing a t-shirt is simple, effective, and fun to do. You’ll be able to create unique and individual clothing for a personalized wardrobe in no time.
I hope this article has encouraged you to give it a go. Which method will you use? Let me know in the comments.