Over the years, I’ve become the person my entire family goes to when they need something to be sewn or tailored. So it wasn’t all that surprising when one of my relatives came to me and asked if I could custom embroider a shirt for them. However, I haven’t ever felt the need to spend lots of money on an expensive embroidery machine, which led me to wonder – can you embroider with a sewing machine?
Yes, you can embroider with your regular home sewing machine if you make a few changes before you start. For one, you’ll need to use an embroidery hoop to hold the fabric in place as you sew your design. You’ll want to keep your designs simple since home sewing machines can’t replicate the more intricate details that an actual embroidery machine can.
Embroidering on my sewing machine has become one of my favorite ways to add unique details to my projects, and I’m here to share all my tips with you. Keep reading and I’ll walk you through everything you need to know to begin your embroidering journey at home.
Quick Navigation
- Can You Embroider With a Sewing Machine?
- How to Embroider With a Sewing Machine
- How to Embroider Letters With Sewing Machine
- What Type of Needles Do You Need to Machine Embroider?
- Do You Need a Certain Type of Thread to Embroider?
- Can You Do Freehand Embroidery On a Sewing Machine?
- What is a Computerized Embroidery Machine?
- Conclusion
Can You Embroider With a Sewing Machine?
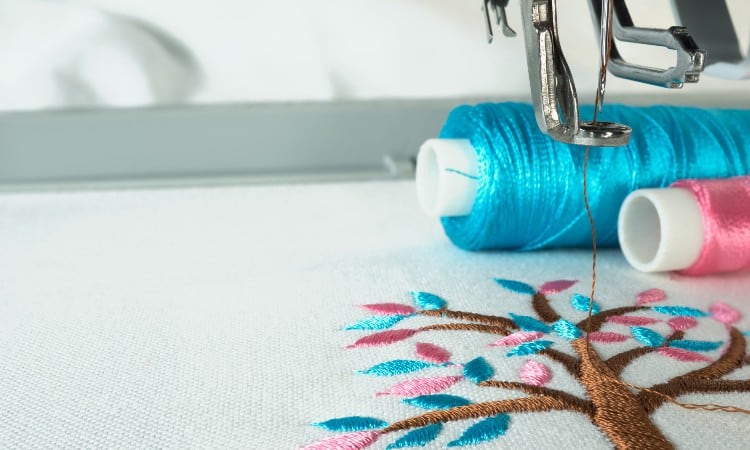
You can use your normal sewing machine to embroider designs on your fabrics. It’s an excellent way to add your own touch to your projects, giving them a bit more personality and detail than they would otherwise have. You can embroider all sorts of designs using your regular machine, ranging from borders to monogrammed initials, words, or entire phrases.
Embroidering using a regular sewing machine will require you to make a few temporary modifications to your machine before you begin. You’ll also need to carefully choose your needles and thread, for example, to better suit this task. This type of embroidery also requires you to use an embroidery hoop to hold the fabric as you work to free-motion sew over the top of it.
Keep in mind that a normal sewing machine can only make simple designs that won’t be as elaborate as what a true embroidery machine can create. The designs won’t be as neat or pretty either since you’ll have to guide the stitches by hand rather than relying on an embroidery machine’s computer to keep them even for you.
How to Embroider With a Sewing Machine
When it comes to embroidering with your home sewing machine, there are several steps you’ll need to keep in mind as you work. I’ll offer you a word of caution that if you don’t follow the steps I’ve laid out, you might end up running into problems that may result in your design being ruined on your fabric.
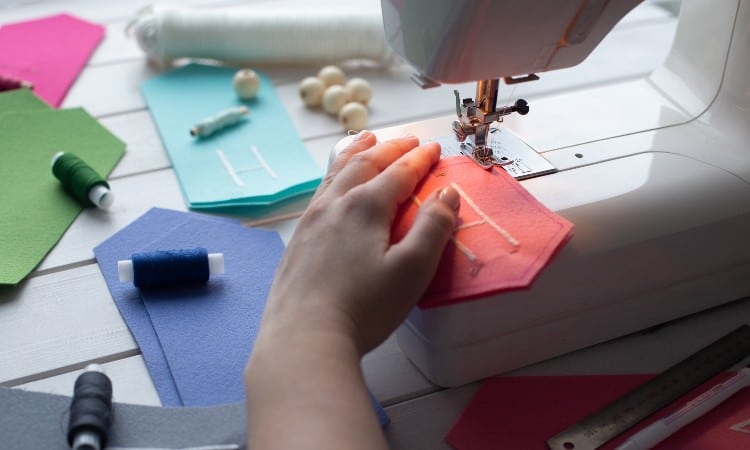
1. Supplies You’ll Need
Before you immediately launch into embroidering, you’ll need a few supplies. Other sewers might tell you that some of these supplies are optional to make the process seem easier. However, I’ve found that the quality of my designs suffers if I don’t use everything I have listed below.
- Embroidery hoop
- Embroidery backing or stabilizer
- Free motion or quilting foot that fits your machine
- Sewing scissors
- Needles appropriate for your fabric type
- Embroidery thread
Each of these tools serves a special purpose while embroidering. The embroidery hoop and backing help to stabilize and strengthen your fabric as you work. You don’t want to miss this step since embroidery requires a small area of the fabric to be punctured repeatedly with needles. This can end up tearing or bunching up the fabric as you work if it’s not properly stabilized.
A free motion or quilting foot is also essential to give you the range of motion you will need to create your designs. A regular sewing foot will only be able to work in straight lines and will require you to repeatedly reset the piece so that you can layer over what you’ve already sewn.
Finally, the needles and thread you use can make or break your project. You’ll need a needle appropriate for the fabric you are using or will want to invest in embroidery needles. Similarly, you’ll need the strength that embroidery thread gives if you are to make a design that will last.
2. Choosing Your Design
When designing embroidery patterns for your home sewing machine, keep it simple. Your regular sewing machine won’t be able to do the intricate level of detail that an embroidery machine can.
Your best bet is choosing a design with straight lines and relatively few curves. Simple letters, flowers, and geometric shapes are good designs to start with as a beginner. Try searching online for line art designs to give you some inspiration.
While it can be tempting to try and embroider with many different colors right away, these types of designs are often very complicated. I recommend starting with a single color thread in your designs before moving on to blending multiple colors.
Just be sure that the design you choose will fit well on your piece. Ideally, it should fit inside your embroidery hoop. You can work on a design in sections, but this is a lot more difficult for beginners to embroidery to do. Start simple and work your way up.
3. Preparing Your Fabric
Once you’ve gathered all of your supplies and chosen your design, you’ll need to prepare your fabric for sewing. Iron or steam your fabric until it is wrinkle-free since wrinkles within your designs will be hard to remove once they’ve been sewn over. Make sure your fabric is fully dry before you continue.
Mark out your design onto the right side of the fabric, being careful to place it exactly where you want it to be on your final project. I recommend using a washable fabric marker or a fabric pencil to draw out your designs. You can also purchase iron-on transfer paper and similar products if you don’t want to draw your designs by hand.
Once your design is in place, add the embroidery backing or stabilizer to your fabric as instructed by the back of the package. Keep in mind that if you use an iron-on backing, you might want to complete this step before you draw designs using a marker or pencil that will disappear with heat.
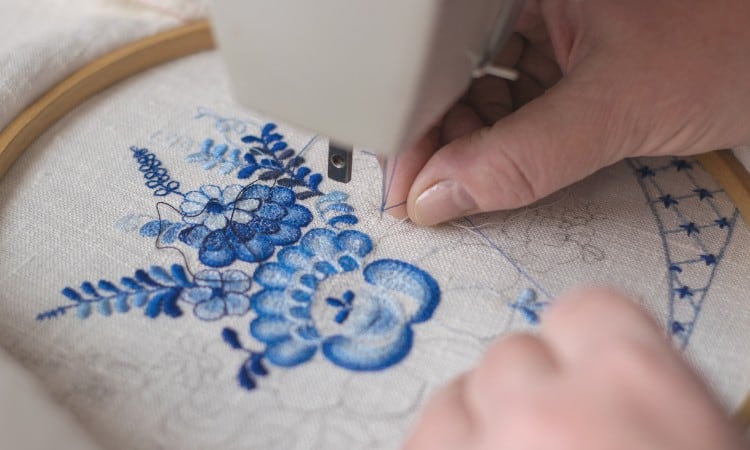
4. Using an Embroidery Hoop
Once you have your design on the right side of your fabric, you’ll need to stretch the fabric in your embroidery hoop to keep it stable as you work. It’s important to keep the fabric pulled taut as you sew so it doesn’t sag and cause the stitches to become loose.
Place the fabric inside the hoop so that the right side of the fabric rests on the lowest part of the hoop. The edges of the hoop should be raised above the right side of the fabric when the right side is facing upwards. You do not want the fabric to be stretched across the top of the hoop like a drum.
You’ll need your design to be centered in the hoop and for the hoop to be large enough to give you plenty of room to work. Keep in mind that if your design is very large, you might need to do it in sections.
5. Setting Up the Sewing Machine
Once you’ve gotten your design situated in your embroidery hoop, it’s time to set up your sewing machine. Remove your regular presser foot and needle from your sewing machine. You will replace both of these things with your free motion/ quilting foot and your new needles.
If you’re uncertain about how to install your quilting foot, I recommend following the instructions given by your machine’s manufacturer. The manufacturer’s instructions for installing presser feet will be safe and guaranteed to help you avoid accidentally damaging your machine.
Set your machine to a straight stitch and do a few practice stitches on a spare piece of fabric. You’ll want to adjust the length of the stitches to be approximately as wide as you want your embroidery lines. You need to repeat this process for the zigzag stitch on your machine and note the length you need to use for each.
The straight stitch setting will be used to make your outlines. The zigzag stitch will be used to fill in your design.
6. Embroidering the Fabric
Now it’s time to start embroidering! Lift your presser foot and slide the embroidery hoop underneath so the needle will be above your design. The right side of your fabric should be facing upward with the design visible, and the fabric should be close to resting flat on the surface of your machine.
Lower your needle and begin using a straight stitch to outline your design. You’ll want to move slowly and keep the length of your stitches even as you work. I find it easiest to hold onto the hoop and move it around as I sew to guide the needle to where I need it.
Once your design has been completely outlined, you can begin filling it in. You’ll use a zigzag stitch to do this, working your way back and forth to fill in the shape. I often like to use a tall and narrow zigzag stitch to do this since I like the finished look it gives.
You can always practice these stitches on a spare piece of fabric before you begin sewing to figure out what stitching style will work best for you and what finished look you prefer.
7. Finishing the Project
Once you’ve finished embroidering your entire design, you’re ready to make the final touches to the piece. If needed, go back over areas you’ve previously sewed if you aren’t happy with the finished look. It can be difficult to keep your stitches neat when you’re first beginning to embroider, so don’t be surprised if you have to make a few tweaks.
After you’re satisfied:
- Cut the thread and remove the hoop and fabric from your machine.
- Take a moment to make sure you’ve woven the end of your thread into the back of your piece.
- Cut off loose threads hanging to give the back of the design a clean finish.
If your fabric can handle being exposed to heat, iron the back of the fabric using steam if the setting is available. This will help flatten the stitches and keep them looking smooth and neat. You can also wash your embroidered fabric to remove any stray design marks.
How to Embroider Letters With Sewing Machine
Embroidering letters is fairly straightforward and done much like any other embroidery design with your home sewing machine. Monogrammed initials and other basic letter designs are great choices if you’re just beginning to learn to embroider.
I often use many typing fonts on my home computer as inspiration for designing the letters I create on my pieces. These fonts range from straight letters to more intricate cursive designs. You can choose a font that fits your style and the pattern of fabric that you are using.
Simply draw or trace your letters onto your fabric and then embroider just like you would any other design. Be sure to move slowly to ensure that your lines stay straight. Any uneven stitching will be very noticeable on these simple designs.
What Type of Needles Do You Need to Machine Embroider?
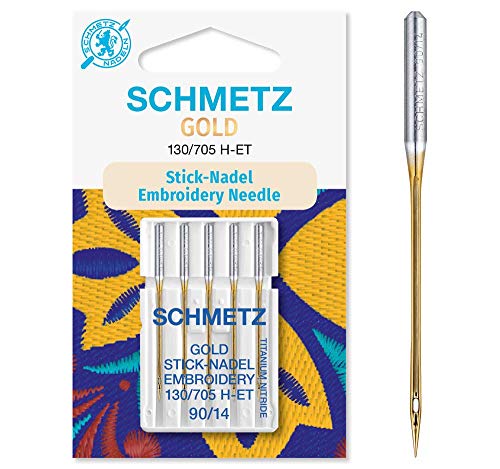 Embroidery can be rough on your fabric since it requires stitches to be made repeatedly in a very small area. It’s important that you choose a needle that will minimize this damage. The way to do this is to select needles appropriate for the weight of the fabric you are using or to purchase embroidery needles.
Embroidery needles are the best choice for these projects and can be found at most craft stores. These needles are designed to help prevent damage to the fabric and are also better suited to sewing with embroidery thread. Just be sure to choose the right needles for your machine brand since they aren’t always universal.
Embroidery can be rough on your fabric since it requires stitches to be made repeatedly in a very small area. It’s important that you choose a needle that will minimize this damage. The way to do this is to select needles appropriate for the weight of the fabric you are using or to purchase embroidery needles.
Embroidery needles are the best choice for these projects and can be found at most craft stores. These needles are designed to help prevent damage to the fabric and are also better suited to sewing with embroidery thread. Just be sure to choose the right needles for your machine brand since they aren’t always universal.
If you don’t want to spend money on needles designed specifically for embroidery, you can use regular sewing needles. Always choose needles that fit the type of fabric you are sewing with. Thinner, lightweight fabrics will need you to use a finer needle than thicker, more robust fabrics can handle.
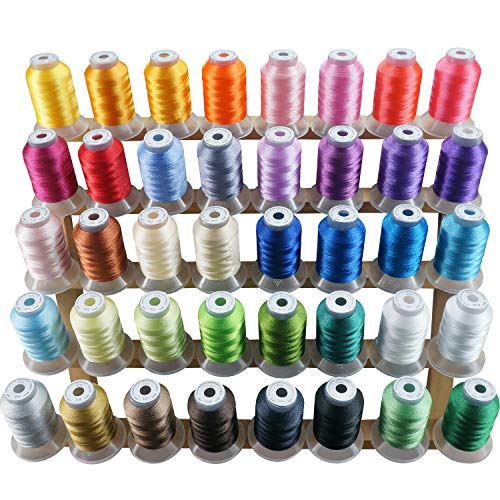
Do You Need a Certain Type of Thread to Embroider?
Yes, you need a thread that is strong and sturdy while embroidering. Embroidery thread is the best choice since it is stronger than regular cotton thread and is a bit smoother and thinner to the touch. This lets you layer it many times to create your designs without causing too much bulk.
If you’re able, I strongly recommend using embroidery thread for this project. However, in a pinch, you could get away with using a cotton or polyester thread for your designs. Just know that they’ll be a bit more prone to breakage and will probably add some bulk to your designs. They will also be a bit rougher to the touch.
Can You Do Freehand Embroidery On a Sewing Machine?
 Yes, if that is the style of embroidery you enjoy! Just skip the step above that requires you to draw out your design in advance. All you’ll have to do is set up your machine, get your fabric and hoop in place, and start embroidering any way you’d like!
However, remember that embroidering with a home sewing machine already doesn’t create designs that are quite as elegant as what an embroidery machine creates. Freehand embroidering on a sewing machine can be very difficult and the designs may look sloppy compared to designs you’ve planned out in advance. You may want to spend time practicing on some spare fabric before you start embroidering your actual piece.
What is a Computerized Embroidery Machine?
A computerized embroidery machine is a type of sewing machine that is specially designed to do embroidery projects. Its built-in computer automates the process, embroidering a pre-programmed design without having to sit there and make the stitches yourself. These machines make embroidery a breeze but can also be quite expensive to buy for yourself.
One of the greatest things about computerized embroidery machines is the thousands of online designs that can be downloaded to the machines to be automatically embroidered. This gives you a much broader range of designs that you can make. The final product is also often much neater and better looking than what a home sewing machine can do.
Conclusion
Embroidering fun designs onto fabric doesn’t always require you to buy an expensive machine. Your regular home sewing machine is perfectly capable of creating unique embroidery on whatever projects you’re currently working on. I encourage you to keep this guide handy as you work so you can follow it step-by-step. We can’t wait to see what projects you make!