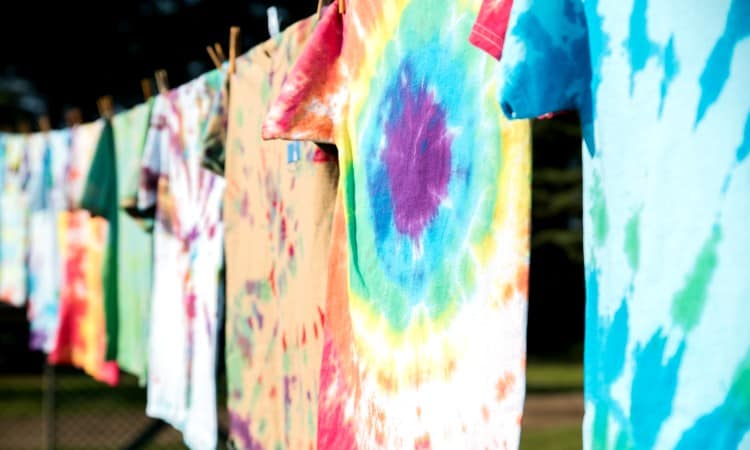
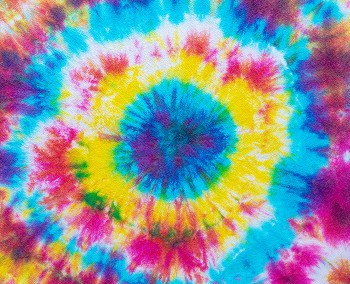
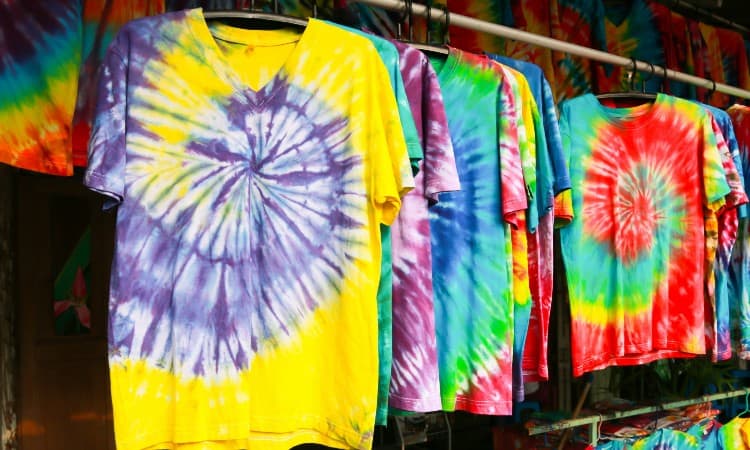
Nothing says summer quite like the bold splash of color in a tie-dye t-shirt! You may have a favorite tie-dye sundress to wear at the beach or a shirt you made yourself at summer camp long ago! If you’re looking for a fun DIY project that doesn’t cost a lot, you might find yourself wondering how to tie-dye a t-shirt with food coloring.
Tie-dyeing a shirt with food coloring is an easy project that creates a fun, temporary starburst design in the fabric. This process requires preparing the shirt with a vinegar solution, selecting a dye pattern, and allowing the dye to set. Food coloring tie-dye can be made more or less permanent depending on the process used to form the dye pattern.
In this article, you’ll learn how food coloring works. You’ll also discover the basic steps to create food-coloring tie-dye patterns. Finally, you’ll find tips on how to use food coloring without vinegar.
Can You tie-dye With Food Coloring?
You can tie-dye with food coloring, though it typically does not create a fabric dye’s bold color and permanent designs. Food coloring works great for fun kid crafts like tie-dyeing t-shirts or socks. This coloring agent easily dissolves in water for a quick, fun dying process.
That said, food coloring does not have the vibrancy or permanency of actual fabric dyes. Most commercial food coloring is made out of petroleum and is water-soluble, meaning that it can dissolve in water. This allows it to soak into any kind of cloth that absorbs water, such as cotton.
You may find the temporary nature of food coloring design annoying, but using this kind of dye does offer a safe alternative to most commercial dyes. While most fabric dyes today don’t contain poisonous elements, they contain strong chemicals and permanently stain many surfaces. This makes them a risky choice for using with children!
Food coloring, sometimes also called color additives, works best in cotton fabric. You will see the most vibrant results if you use plain white t-shirts or socks, too.
The color will not set well in a synthetic material such as polyester. Most synthetic fabrics are essentially made out of plastic, which does not absorb water. This means the dye can’t soak into the synthetic material!
As a note of caution, food coloring may permanently dye protein-based fabric such as wool and silk. This is because food coloring is technically an acid dye. Acid dyes can permanently heat-set into any kind of material that comes from an animal.
For this reason, you can do real, long-lasting fabric dyeing projects using food coloring if you choose to work with wool or silk! Most of the time, though, you will want to use food coloring as a temporary coloring agent for cotton products.
How to Tie-Dye a Shirt With Food Coloring?
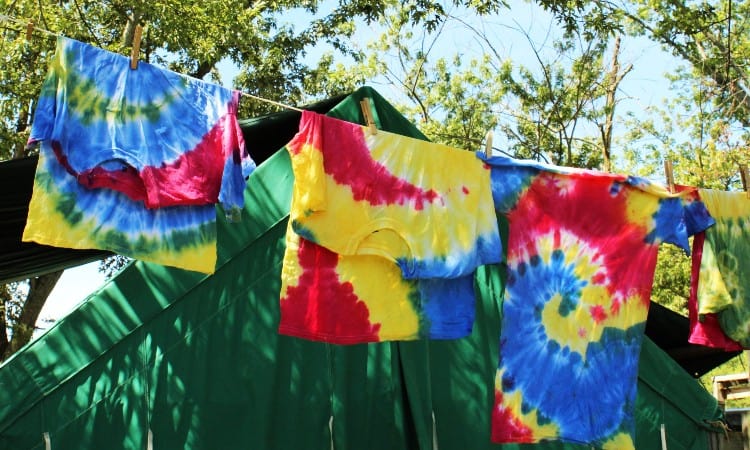
Tie-dying uses a special twisting and tying process to create swirling, spattering colors in a garment. Most DIY tie-dye uses just one or two colors in these designs to prevent the colors from bleeding together too much. Store-bought tie-dye patterns may use a whole rainbow of colors, though!
You probably see tie-dyed t-shirts most often, but you can also dye fun items like scarves and socks!
Follow these simple steps to tie-dye a t-shirt for yourself using cheap, safe food coloring!
Preparing the Shirt
It may not feel as exciting as applying the food coloring, but preparing the shirt is essential! You can choose to twist and tie your shirt in several different ways. Each method will create a unique swirling pattern of dye.
To get your shirt ready for dyeing:
- Throw your shirt (or shirts!) in the washer and dryer, as usual, to remove any clinging lint and prevent shrinking later on. Washing your tee ahead of time will also remove any invisible chemical treatments manufacturers sometimes apply to prevent wrinkling and staining.
- Don’t use any fabric softeners, as this could impact the dying process.
- If you want your food coloring design to stay nice as long as possible, set up a quick vinegar soak. Measure one-half cup of white vinegar and one-half cup of warm water into a flat bowl or bucket, and soak your t-shirt in that solution for about 30 minutes. If you need more water to thoroughly soak many shirts at once, just use a 1:1 ratio of water and vinegar.
- Alternatively, you can soak the t-shirt in plain water if you want to create a washable design! The vinegar helps the food coloring set and become semi-permanent, so skip that and just use one cup of warm water if you would like a fully washable design.
- Next, you can roll or tie your damp shirt in the starburst, spiral, or pinwheel design. You will use rubber bands to hold the shirt in this shape for the dying process. Check out the section on “how to make tie-dye patterns” for tips on this process!
You will also need to take a few precautions to protect your clothing and workspace from any splashing dye. Make sure you or your kids have smocks or plastic aprons to wear so you don’t accidentally dye the clothes you’re wearing! You may also want to wear plastic gloves, though food coloring will not harm your skin and should wash off eventually just with soap and water.
You will also want to lay out a large plastic trash bag or tablecloth to protect your workspace. If you have nice weather, you may want to move the dyeing process outside if you’re working with kids!
Preparing the Dye

You can make food coloring “dye” using a few drops of coloring and some cool water!
Find a clean squeeze bottle for each color you plan to use. You can use old condiment bottles, shampoo bottles, or the kind of water bottle that has a squeeze top.
Generally, using the kind of food coloring that comes in small, squeezable plastic bottles works best. That said, you can also use the paste food coloring often found in the cake decorating aisle of your local grocery store. These come in a wider variety of colors, perfect for the artistic tie-dyer!
- Measure one-half a cup of cool water and eight to sixteen drops of food coloring into the bottle. If you add eight drops, you will see a paler, more pastel-like color. Repeat this process for each color you plan to use.
- Make sure you have sealed the bottle, and then shake it up.
- If you choose to go with paste food coloring, follow this step instead: scoop up a chunk of coloring about the size of a grain of rice. Dissolve it in one-half a cup of warm water. Check to see how colorful the water looks, and repeat with more coloring as necessary.
- To apply the dye, simply turn your squirt bottle upside down and squeeze some of the colored water out onto the shirt! You often need to turn the shirt over to add color to the opposite side, too.
- If you’re using more than one color, remember to leave some white space for the second color! Then simply apply the second color in the same manner.
Setting the Dye
You will need to let your freshly dyed shirt sit for 12-24 hours before rinsing and drying it.
- Carefully slide your dye-soaked shirt into a large ziploc bag and seal it up. If you don’t have a large enough ziploc, roll it up inside a trash bag! You want to make this as airtight as possible.
- Leave the shirt in the bag overnight or up to 24 hours.
- Take the shirt out of the bag and carefully use scissors to cut away the rubber bands.
- For a washable shirt, simply rinse the shirt under cool, running water until no color ashes away into your sink.
- For a semi-permanent design, measure one-half a cup of table salt and one-half a cup of cold water into a bowl. Swish your shirt through that solution until it gets thoroughly soaked.
- Then rinse the shirt under cool, running water until the water runs clear!
- Hang it up to air dry outside if possible, or in a bathtub where it will not drip dye onto anything valuable!
How to Make Tie-Dye Patterns
The most popular tie-dye patterns are the scrunch, the starburst, and the swirl. You will find easy directions to create each design in this section!
Now, you can find all kinds of elaborate patterns, such as the Shibori technique, the heart design, and the spider pattern if you want to delve into complex tie-dying. That said, the swirl, starburst, and scrunch pattern form the basic, most commonly tie-dye patterns you see most often on t-shirts!
Before prepping your shirt for the design pattern, make sure you follow the washing and soaking steps described earlier in this article. The dye process works best when you prepare the fabric first!
Scrunch
This fun pattern is great for beginners. It’s easy to make and it looks fabulous!
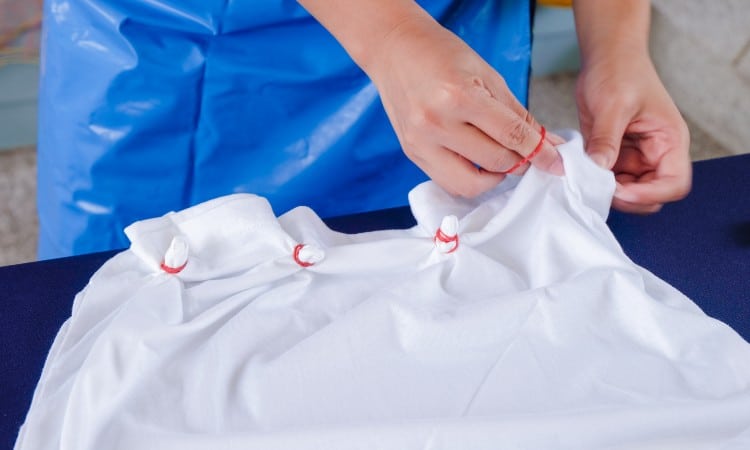
- Smooth out your damp t-shirt on your work surface. Make sure you have ten-twenty rubber bands nearby as well.
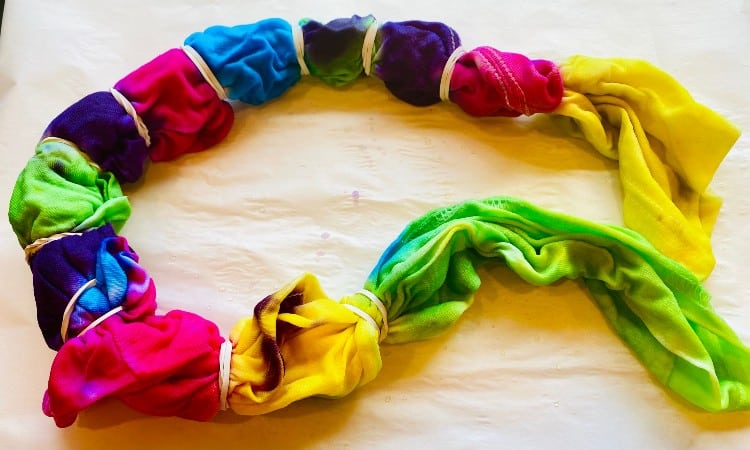
- Next, scrunch the shirt into one long snake by pinching the shirt right below the collar and then “scrunching” handfuls of the shirt toward that center point.
- Take a rubber band and twist it around one end of your scrunched shirt.
- Keep placing rubber bands at regular intervals down the length of your snake-like scrunched shirt. For a tighter design, use more rubber bands!
- Finally, coil up your rubber-banded snake like a cinnamon roll, and use three or four more large rubber bands to keep it in this coiled circle.
Now your shirt is ready for dying!
Starburst

Sometimes also called a bullseye, the starburst design looks like the classic snail shell-like outward spiral you often think of when you picture tie-dye. You can make one giant starburst or tons of tiny bursts all over your shirt!
 Once again, this design takes very little work to prepare!
- For one big starburst, select the center of your burst on the shirt, Pinch a small bit of shirt between your fingers at this point, and secure it with a rubber band so that you have a tuft of t-shirt standing up.
- Next, gather a larger handful beneath the tuft, and secure that with a band, too. Repeat this one more time to have a really large starburst!
- For many small starbursts, simply secure lots of tiny pinched tufts across the surface of your shirt using multiple small rubber bands.
Swirls
You can use this process to make one giant swirl out of your whole shirt!
- Arrange your damp shirt flat on your covered work surface.
- Select the middle of your swirl. Usually, somewhere near the center of your shirt will work best for this design. Pinch a small portion of the shirt and hold onto it.
- Next, twist the rest of the shirt around the midpoint you’re holding onto. Keep swirling the shirt around your hand until you have a large swirled circle and no extra shirt left!
- Use large rubber bands across the circle of the shirt to hold it all in place. You will probably need five or six bands.
- You should end up with a cinnamon-roll-like circle of the shirt held by crisscrossing rubber bands.
How to Make Food Coloring Tie-Dye Permanent
Unless you dye a wool or silk garment, you can’t truly make a food coloring tie design permanent. That said, using a vinegar presoak and a salt bath after dying with food coloring will help keep the color nice for a longer amount of time.
Both salt and vinegar will help the dye saturate the fabric fibers and stay put as long as possible.
You can also lengthen the lifespan of food coloring tie-dye by only washing it when necessary.
To permanently dye a wool or silk item, you have to boil the dye and clothing together in a large pot for 20 minutes. The heat will set the acid dye into the protein fibers of this kind of fabric.
Despite your best efforts, though, food coloring won’t stay bright and beautiful forever in most cotton items. The ink–made for temporary use in foodstuffs–will fade with time. Plus, every time you wash it, more dye will leach away!
How to Make Your Own Tie-Dye Liquid?
You can easily make your own tie-dye kit using food coloring, fabric paint, or natural dyes! Making your own “dye kit” saves you a lot of money and lets you skip the harsh chemicals that may come in commercial fabric dyes!
To make tie-dye liquid with fabric paint, fill your squeeze bottle with one cup of water and three tablespoons of fabric paint. Repeat this for every color you plan to use.
Shake the bottle well for about a minute. Then squirt the liquid on your design as described earlier in this article!
Of course, to make your food coloring solution, you already know to mix ½ cup of water with 8-16 drops of food coloring!
Finally, you can make your own natural dyes from things like red onion skins, beets, or avocado pits. This process does involve more time and a lot of work, but if you want an all-natural tie-dye, go for it!
While the dye-making process may vary slightly depending on what kind of plant you use, the basic process is to simmer your chosen plant in hot water for about an hour. Then strain the liquid through a sieve or cheesecloth.
Next, reheat the dye for another hour, and then let it cool overnight.
You will need to heat the garment in the dye bath for about an hour to complete the dying process.
Making your own natural dyes does involve a lot of work. Still, if you or your kids have an allergy to food coloring, this method gives you tie-dye liquid that doesn’t use any food coloring or commercial chemical dyes!
How to Wash tie-dye Shirts for the First Time
 The key to washing your tie-dye shirt for the first time is to put it in the washer all by itself. You do not want to wash it with anything else–not even another tie-dyed shirt in another color! The dye will leak out of these freshly colored shirts and stain any other clothing.
Of course, before you begin the wash process, you should follow all the steps described earlier. Make sure you place your freshly dyed shirt in a salt bath and then rinse it under cold running water until you don’t see any dye coming off into the sink.
- First, set your washing machine to a small load setting if you have that option.
- Put your shirt in the machine by itself.
- Select hot water and measure in normal laundry detergent.
- Do not use any kind of bleach or fabric softener!
- Run the washing machine as usual, and then take the shirt outside to air dry.
You can now safely wear your t-shirt, but you will need to continue to wash it in this manner for at least the first two or three washes.
If possible, you should always air dry the tie-dyed shirt. The heat of your dryer could make the colored design fade.
Can You tie-dye a Shirt Without Vinegar?
You can tie-dye a shirt without vinegar, but your design will easily wash back out of the fabric if you choose to skip the vinegar bath. The vinegar helps set food coloring into the fabric in a semi-permanent way that can withstand several washes.
Alternatively, you can use commercial dye fixatives or soda ash in place of the vinegar. These will also help set the color into the material. Both of these products may require heat setting. You can simply follow the instructions on the package.
Of course, you can also use more permanent dyes if you want to create a tie-dye without using vinegar!
Can You Tie-Dye Colored Fabric?
You can tie-dye colored fabric using a method called over-dying, but it does not work well with food coloring dye. You will need to use fabric dye to create a vibrant tie-dye design on a colored shirt.
Overdying means considering how well a light dye will cover a darker-colored fabric or planning for your “over” dye to mix with existing designs and logos on the fabric. For example, if your t-shirt has printed yellow flowers on it and you dye it with blue dye, the flowers will turn green!
If you overdye a garment that has bleach spots or paler areas on it, the dye will look paler in those areas, too.
Over-dying adds some complications to the tie-dye process, but you may find the extra work worthwhile if you want to tie-dye a colored garment!
How to Tie-Dye Socks With Food Coloring
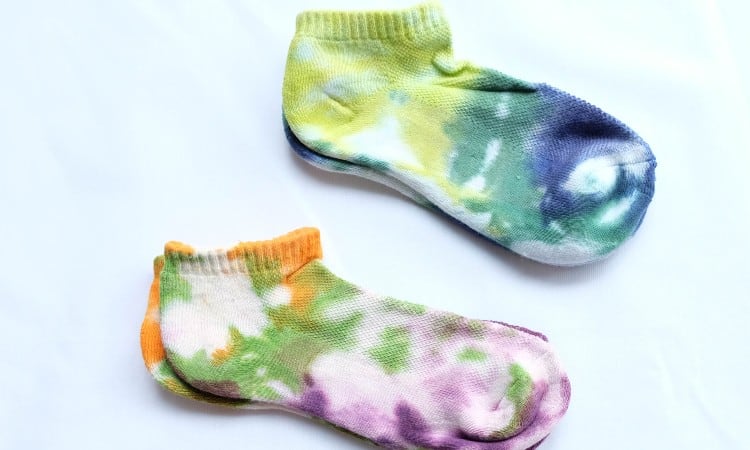
Tie-dying socks creates fun, unique footwear for your family or to give as a thoughtful gift! You can follow most of the steps described earlier in this article, but keep these helpful sock tips in mind, too!
- You will get a better design if you use taller socks. Ankle socks don’t give you much fabric to work with!
- Most socks contain a blend of different materials, such as cotton and spandex. Try to find socks that have a large percentage of cotton to get the best results.
- You will also find it easiest to tie-dye plain white socks with food coloring.
- It might prove challenging to create a special starburst or swirl pattern on a small sock! Instead, you can simply roll each sock up like a cinnamon bun and rubber band into this spiral before applying dye.
- Finally, make sure you follow the vinegar soak, salt bath, and post-dying wash guidelines explained earlier!
Conclusion
You can easily make your own tie-dye solution using a small amount of food coloring mixed in water. You will also need to twist, knot, or scrunch your shirt into special shapes held by rubber bands before applying the food coloring dye. Using a vinegar soak and a salt bath will make your tie-dye more permanent, though you can skip this part of the process if you want a washable design!
Food coloring tie-dye lets you create fun, vivid designs without any dangerous chemicals or giant mess. That said, it doesn’t last as long as most fabric dyes, making it a temporary art form.
Have you ever tie-dyed a shirt? What kind of dye did you use? Leave a comment below to let us know!